
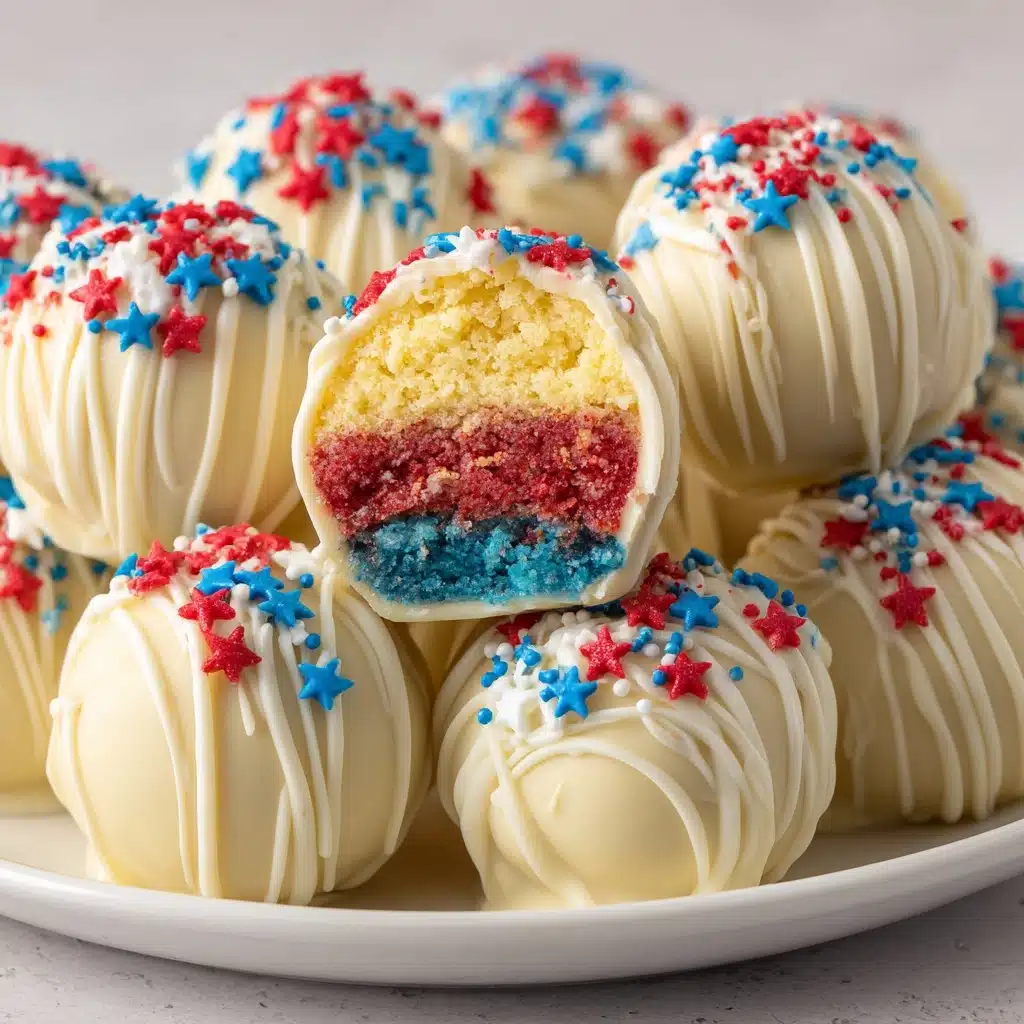
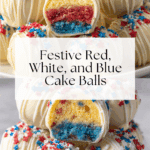
Red, White, and Blue Cake Balls Recipe
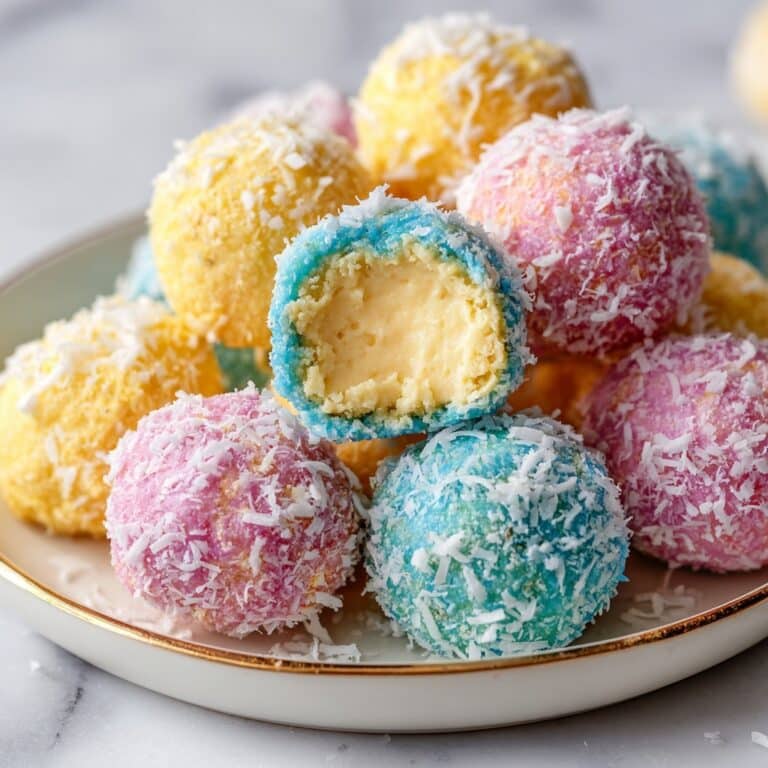
Festive, fun, and impossibly delicious, these Red, White, and Blue Cake Balls turn any celebration into an occasion to remember. Imagine biting through sweet and candy-smooth chocolate only to discover a tricolor, creamy cake surprise inside—each bite even better than the last! Whether you’re hosting a backyard barbecue, Memorial Day party, or simply reveling in the flavors of summer, these cake balls pack color, nostalgia, and irresistible taste all into one delightful treat. Dare you to eat just one!
Ingredients You’ll Need
Ingredients You’ll Need
Let’s talk about what you’ll need! These ingredients are simple, probably already in your pantry or easy to find at the store, but each one is essential for achieving the iconic taste, color, and texture Red, White, and Blue Cake Balls are famous for.
- White cake mix: The ultimate shortcut, giving you a moist, fluffy base that absorbs coloring beautifully.
- Eggs, oil, and water (as called for on box): These combine with the mix to create a classic cake texture—don’t skip any!
- Red and blue food coloring: Just a few drops transform your batter into vibrant, festive hues.
- Cream cheese (softened): Adds creaminess and tang, binding the crumbled cake into rich, delicious bites.
- White melting chocolate: Creates that glossy, candy-like shell and perfectly complements the soft center.
- Red, white, and blue sprinkles: An absolute must for that eye-catching finish—plus, they add a little crunch.
How to Make Red, White, and Blue Cake Balls
Step 1: Prepare Your Pans and Preheat
Start by heating your oven to 350°F (or follow your cake mix box instructions for temperature). Lightly grease three small baking pans—using 8×8-inch size works wonderfully for evenly baked, easy-to-crumble cakes. Set them aside and get excited for what’s coming!
Step 2: Mix Up Your Cake Batter
In a large mixing bowl, prepare your cake batter by mixing the white cake mix with eggs, oil, and water, as instructed on the box. Stir until smooth and no lumps remain. This base will become the canvas for your red, white, and blue layers.
Step 3: Divide and Color the Batter
Scoop the batter evenly into three bowls. Leave one as-is for the “white”—this keeps the trio classic. In another bowl, add a few drops of red food coloring, mixing until you reach a vivid shade (start with five and add more as needed). Repeat with blue in the third bowl. The colors should be bold and bright for the best effect.
Step 4: Bake the Cakes
Pour each colored batter into a separate prepared pan, smoothing the tops. Bake for 14–16 minutes or until a toothpick inserted in the center comes out clean. The cakes will smell amazing, but let’s keep going for that big finish!
Step 5: Cool and Crumble
Let the cakes cool completely on a wire rack—this step is key so your cake balls don’t get mushy. Once cool, crumble each cake into fine pieces and place each color in its own bowl. This is a hands-on job, and oddly satisfying!
Step 6: Make the Creamy Bind
With a hand mixer, beat the softened cream cheese in a clean bowl until smooth and creamy. Divide the cream cheese evenly among your three bowls of cake crumbs. Mix each with a clean mixer (or by hand if you prefer) until fully combined. You’ll have three rich, colorful “doughs”—red, white, and blue!
Step 7: Shape the Cake Balls
Line two baking trays with parchment paper. Grab small pieces of the colored mixtures—one from each color—and press them gently together, rolling into 1-inch balls. You’ll see the magical swirl of red, white, and blue appear! Place each finished ball on the tray.
Step 8: Chill Until Firm
Pop your trays in the refrigerator for 1–2 hours. This chilling time is crucial: it helps the cake balls stay together during dipping and sets their gorgeous marbled interior.
Step 9: Melt and Dip in Chocolate
Melt the white chocolate in a microwave-safe bowl, heating in 30-second bursts and stirring well between each until silky smooth. One by one, dip each chilled cake ball into the melted chocolate, letting excess drip away. Set them back on the parchment. You’re so close!
Step 10: Decorate and Finish
Pour any leftover chocolate into a piping or zip-top bag, snip the corner, and drizzle over the cake balls. Sprinkle immediately with red, white, and blue sprinkles for that joyful, party-ready finish. Chill again for 15 minutes to set the chocolate completely.
Step 11: Store and Serve
Once set, store your Red, White, and Blue Cake Balls in the refrigerator until you’re ready to share. Now, prepare yourself for compliments!
How to Serve Red, White, and Blue Cake Balls
Garnishes
A few extra touches can make these little treats truly dazzle! Roll the finished cake balls in a bit more of those festive sprinkles, or even edible glitter for sparkle. For holiday vibes, try tiny flags or star-shaped picks stuck on top of each cake ball—this amps up the party factor and makes for cute, easy grab-and-go desserts.
Side Dishes
Serve your Red, White, and Blue Cake Balls alongside a fruit platter, especially with berries like strawberries and blueberries to keep with the theme. They also pair wonderfully with scoops of vanilla or berry ice cream, or even a glass of bubbly lemonade or rosé for the grown-ups in the crowd.
Creative Ways to Present
Presentation is half the fun with these treats! Try arranging the cake balls in concentric circles on a tiered dessert tray, or thread them onto skewers for cake pops. Glass jars or mini cupcake liners add a charming touch for individual servings, making them the perfect party favor or picnic basket surprise.
Make Ahead and Storage
Storing Leftovers
Once your Red, White, and Blue Cake Balls are set, transfer them into an airtight container and keep them refrigerated. They’ll stay fresh and delicious for up to 5 days—if they last that long! Just make sure to layer parchment between the balls to prevent sticking and preserve their pretty decorations.
Freezing
To make them ahead for busy celebrations, simply freeze your cake balls before dipping in chocolate. Place them on a tray, freeze until solid, then store in a zip-top bag for up to a month. When ready, thaw in the fridge and dip in fresh melted chocolate and sprinkles for that just-made look and taste.
Reheating
Since these are enjoyed chilled or at room temperature, you won’t need to “reheat” them. If they’ve been stored in the freezer, let them thaw overnight in the refrigerator before serving, then bring to room temperature if you prefer a softer bite.
FAQs
Can I use homemade cake instead of a mix?
Absolutely! If you have a preferred homemade white cake recipe, go for it. Just make sure the cake is plain (without fruity bits or nuts) so the tricolor effect stays sharp and the texture is easy to crumble.
Do I have to use cream cheese, or is there a substitute?
Cream cheese offers the perfect balance of tangy and creamy, but you can substitute with full-fat frosting or mascarpone if you prefer. Just know the flavor and texture will change a bit, but your cake balls will still be delicious.
Can I decorate the cake balls with colored chocolate?
Yes! If you want even more color, use red and blue candy melts in addition to white chocolate. Dip each cake ball into a different shade or create stripy drizzles for an ultra-festive effect.
How do I avoid cracks in the chocolate coating?
Chill your cake balls, but don’t freeze them solid before dipping; extreme cold can shock the chocolate shell, causing cracks. Work quickly, and let your dipped cake balls set at room temperature before moving them to the fridge.
Can I make these ahead for a big party?
Yes! Red, White, and Blue Cake Balls are fantastic make-ahead treats. Prepare and chill them a day or two in advance, and wait to dip and decorate until just before your party for maximum freshness and sparkle.
Final Thoughts
These Red, White, and Blue Cake Balls are more than just a dessert—they’re a celebration in every bite! Whether you’re sharing them with friends, family, or neighbors, they’re guaranteed to bring out plenty of smiles and a little extra sparkle. Give them a try and watch your next gathering come to life!
PrintRed, White, and Blue Cake Balls Recipe

These festive Red, White, and Blue Cake Balls are perfect for patriotic celebrations or any occasion where you want a colorful and delicious treat. Made with a white cake mix, cream cheese, and white chocolate, these bite-sized delights are sure to impress your guests.
- Prep Time: 30 minutes
- Cook Time: 16 minutes
- Total Time: 2 hours
- Yield: About 36 cake balls 1x
- Category: Dessert
- Method: Baking, Chilling, Mixing
- Cuisine: American
- Diet: Vegetarian
Ingredients
For the Cake:
- 1 (15.25 ounce) white cake mix, plus ingredients on box needed to make it
- Red and blue food coloring
For the Filling:
- 1 (8 ounce) block cream cheese, softened to room temperature
For Coating:
- 1 (10 ounce) package white melting chocolate
- Red, white, and blue sprinkles
Instructions
- Preheat and Prepare: Preheat oven to 350F or according to package instructions. Grease 3 small baking pans and set aside.
- Mix Cake Batter: Prepare the white cake mix according to package instructions. Divide batter into 3 bowls and color each with red and blue food coloring.
- Bake: Pour each batter into pans and bake for 14-16 minutes. Cool completely.
- Prepare Filling: Crumble the cakes and mix each with cream cheese. Form into balls and chill.
- Coat with Chocolate: Melt white chocolate, dip each ball, and decorate with sprinkles.
- Chill: Refrigerate the cake balls until the chocolate sets.
Notes
- You can customize the colors for different events.
- Ensure the cake balls are well-chilled before coating with chocolate.
Nutrition
- Serving Size: 1 cake ball
- Calories: 120
- Sugar: 10g
- Sodium: 90mg
- Fat: 6g
- Saturated Fat: 3.5g
- Unsaturated Fat: 2.5g
- Trans Fat: 0g
- Carbohydrates: 15g
- Fiber: 0g
- Protein: 2g
- Cholesterol: 10mg
Keywords: Red, White, Blue, Cake Balls, Patriotic, Dessert, Colorful

