
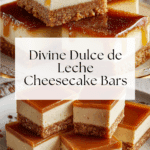
Dulce de Leche Cheesecake Bars Recipe
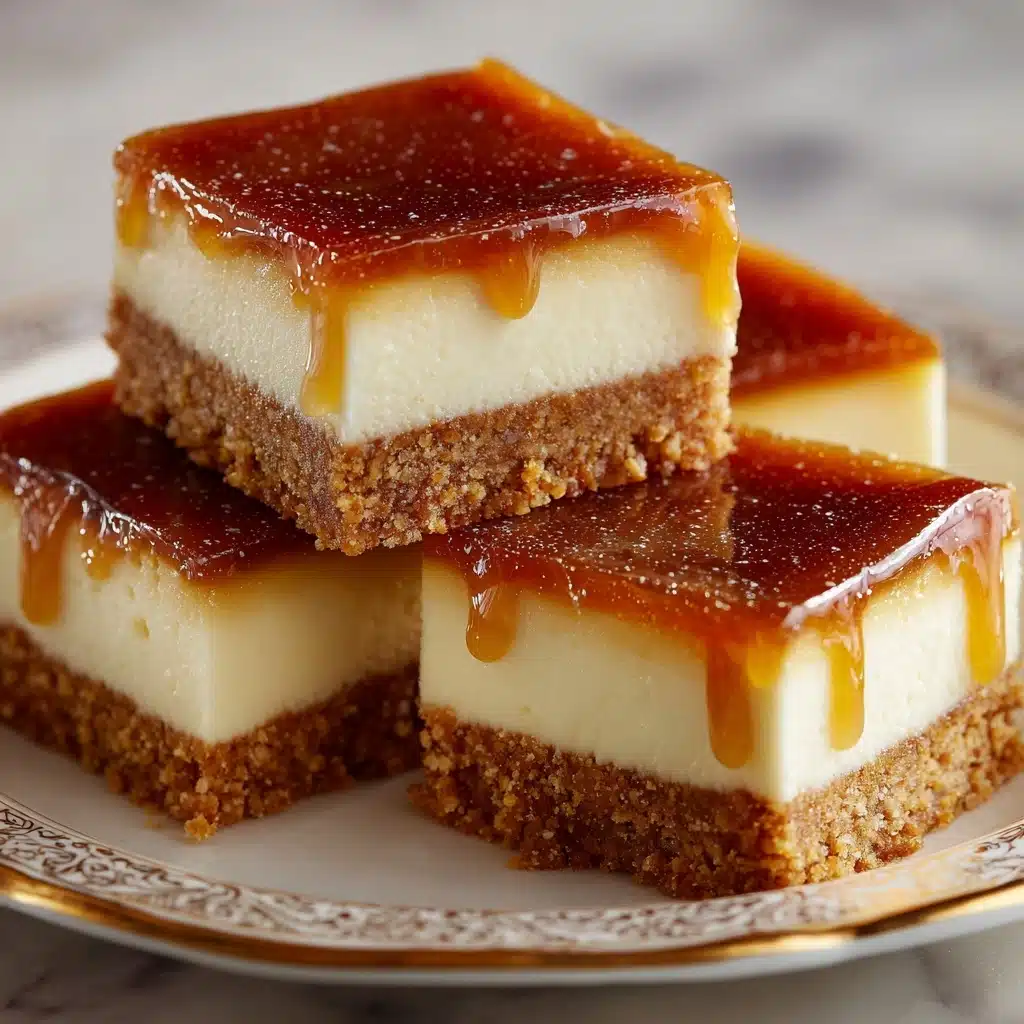
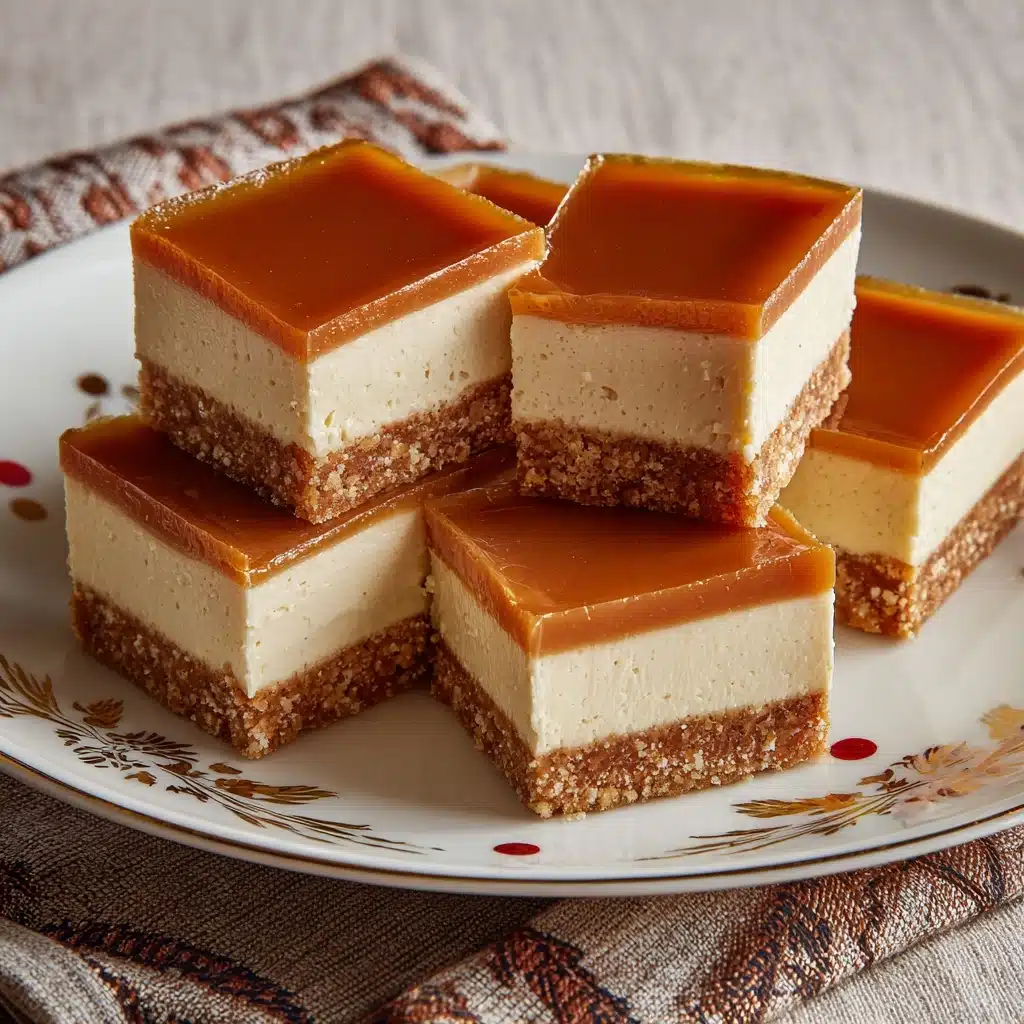
If you’re searching for a show-stopping treat that blends creamy richness with deep caramel notes and a hint of salt, you’re going to fall in love with these Dulce de Leche Cheesecake Bars. Imagine a buttery graham cracker crust, silky cream cheese filling swirled with velvety dulce de leche, and a luscious caramel topping finished with a touch of sea salt. It’s an irresistible dessert bar that feels both homey and gourmet, perfect for gatherings, celebrations, or whenever you want to wow your taste buds.
Ingredients You’ll Need
What I adore most about Dulce de Leche Cheesecake Bars is how simple the ingredients are, yet each one adds its own important touch. Here’s why every component matters for the ultimate dessert experience.
- Nonstick spray: Ensures easy release, so every bar comes out cleanly, with no sticky mess left behind.
- Graham crackers: These finely ground beauties form the backbone of the crust, adding a toasty crunch and mild sweetness.
- Sugar: Sweetens both the crust and filling just right, balancing the tangy notes of the cream cheese.
- Ground cinnamon: Lends warmth and richness to the crust, making every bite a little more special.
- Melted butter: Binds the graham cracker crumbs for a flavor-packed, cohesive base that won’t crumble.
- Cream cheese: The star of the show—plush, tangy, and ultra-creamy, it makes the bars decadently smooth.
- Eggs: Essential for structure and a silky texture, they bring everything together in the filling.
- Dulce de leche: Delivers that dreamy caramel flavor in both the filling and topping, making each bite rich and satisfying.
- Vanilla extract: Boosts the sweet, aromatic notes and rounds out the flavors beautifully.
- Heavy whipping cream: Thins the dulce de leche for the topping, ensuring it’s silky and pourable rather than clumpy.
- Fleur de Sel: A sprinkle of this finishing salt lifts the caramel flavors and provides the perfect hint of contrast.
How to Make Dulce de Leche Cheesecake Bars
Step 1: Prepare the Crust
Start by firing up your oven to 350°F and grabbing a 13×9-inch pan. Give it a generous coat of nonstick spray—or line it with foil first if you want super-easy removal. Stir together the graham cracker crumbs, sugar, and cinnamon, then pour in your melted butter. Mix until everything’s just moistened, then press it firmly into the pan—it should form an even, compact layer. Pop that in the oven and bake until the crust is just golden at the edges, about 10 minutes, then let it cool to room temperature.
Step 2: Whip Up the Filling
For that signature creamy center, combine the cream cheese and sugar in your mixer or food processor. You want a perfectly smooth texture, with no lumps in sight. Next, blend in that gloriously sticky dulce de leche. Add the eggs one at a time, giving each a quick blend so the mixture stays airy but not overmixed. Finally, pour in the vanilla extract and blend just until it’s all gorgeous and unified.
Step 3: Bake the Cheesecake Bars
Spoon dollops of the rich batter across your cooled crust, then spread it out evenly—don’t worry if it’s thick, it will settle as it bakes. Slide the pan into the oven and bake for roughly 38 minutes. You’re looking for puffed edges and a center that’s set but still gives a gentle jiggle. Once baked, set the pan on a rack and let the bars cool completely, giving them that classic, luscious cheesecake texture.
Step 4: Prepare and Apply the Topping
This is where Dulce de Leche Cheesecake Bars get their finishing touch. Warm the reserved dulce de leche with a few tablespoons of heavy whipping cream in short microwave bursts, stirring each time. The goal is a pourable, glossy caramel sauce. If it feels too thick, add cream, one teaspoon at a time, until it flows smoothly. Pour it generously over the cooled cheesecake, spreading it for an even layer, then chill the whole pan until set.
Step 5: Slice and Finish
Once thoroughly chilled, use a sharp knife to cut the cheesecake into neat bars (pro tip: wiping the blade between cuts keeps the edges tidy). Right before serving, scatter a pinch of fleur de sel over the top of each bar for a magical, gourmet flourish that brings out all the caramel goodness.
How to Serve Dulce de Leche Cheesecake Bars
Garnishes
While these bars are showy enough on their own, dressing them up is half the fun. A little extra drizzle of dulce de leche looks lovely, or try a cloud of softly whipped cream. For more crunch, sprinkle over some toasted nuts or even a flurry of chopped chocolate. And definitely don’t skip that finishing dusting of fleur de sel—it truly makes the caramel sing.
Side Dishes
Dulce de Leche Cheesecake Bars shine as a standalone dessert, but they also pair wonderfully with espresso, strong coffee, or black tea. Want a little contrast? Serve them alongside fresh berries or a bowl of lightly macerated fruit for brightness and a pop of color. If you’re feeling extra, a scoop of vanilla or cinnamon ice cream is creamy perfection.
Creative Ways to Present
Presentation brings personality to the party! Stack bars on a pretty platter for potlucks, or use cupcake wrappers for grab-and-go treats at an event. For an elegant touch, set each bar on a small dessert plate, drizzle with a crisscross of caramel, and add a petite mint sprig or edible flower on top—your guests might just think they’ve wandered into a fancy patisserie.
Make Ahead and Storage
Storing Leftovers
One of the best things about Dulce de Leche Cheesecake Bars is how well they keep. Store any leftover bars in an airtight container in the fridge. They’ll stay fresh for up to five days—if you can make them last that long without sneaking a midnight nibble!
Freezing
Want to make life even easier? These bars freeze beautifully. Wrap each bar tightly in plastic wrap and then foil, then tuck into a freezer-safe bag or container. They’ll keep for up to two months. When you’re ready to indulge, just thaw them overnight in the fridge before serving.
Reheating
These bars are truly best served chilled, but if you prefer a softer, slightly gooey texture, let them sit at room temperature for 15 to 20 minutes before enjoying. There’s no need to microwave—they’ll come to the perfect temperature all on their own.
FAQs
Can I use homemade dulce de leche?
Absolutely! Homemade dulce de leche will make these bars extra special. Just ensure it’s thick and spreadable at room temperature, so it incorporates and pours properly in both the filling and topping.
Can I substitute the graham cracker crust?
If you want to mix things up, try a cookie crust using vanilla wafers, digestive biscuits, or gingersnaps. The flavor will change, but the bars will be equally delightful.
Is it okay to leave out the cinnamon?
Yes, if cinnamon isn’t your thing or if you want a purely sweet crust, feel free to omit it. The bars will still deliver tons of flavor from the graham crackers and caramel elements.
What’s the best way to cut clean slices?
The secret to neat bars is a really sharp, thin-bladed knife. Wipe the knife clean after each cut, and if things get sticky, run it under hot water and dry between slices for picture-perfect bars.
Do I have to use fleur de sel, or can I substitute another salt?
Fleur de sel gives the bars that signature, delicate crunch and gentle pop of salt. If you can’t find it, any good quality flaky sea salt will do, but avoid table salt, as it tends to be too sharp and intense for finishing touches.
Final Thoughts
There’s a certain magic to sharing Dulce de Leche Cheesecake Bars with friends and family. Each bite is a blend of creamy, caramel-swirled happiness, wrapped up in a satisfying crust and finished with a hint of salt. Whether you serve these for a celebration or a simple weekend treat, I hope they become a beloved favorite from your kitchen, just as they are in mine. Give them a try—you’re in for something truly special!
PrintDulce de Leche Cheesecake Bars Recipe

Indulge in the rich and creamy goodness of these Dulce de Leche Cheesecake Bars. A buttery graham cracker crust holds a luscious cream cheese filling swirled with decadent Dulce de Leche, finished with a drizzle of more Dulce de Leche and a sprinkle of Fleur de Sel. These bars are a perfect combination of sweet and salty, sure to please any dessert lover.
- Prep Time: 30 minutes
- Cook Time: 48 minutes
- Total Time: 1 hour 48 minutes
- Yield: 24 bars 1x
- Category: Dessert
- Method: Baking
- Cuisine: American
- Diet: Vegetarian
Ingredients
Crust:
- Nonstick spray
- 2 1/4 cups finely ground graham crackers (from about 17 crackers)
- 2 tablespoons sugar
- 1/4 to 1/2 teaspoon ground cinnamon
- 10 tablespoons melted butter (1 1/4 sticks)
Filling:
- 3 eight-ounce packages cream cheese, room temperature
- 1 cup sugar
- 3 large eggs, room temperature
- 1/2 cup Dulce de Leche (store-bought or home-made) at room temperature (remainder for topping)
- 2 teaspoons vanilla extract
Topping & Finishing:
- About 2/3 cup Dulce de Leche (remainder of can)
- 3 or more tablespoons heavy whipping cream
- Fleur de Sel
Instructions
- Crust: Preheat oven to 350°F. Coat a 13 x 9 x 2-inch metal baking pan with nonstick spray. Mix graham cracker crumbs, sugar, and cinnamon in a bowl. Add melted butter, stir, and press into pan. Bake for 10 minutes and cool.
- Filling: Blend cream cheese and sugar until smooth. Add Dulce de Leche, eggs, and vanilla; blend. Pour over crust and bake until set. Cool completely.
- Topping & Finishing: Microwave Dulce de Leche and cream until melted. Pour over cheesecake. Refrigerate until chilled. Cut into bars, sprinkle with Fleur de Sel before serving.
Nutrition
- Serving Size: 1 bar
- Calories: 280
- Sugar: 18g
- Sodium: 250mg
- Fat: 18g
- Saturated Fat: 10g
- Unsaturated Fat: 6g
- Trans Fat: 0g
- Carbohydrates: 24g
- Fiber: 0g
- Protein: 4g
- Cholesterol: 85mg
Keywords: Dulce de Leche Cheesecake Bars, Cheesecake Bars Recipe, Dessert Bars
