
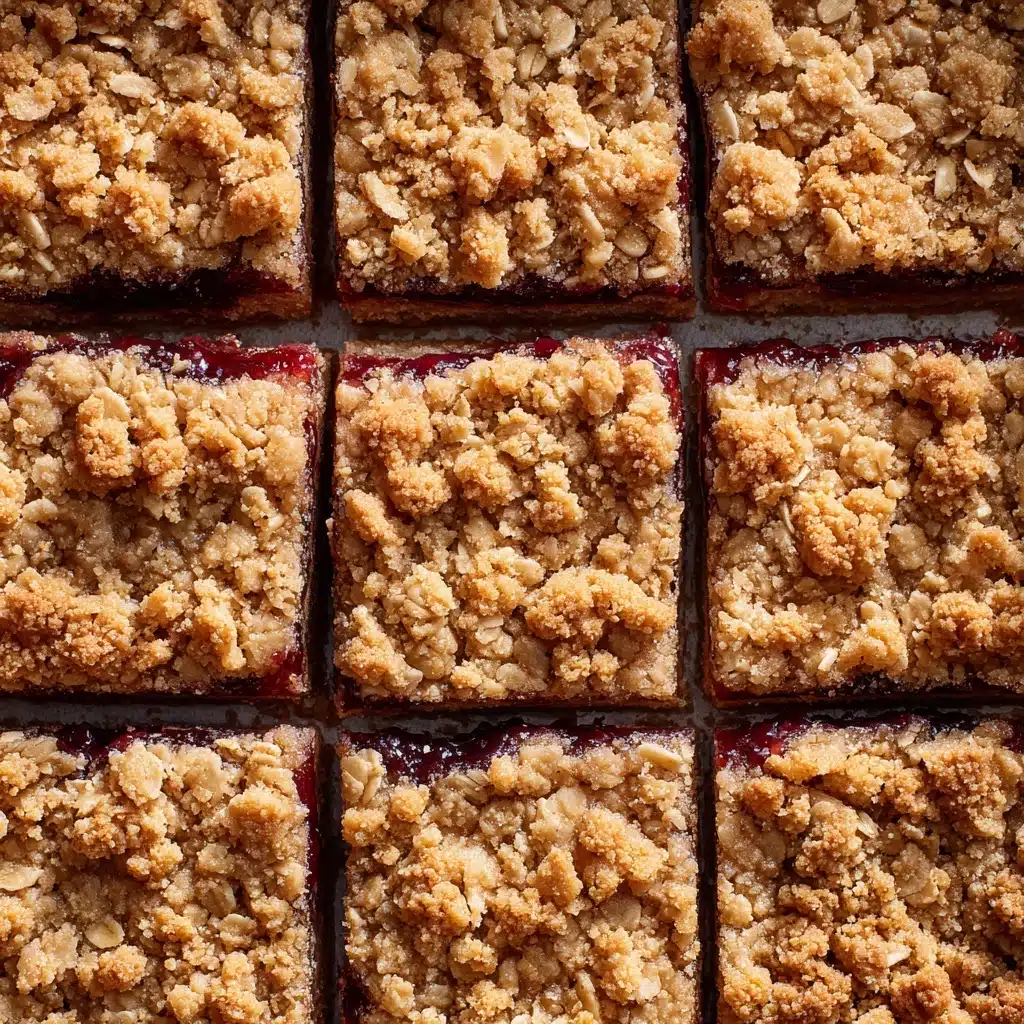
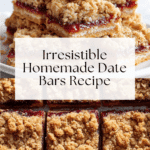
Date Bars Recipe
If you’re the kind of person who loves baked treats that balance chewy sweetness with a cozy crunch, you absolutely have to try these Date Bars. They’re like the ultimate nostalgic snack: buttery, golden crumb layers sandwiching a rich, sticky filling full of dates simmered to jammy perfection. Whether you grew up with them or you’re discovering Date Bars for the first time, this recipe makes a classic that’s perfect with afternoon tea, tucked into a lunchbox, or shared at a potluck. Prepare to fall in love with a little square of comfort!

Ingredients You’ll Need
What makes these Date Bars so magical is how the simplest ingredients come together—nothing fancy, just honest basics working in harmony. Each item really plays a star role, from lending structure and sweetness to bringing in that wonderful texture that makes these bars irresistible.
- Unsalted Butter (2 sticks, softened): The foundation for both crust and crumb, butter offers rich flavor and a tender, melt-in-your-mouth texture.
- Light Brown Sugar (1 cup, packed): Adds sweet caramel notes and a bit of chewiness, essential for a bar that feels extra homey.
- All Purpose Flour (1 3/4 cups): This gives the bars their structure and firmness, allowing them to hold together beautifully.
- Quick or Old Fashioned Oats (1 1/2 cups): Oats bring chewy heartiness and a rustic touch; quick oats soften more while old fashioned oats add extra texture.
- Baking Soda (1/2 teaspoon): Helps to lighten the crumb, ensuring the bars are tender and not dense.
- Salt (1/2 teaspoon): Just enough to brighten the sweetness and round out the flavors.
- Chopped Pitted Dates (2 packages, 8 oz each): The star of the show! Dates become lusciously sweet and sticky when cooked down, creating that signature filling.
- Sugar (1/4 cup): Gives the filling an extra layer of sweetness and helps create its glossy, jammy texture.
- Water (1 1/2 cups): Softens and cooks down the dates for a perfectly spreadable filling.
How to Make Date Bars
Step 1: Prepare for Baking
Preheat your oven to 400°F (200°C). Grab a 9×13-inch baking pan and set it aside—you don’t need to grease the pan, as the buttery base will do the work later. Having everything in place at the start makes assembling these Date Bars a breeze.
Step 2: Make the Crust and Crumb Topping
In a medium bowl, whisk together the flour, oats, baking soda, and salt. In a large mixing bowl, cream the softened butter and brown sugar until the mixture is light and fluffy—this step is worth a vigorous arm workout, or you can use a hand mixer. Fold the dry ingredients into the butter mixture, stirring until everything just comes together into a slightly crumbly dough. This will serve as both your crust and that irresistible, golden crumb topping.
Step 3: Cook the Date Filling
Combine the chopped dates, 1/4 cup sugar, and 1 1/2 cups water in a saucepan. Set over low heat and stir constantly for 10 minutes. As the dates soften and absorb the water, they’ll turn into a sticky, glossy filling—don’t rush this step, as it’s the heart of your Date Bars! Once thick and glossy, remove from the heat and let it cool slightly.
Step 4: Assemble the Bars
Press half of the crumb mixture firmly into the bottom of your prepared baking pan using your hands or the back of a spoon. Spread the warm date filling all over in an even, luscious layer. Sprinkle the remaining crumb mixture over the filling, gently patting it down to form your top layer. This simple layering technique is what gives Date Bars their homey, hand-assembled charm.
Step 5: Bake to Golden Perfection
Slide the pan into your preheated oven and bake for 25 to 30 minutes, until the top is a light golden brown and the house smells like heaven. Remove and let them cool for about 15 minutes—just enough to set the bars, but don’t walk away! While they’re still slightly warm, cut into bars to ensure clean slices and beautifully separated layers.
How to Serve Date Bars
Garnishes
A dusting of powdered sugar on top gives Date Bars a little extra sparkle and elegance. If you love texture, try a sprinkle of finely chopped toasted nuts—walnuts or pecans pair beautifully with dates—or even a drizzle of melted dark chocolate for an indulgent touch.
Side Dishes
For a simple afternoon pick-me-up, Date Bars are wonderful with a cup of coffee or hot tea. If you’re serving at a brunch, they make a lovely contrast to savory dishes like quiches or egg bakes, or serve them alongside fresh fruit for a light and satisfying finish.
Creative Ways to Present
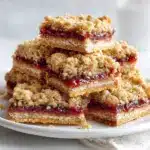
Stack Date Bars in layers on a pretty vintage cake stand or wrap individual bars in wax paper for a portable lunchbox treat. You could slice them into smaller squares for a cookie platter, or even tuck one into a care package—the crumbly texture holds up surprisingly well when shipped to friends and family.
Make Ahead and Storage
Storing Leftovers
Date Bars keep deliciously fresh for up to five days when stored in an airtight container at room temperature. If your kitchen runs warm or humid, you can store them in the fridge to help the filling stay firm and the crumb topping crisp.
Freezing
These bars freeze like a dream! Once completely cooled, wrap each bar individually in plastic wrap and store them in a freezer-safe zip bag. They’ll keep for up to two months—and you can grab one any time your sweet tooth strikes.
Reheating
To bring back that fresh-baked magic, warm Date Bars gently in the microwave for 10-15 seconds. If you’re starting from frozen, let them thaw at room temperature, then give a quick zap before serving. The filling becomes soft and gooey, just like the day they were baked.
FAQs
Can I use fresh dates instead of packaged chopped dates?
Absolutely! If you find plump, fresh dates, just pit and chop them. Keep in mind you may need to reduce the added sugar slightly, as fresh dates often taste sweeter and have a softer texture.
Do Date Bars work with gluten-free flour?
Yes, a good 1:1 gluten-free all-purpose baking blend will swap in nicely for regular flour. Check your oats to make sure they’re certified gluten-free as well for a fully gluten-free treat.
How do I know when the bars are done baking?
Look for a light golden color on top and firmness around the edges. The bars should not jiggle in the center; a bit of bubbling around the sides is fine. When in doubt, a few extra minutes in the oven won’t hurt!
Can I add other flavors to the filling?
Certainly! Try adding a teaspoon of orange zest, a pinch of cinnamon, or even a splash of vanilla extract to the date filling for a unique, personalized twist on classic Date Bars.
What’s the best way to cut neat squares?
Use a sharp knife and cut them while they’re still slightly warm but not hot. Wiping the knife clean between cuts gives you those gorgeous, defined layers that really show off the gooey date center.
Final Thoughts
If you’ve been searching for an easy yet unforgettable dessert, Date Bars truly deliver on all counts—old-fashioned flavor, blissful texture, and that delightful hint of nostalgia in every bite. Give this recipe a try, share the bars with friends or family, and get ready for them to become a new favorite in your baking rotation!
PrintDate Bars Recipe
Delicious homemade date bars with a buttery oat crust and sweet date filling, perfect for a snack or dessert.
- Prep Time: 20 minutes
- Cook Time: 30 minutes
- Total Time: 50 minutes
- Yield: 24 bars 1x
- Category: Dessert
- Method: Baking
- Cuisine: American
- Diet: Vegetarian
Ingredients
For the Crust and Crumb Topping
- 1 cup (2 sticks) unsalted butter, softened
- 1 cup light brown sugar, packed
- 1 3/4 cups all-purpose flour
- 1 1/2 cups quick or old-fashioned oats
- 1/2 teaspoon baking soda
- 1/2 teaspoon salt
For the Date Filling
- 2 packages (8 ounces each) chopped pitted dates
- 1/4 cup sugar
- 1 1/2 cups water
Instructions
- Preheat oven to 400 degrees. In a medium bowl, whisk together the dry ingredients for the crust and crumb topping. Set aside.
- For the Crust and Crumb Topping: In a large bowl, cream together the butter and brown sugar. Add the dry ingredients and mix well. Set aside.
- For the Date Filling: In a pan, combine dates, sugar, and water. Cook over low heat for 10 minutes until thickened.
- Assembly: Press half of the crumb mixture into a baking pan. Spread date filling, then top with remaining crumbs. Bake for 25-30 minutes until golden brown. Cool, then cut into bars.
Notes
- You can add chopped nuts to the crumb topping for extra crunch.
- These bars freeze well; store in an airtight container for longer freshness.
Nutrition
- Serving Size: 1 bar
- Calories: 220
- Sugar: 18g
- Sodium: 100mg
- Fat: 8g
- Saturated Fat: 5g
- Unsaturated Fat: 2g
- Trans Fat: 0g
- Carbohydrates: 35g
- Fiber: 2g
- Protein: 2g
- Cholesterol: 20mg
Keywords: date bars, oat bars, dessert recipe, homemade bars

