
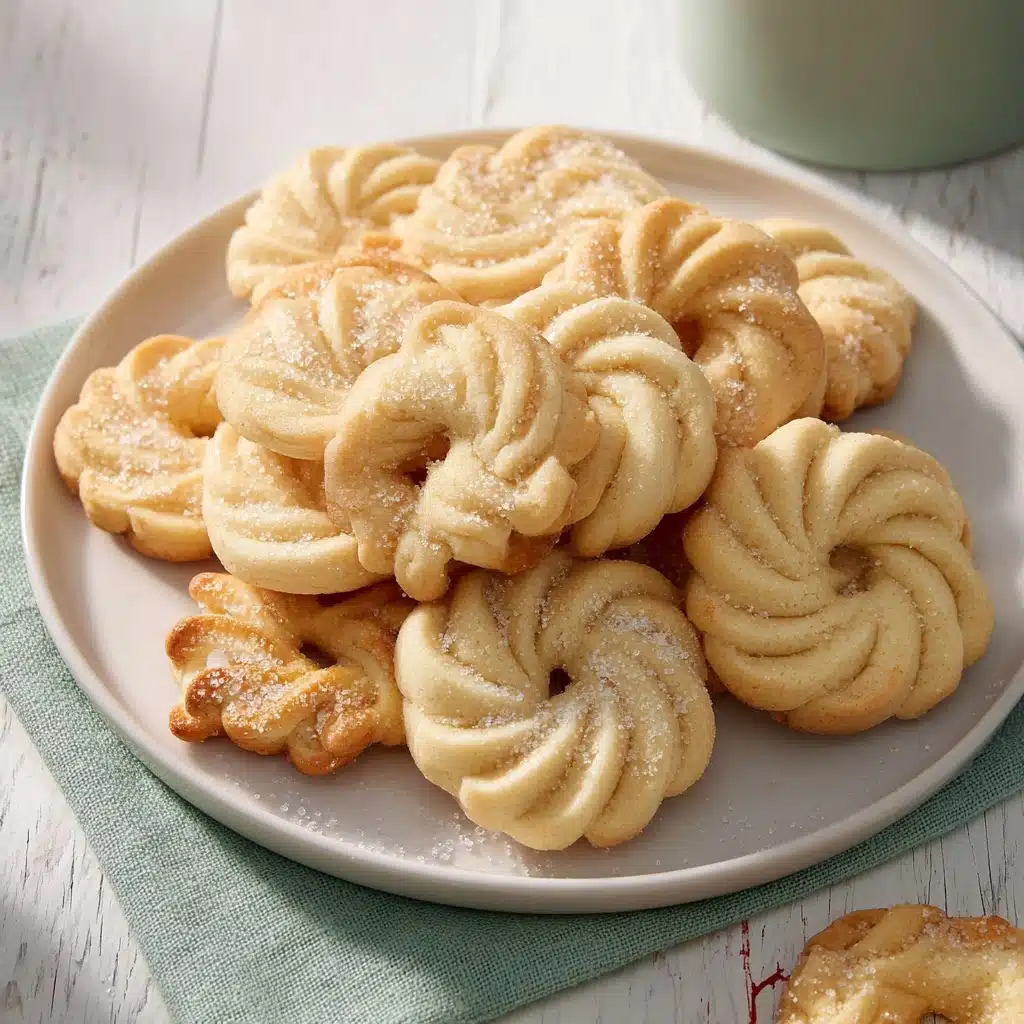
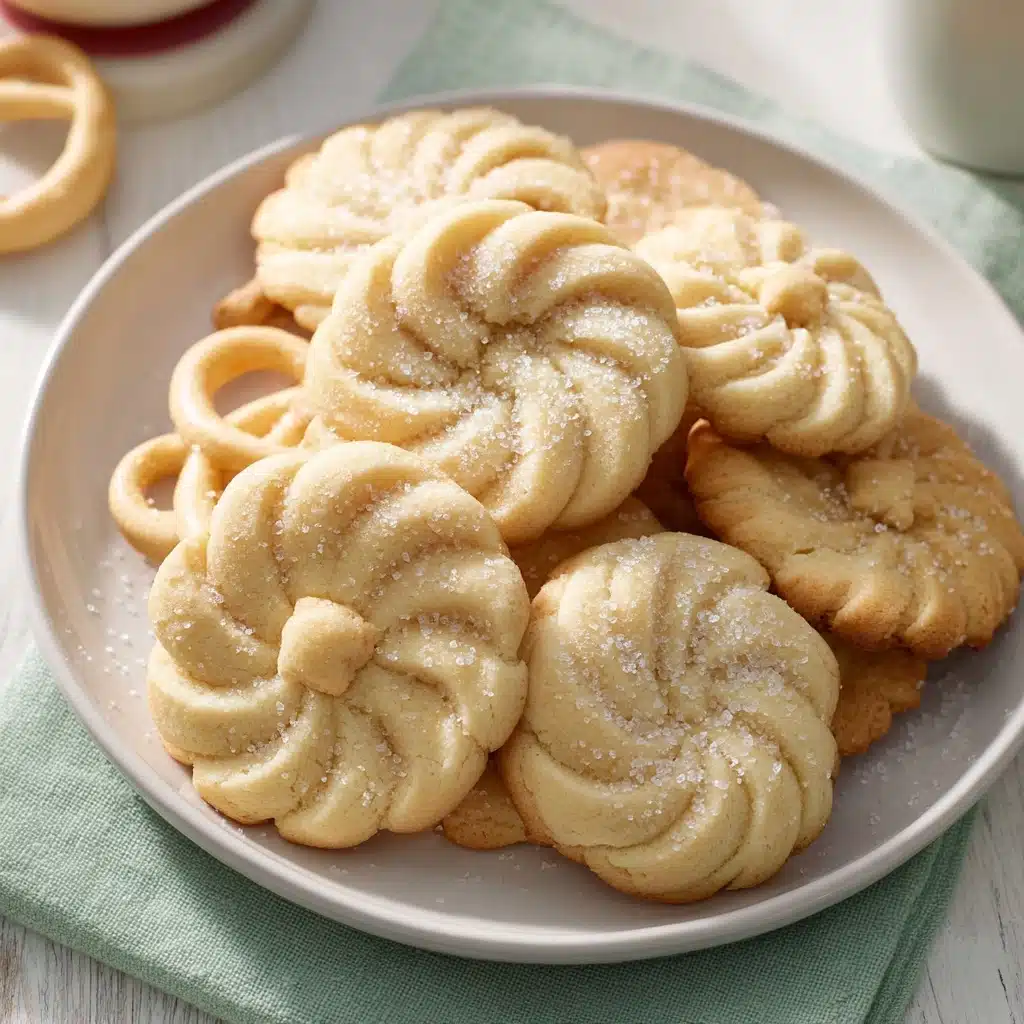
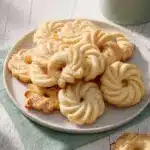
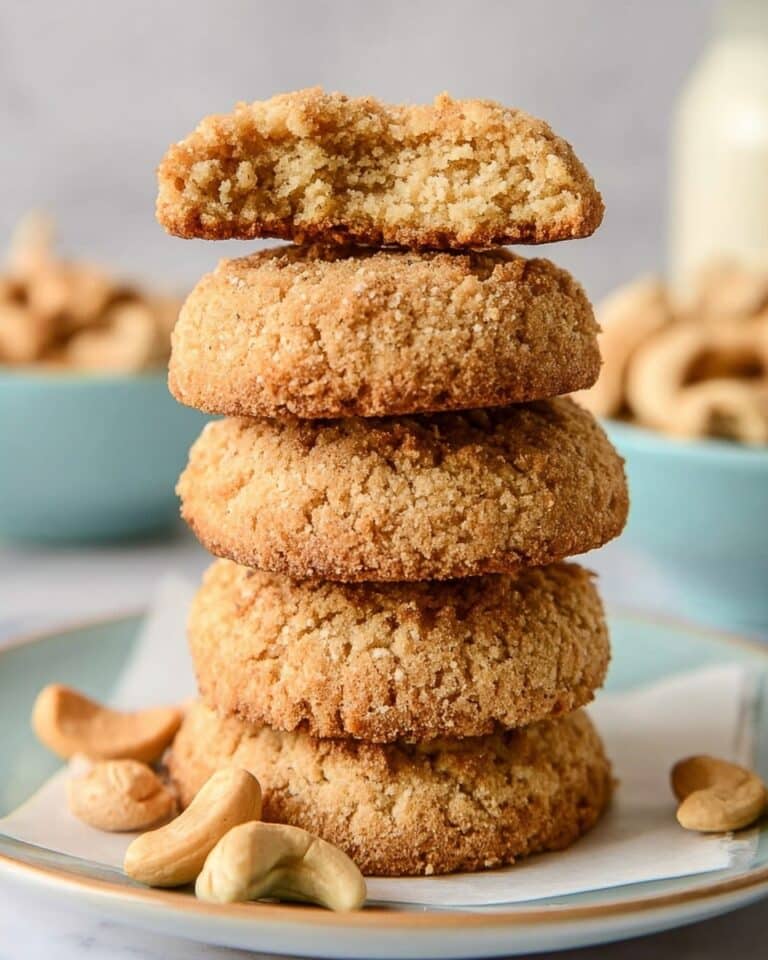
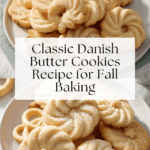
Danish Butter Cookies (Melt in your mouth) Recipe
If you’ve ever bitten into a cookie that vanished on your tongue, leaving behind a whisper of buttery sweetness and a tender crumb, you’re in for a treat with these Danish Butter Cookies (Melt in your mouth). This classic recipe achieves that perfect balance of crisp edges and soft centers, making each cookie a tiny bite of heaven. With simple, wholesome ingredients coming together in a straightforward process, these cookies embody comfort and elegance in every single morsel. Whether you’re surprising your loved ones or indulging yourself, these Danish Butter Cookies (Melt in your mouth) are guaranteed to become a beloved staple in your baking repertoire.
Ingredients You’ll Need
Don’t be fooled by the short list of ingredients—each one plays a crucial role in delivering the rich flavor and tender texture of these Danish Butter Cookies (Melt in your mouth). From the creamy butter to the delicate combination of flours, every component adds something special.
- European salted butter (1 cup / 227 g): Adds richness and a slight saltiness to balance the sweetness perfectly.
- Granulated sugar (1/2 cup / 100 g): Sweetens the cookies while helping them achieve a light, fluffy texture.
- Salt (1/8 teaspoon): Enhances all the flavors without overpowering the delicate sweetness.
- Egg yolks (2): Provide structure and contribute to the cookie’s tender, melt-in-your-mouth crumb.
- Vanilla extract (2 teaspoons / 10 g): Brings warmth and depth to the flavor profile.
- Whole milk (1 tablespoon / 15 g): Keeps the dough soft for perfectly piped shapes and adds moisture.
- All-purpose flour (2 cups / 220 g): The body of the dough, it helps shape the cookie while remaining tender.
- Cake flour (1/2 cup / 50 g): Adds softness for that signature melt-in-your-mouth texture.
- Coarse sugar (for decorating): Optional, but a sprinkle adds a delightful crunch and sparkle on top.
How to Make Danish Butter Cookies (Melt in your mouth)
Step 1: Prep and Chill
Start by making some room in your refrigerator—this step is vital! Chilling the piped cookies on a lined baking sheet prevents them from spreading too much during baking, helping the buttery shapes keep their beauty and bite. Lining two baking sheets with parchment or silicone mats gets you ready to pipe the batter right away.
Step 2: Cream Butter, Sugar, and Salt
Using a stand mixer fitted with the paddle attachment, cream the softened European salted butter at medium speed until it’s perfectly smooth. Then, gradually add sugar and salt while mixing on low to combine, followed by bumping the speed to medium until you get a fluffy, airy base for your dough. This step is the secret to lightness!
Step 3: Add Egg Yolks, Vanilla, and Milk
Next, incorporate the egg yolks, vanilla extract, and whole milk into the mixture while the mixer runs at medium speed. These ingredients will enrich the dough, lending it beautiful texture and depth. Don’t forget to scrape down the bowl sides to ensure an even blend of flavors.
Step 4: Combine Dry Ingredients and Add to Batter
Whisk together the all-purpose flour and cake flour in a separate bowl. Adding these to your wet ingredients in two parts allows for gentle mixing, avoiding overworking the dough and ensuring the light, delicate crumb that Danish Butter Cookies (Melt in your mouth) are famous for. If the dough feels too thick to pipe, feel free to soften it with an extra tablespoon of milk.
Step 5: Pipe the Cookies
Transfer your lovely dough into a large piping bag fitted with a half-inch open star tip and pipe 2-inch shapes onto your prepared baking sheets. Classic shapes like rosettes, pretzels, circles, or squares look beautiful—get creative! Don’t forget to space your cookies at least two inches apart to allow room for expansion. For a festive touch, garnish with coarse sugar or sprinkles before chilling them in the refrigerator for 20 to 30 minutes.
Step 6: Preheat the Oven
While your dough chills, preheat your oven to 350°F. Position the rack in the middle to ensure even, golden baking without burning the bottoms.
Step 7: Bake to Golden Perfection
Bake the chilled cookies for 10 to 15 minutes, watching closely for just a hint of golden brown around the edges. This slight color is your cue that the cookies are perfectly baked—tender and buttery on the inside, with just enough crispness on the outside. Let them rest on the baking sheet for five minutes before transferring to a wire rack to cool fully.
How to Serve Danish Butter Cookies (Melt in your mouth)
Garnishes
While the coarse sugar sprinkle offers a lovely crunch, you can also get playful with garnishes! Dip one edge of the cooled cookies in melted dark or white chocolate for an elegant look. Toasted finely chopped nuts such as almonds or pistachios can add delightful texture and a nutty aroma that pairs beautifully with the buttery base.
Side Dishes
These Danish Butter Cookies (Melt in your mouth) are divine on their own but also love a good companion. Serve them alongside a warm cup of tea, rich coffee, or even chilled milk for a perfect snack. At festive gatherings, pair them with soft cheeses or fruit preserves for a sweet-savory contrast everyone will adore.
Creative Ways to Present
Try layering these cookies in a decorative jar tied with a ribbon for gift giving, or arrange them on a pretty platter with fresh berries and edible flowers for parties. You can also sandwich a dollop of lemon curd or jam between two cookies for a delightful twist that amps up the flavor while maintaining that classic melt-in-your-mouth feel.
Make Ahead and Storage
Storing Leftovers
Store your Danish Butter Cookies (Melt in your mouth) in an airtight container at room temperature for up to a week. Make sure they are completely cooled before storing to keep them crisp and avoid any sogginess.
Freezing
To keep these buttery delights fresh longer, freeze the baked cookies in a single layer on a baking sheet first. Once frozen solid, transfer them to a resealable freezer bag or container. They can stay in the freezer for up to two months and still retain that irresistible texture.
Reheating
If you want to revive a little warmth and softness, pop the cookies in a preheated 300°F oven for about 5 minutes. This brings back that fresh-baked feeling without drying them out, so you get the full Danish Butter Cookies (Melt in your mouth) experience again.
FAQs
Can I use unsalted butter instead of European salted butter?
Absolutely! If you use unsalted butter, just add an extra pinch of salt to your dough to maintain the flavor balance that makes these Danish Butter Cookies (Melt in your mouth) so special.
What if I don’t have cake flour?
You can make a substitute by removing 2 tablespoons of all-purpose flour per cup and replacing it with 2 tablespoons of cornstarch. This mimics the softness cake flour provides, keeping your cookies tender and light.
Can I make these cookies gluten-free?
With some experimenting, you can try replacing the flours with a gluten-free blend suitable for baking. Keep in mind the texture might vary slightly from the classic melt-in-your-mouth quality.
How important is chilling the dough before baking?
Chilling is key to prevent the cookies from spreading too much. It also enhances the flavor and helps keep those beautiful shapes crisp and defined for the perfect Danish Butter Cookies (Melt in your mouth).
Can I flavor the cookies differently?
Of course! While vanilla is classic and comforting, you can experiment by adding lemon zest, almond extract, or even a pinch of cinnamon for a fun twist without losing their signature tenderness.
Final Thoughts
There’s something truly magical about the simplicity and elegance of Danish Butter Cookies (Melt in your mouth). Once you try baking this recipe, with its buttery richness and tender crumb, you’ll understand why it holds a special place in hearts around the world. So grab your mixing bowl and treat yourself to these charming cookies—you’ll wonder how you ever lived without them.
PrintDanish Butter Cookies (Melt in your mouth) Recipe
These Danish Butter Cookies are classic melt-in-your-mouth treats made with rich European salted butter, a perfect balance of sweetness, and a hint of vanilla. Their delicate texture and buttery flavor make them ideal for gift-giving or enjoying with a cup of tea or coffee. With a simple piping method and a quick chill before baking, these cookies maintain their shape beautifully and have a delightful crisp edge with a tender center.
- Prep Time: 15 minutes
- Cook Time: 12 minutes
- Total Time: 45 minutes
- Yield: About 24 cookies 1x
- Category: Dessert
- Method: Baking
- Cuisine: Danish
- Diet: Vegetarian
Ingredients
Dough Ingredients
- 1 cup (227 g) European salted butter, room temperature
- 1/2 cup (100 g) granulated sugar
- 1/8 teaspoon salt
- 2 egg yolks
- 2 teaspoons (10 g) vanilla extract
- 1 tablespoon (15 g) whole milk, plus extra if needed
- 2 cups (220 g) all-purpose flour
- 1/2 cup (50 g) cake flour
For Decoration
- Coarse sugar (for sprinkling)
Instructions
- Prepare Refrigerator and Baking Mats: Clear space in your refrigerator for a baking sheet to chill the piped cookies. Line two baking sheets with parchment paper or silicone baking mats and set aside.
- Cream Butter, Sugar, and Salt: In a stand mixer fitted with a paddle attachment, beat the butter on medium speed until smooth. Gradually add sugar and salt while mixing on low, then increase speed to medium and beat until the mixture is light and fluffy.
- Add Egg Yolks, Vanilla, and Milk: With the mixer running on medium, add egg yolks, vanilla extract, and milk. Continue mixing until fully incorporated, then scrape the bowl sides to ensure even mixing.
- Incorporate Dry Ingredients: Whisk together all-purpose and cake flours in a separate bowl. Add the flour mixture to the wet ingredients in two parts, mixing on low speed until no streaks of flour remain. Add an additional tablespoon of milk if the dough is too stiff to pipe.
- Pipe the Cookies: Transfer the dough into a large piping bag fitted with a ½-inch open star tip. Pipe 2-inch shapes (such as rosettes, pretzels, circles, or squares) onto prepared baking sheets, spacing them at least 2 inches apart. Sprinkle coarse sugar or festive sprinkles on top if desired. Chill the piped cookies in the refrigerator for 20-30 minutes to prevent spreading.
- Preheat Oven: Set the oven to 350°F (175°C) and position the rack in the middle.
- Bake the Cookies: Bake chilled cookies for 10-15 minutes or until the edges are just lightly golden. Allow cookies to cool on the baking sheet for 5 minutes before transferring them to a wire rack to cool completely.
Notes
- Chilling the cookies before baking is essential to prevent them from spreading too much and to maintain their shape.
- Using European salted butter adds a richer flavor due to its higher butterfat content compared to regular butter.
- If you do not have cake flour, you can substitute with all-purpose flour minus 2 tablespoons per cup, replaced by cornstarch for tenderness.
- The coarse sugar sprinkled on top adds a lovely crunch and sparkle, but you can omit for a more subtle cookie.
- Store the cookies in an airtight container at room temperature for up to one week.
Nutrition
- Serving Size: 1 cookie (approx. 15 g)
- Calories: 90
- Sugar: 5 g
- Sodium: 55 mg
- Fat: 6 g
- Saturated Fat: 3.5 g
- Unsaturated Fat: 2 g
- Trans Fat: 0 g
- Carbohydrates: 9 g
- Fiber: 0.2 g
- Protein: 1 g
- Cholesterol: 25 mg
Keywords: Danish butter cookies, butter cookies, melt-in-your-mouth cookies, homemade cookies, vanilla cookies, Christmas cookies, piped cookies