
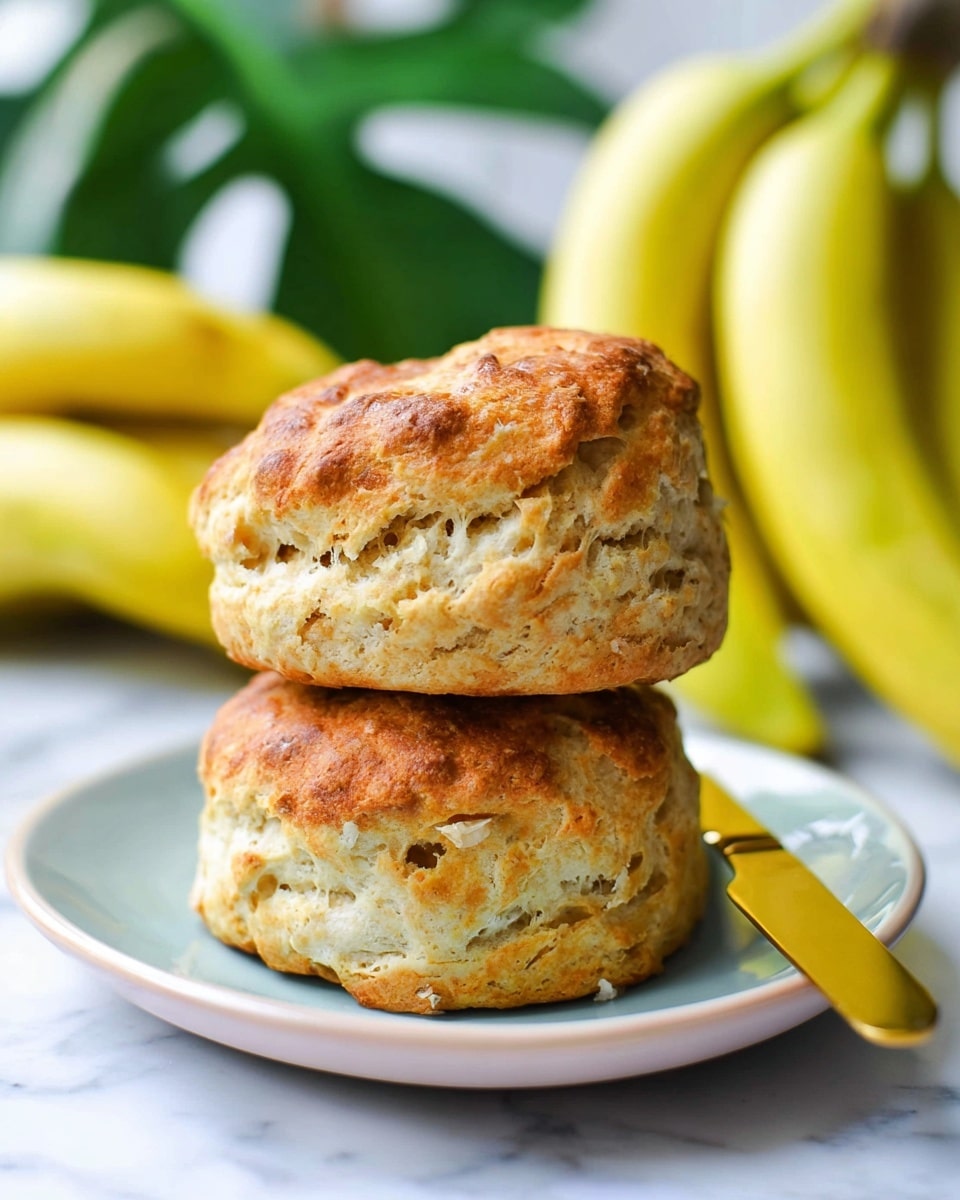
Banana Scones with Chocolate Chips and Cinnamon Recipe
Introduction
These banana scones offer a moist, tender crumb with the natural sweetness of ripe bananas and a hint of cinnamon. Whether enjoyed for breakfast or an afternoon snack, they’re easy to make and can be customized with chocolate chips or nuts.
Ingredients
- 3 1/2 cups self-rising flour (+ 1/4 cup for working the dough)
- 1 1/3 cups mashed banana (about 3 large bananas)
- 2/3 cup vanilla plant-based yogurt (+ extra for brushing)
- 1/2 cup dairy-free dark chocolate chips or chopped pecans/walnuts
- 1 teaspoon cinnamon
- 1/4 cup unrefined cane sugar
Instructions
- Step 1: Preheat your oven to 390°F (200°C). Line a large baking sheet with parchment paper and lightly spray with cooking oil. Set aside.
- Step 2: In a large mixing bowl, mash the bananas with a fork or use a stand mixer with the paddle attachment until smooth.
- Step 3: Measure out 1 1/3 cups of the mashed banana by packing it into a measuring cup, then return it to the mixing bowl.
- Step 4: Add the vanilla yogurt, self-rising flour, cinnamon, and cane sugar to the mashed banana in the bowl. Stir with a spoon until just combined.
- Step 5: Flour your hands lightly and knead the dough gently to form a rough, sticky dough. Alternatively, use the stand mixer to knead with the paddle attachment. The dough will be sticky and crumbly—this is normal.
- Step 6: Fold in the chocolate chips or nuts if using.
- Step 7: Lightly oil your clean hands and the cookie cutter to prevent sticking.
- Step 8: Sprinkle about 2 tablespoons of flour onto your work surface. Place the dough on it, sprinkle a bit more flour on top, and press or roll it out to about 0.8 inches (2 cm) thickness.
- Step 9: Use a 3.5-inch (8 cm) cookie cutter to cut out scones from the dough.
- Step 10: Arrange the scones on the prepared baking sheet, leaving space between each for rising.
- Step 11: Gather leftover dough, press it together, roll or flatten again, and cut more scones.
- Step 12: Brush the top of each scone with a little vanilla yogurt using a pastry brush.
- Step 13: Bake in the center of the oven for 15 to 17 minutes, or until the tops turn golden brown.
- Step 14: Remove from the oven and cool on a wire rack before serving.
Tips & Variations
- Try swapping the plant-based yogurt for regular yogurt or sour cream for a different flavor and texture.
- Add a handful of raisins or dried cranberries for an extra burst of sweetness.
- If you prefer less sweetness, reduce the sugar to 2 tablespoons.
- For a nut-free version, omit the nuts and use only chocolate chips or leave them out entirely.
- Ensure your bananas are very ripe for the best natural sweetness and moisture.
Storage
Store scones in an airtight container at room temperature for up to 2 days. For longer storage, freeze them in a sealed bag for up to 1 month. To reheat, warm in a 350°F (175°C) oven for 5 to 7 minutes or microwave briefly until warm.
How to Serve

Serve this delicious recipe with your favorite sides.
FAQs
Can I use regular flour instead of self-rising flour?
You can substitute all-purpose flour by adding 1 1/2 teaspoons of baking powder and 1/2 teaspoon of salt per cup of flour to mimic self-rising flour.
Can I make these scones vegan?
Yes, using plant-based yogurt and dairy-free chocolate chips will keep this recipe vegan-friendly.
PrintBanana Scones with Chocolate Chips and Cinnamon Recipe

These Banana Scones are a delightful twist on the classic scone, incorporating ripe mashed bananas, vanilla plant-based yogurt, and optional dark chocolate chips or nuts. Light, fluffy, and slightly sweet with a hint of cinnamon, these dairy-free scones are perfect for breakfast or a cozy afternoon treat. The recipe is simple to prepare and bakes in under 20 minutes, delivering warm, golden scones with soft interiors and a tender crumb.
- Prep Time: 15 minutes
- Cook Time: 17 minutes
- Total Time: 32 minutes
- Yield: 12 scones 1x
- Category: Breakfast
- Method: Baking
- Cuisine: American
- Diet: Vegan
Ingredients
Dry Ingredients
- 3 1/2 cups Self-Rising Flour (plus 1/4 cup extra for working the dough)
- 1 teaspoon Cinnamon
- 1/4 cup Unrefined Cane Sugar
Wet Ingredients
- 1 1/3 cups Mashed Banana (a bit less than 3 large bananas)
- 2/3 cup Vanilla Plant-Based Yogurt (plus extra for brushing on top)
Add-ins
- 1/2 cup Dairy-Free Dark Chocolate Chips or chopped pecans/walnuts (optional)
Instructions
- Preheat Oven and Prepare Baking Sheet: Preheat your oven to 390°F (200°C). Line a large baking sheet with parchment paper and lightly spray with cooking oil to prevent sticking. Set the baking sheet aside.
- Mash the Bananas: In a large mixing bowl, mash the bananas thoroughly using a fork or a stand mixer paddle attachment until smooth. Measure out 1 1/3 cups packed.
- Combine Wet and Dry Ingredients: Return the mashed bananas to the bowl, then add the vanilla plant-based yogurt and self-rising flour. If using, add cinnamon and unrefined cane sugar. Stir initially with a spoon.
- Knead Dough: Flour your hands lightly and knead the sticky, crumbly dough until it forms a rough ball. You can also use a stand mixer paddle attachment for kneading. The dough will be imperfect and slightly sticky, which is normal.
- Fold in Add-ins: If using dark chocolate chips or nuts, fold them gently into the dough at this stage.
- Prepare Working Surface: Clean and lightly oil your hands with olive oil to prevent sticking. Also, oil your cookie cutter. Sprinkle 2 tablespoons of flour on the work surface.
- Roll out the Dough: Place the dough on the floured surface, sprinkle flour on top, then use your hands or a rolling pin to flatten the dough to about 0.8 inches (2cm) thickness.
- Cut the Scones: Press a 3.5 inch (8 cm) diameter cookie cutter firmly into the dough to cut out scones.
- Arrange on Baking Sheet: Place the cut scones onto the prepared baking sheet, leaving some space between each for expansion.
- Re-roll Leftover Dough: Gather the leftover dough scraps, knead lightly, flatten again, and cut more scones until all dough is used.
- Brush with Yogurt: Use a pastry brush to lightly brush the tops of each scone with vanilla plant-based yogurt to encourage browning.
- Bake: Place the baking sheet on the center rack of the oven and bake for 15–17 minutes at 390°F (200°C), or until the scones are golden brown on top.
- Cool: Remove from the oven and transfer the scones to a cooling rack. Allow to cool slightly before serving.
Notes
- Use self-rising flour for a light, fluffy texture without needing additional leavening agents.
- Mashed bananas should be ripe to ensure natural sweetness and moisture.
- The plant-based yogurt makes the scones dairy-free; brushing on top helps with browning.
- You can substitute dark chocolate chips with chopped nuts for a different texture and flavor.
- The dough is intentionally sticky and rough; avoid overworking to maintain tender scones.
- Scones expand more in height than width during baking, so space them out accordingly.
Keywords: banana scones, vegan scones, dairy-free scones, breakfast scones, plant-based yogurt, chocolate chip scones, easy baking


