
Apple Pie Biscuits Recipe
If you have a soft spot for warm, comforting desserts but are short on time, let me introduce you to the magical treat known as Apple Pie Biscuits. These delightful pockets combine the flaky, buttery goodness of biscuits with the sweet, spiced charm of traditional apple pie filling, resulting in bite-sized bites of happiness that are perfect any time of day. Whether you’re serving them for breakfast, a snack, or dessert, Apple Pie Biscuits bring a cozy, nostalgic flavor that’s impossible to resist, all made with surprisingly simple ingredients and fuss-free steps.

Ingredients You’ll Need
Each component in this recipe plays a crucial role in creating the perfect balance of texture and flavor. The ingredients are straightforward and easy to find, but when combined, they create a sensation you’ll want again and again.
- Refrigerated biscuit dough: The base of the dish, providing flaky layers and buttery richness without any extra effort.
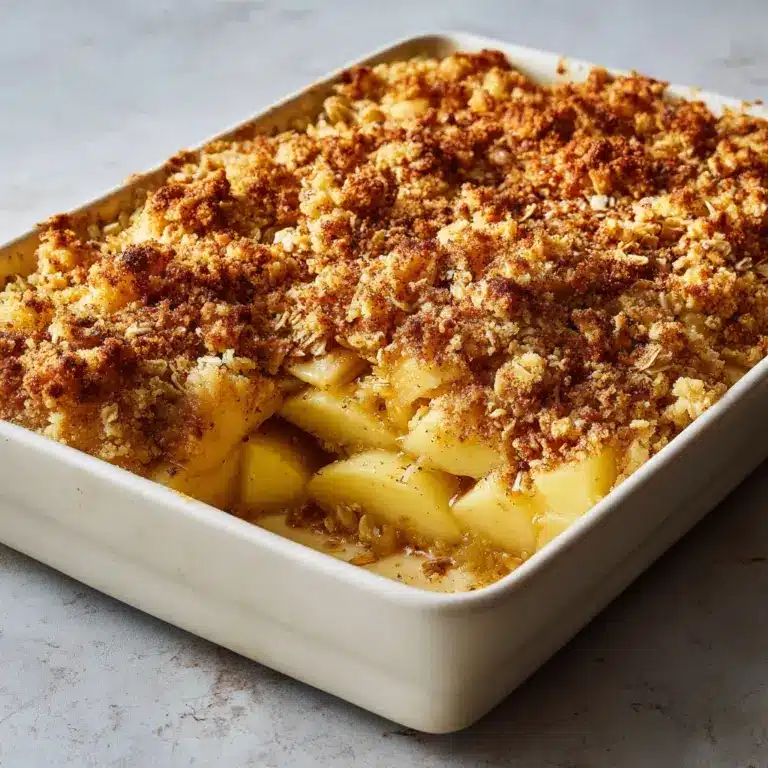
- Apple pie filling: Sweet and soft, the chopped filling adds that classic apple pie flavor and tender fruit texture inside each biscuit.
- Brown sugar: Adds a deep caramel sweetness that perfectly complements the tart apples.
- Ground cinnamon: A warm spice that brings out the cozy essence of fall and classic apple desserts.
- Vanilla extract: Adds fragrant notes that enhance both the filling and the glaze for a well-rounded flavor.
- Butter (melted): Brushed on top, it helps create that irresistible golden-brown, flaky crust we all love.
- Powdered sugar: The base of the glaze that adds sweetness and a pretty finishing touch.
- Milk: Used in the glaze to create just the right drizzling consistency.
How to Make Apple Pie Biscuits
Step 1: Preheat and Prepare
Start by heating your oven to 375 degrees Fahrenheit (that’s 190 degrees Celsius for our metric friends). Line a baking sheet with parchment paper—trust me, this makes cleanup a breeze and prevents the biscuits from sticking or burning on the bottom.
Step 2: Make the Apple Filling
Mix the finely chopped apple pie filling with brown sugar, ground cinnamon, and vanilla extract in a bowl. This simple combination infuses the apples with spice and sweetness, creating that signature apple pie taste that will burst inside each biscuit.
Step 3: Shape the Biscuits
Flatten each biscuit dough piece into a 4-inch circle. Don’t forget to lightly flour your surface or rolling pin to keep things from sticking. This step is crucial because it ensures the biscuit dough is thin enough to fold without tearing but still thick enough to hold the filling securely.
Step 4: Fill and Seal
Scoop about one tablespoon of the apple filling right into the center of each biscuit circle. Bring up the edges, fold over the filling, and pinch to seal thoroughly. Overstuffing can cause the biscuits to burst during baking, so extra pinch power is your friend here!
Step 5: Brush and Bake
Place the folded, sealed biscuits seam-side down on your prepared baking sheet. Brush the tops generously with melted butter—this will help achieve a gorgeous golden crust that’s flaky and rich. Slide the tray into your oven and bake for 15 to 18 minutes until the biscuits are puffed, golden, and filling is bubbling slightly inside.
Step 6: Prepare the Glaze
While the biscuits are cooling just a bit, whisk together powdered sugar, milk, and vanilla extract until you get a smooth, pourable glaze. This sweet drizzle is the icing on the cake—literally—adding sweetness and a lovely shine that makes these Apple Pie Biscuits extra irresistible.
How to Serve Apple Pie Biscuits
Garnishes
A simple dusting of cinnamon or a sprinkle of finely chopped pecans adds texture and an extra hit of warmth. For those who want a little extra indulgence, a scoop of vanilla ice cream or a dollop of whipped cream on the side complements the biscuits beautifully.
Side Dishes
Pair these biscuits with a hot cup of coffee or spiced chai for a perfect breakfast or afternoon pick-me-up. For dessert, a fresh fruit salad or a simple green salad with a tangy vinaigrette can offer a refreshing contrast to the biscuits’ sweetness.
Creative Ways to Present
Serve Apple Pie Biscuits in a rustic basket lined with a colorful kitchen towel for a charming homemade touch. Or, create mini dessert boxes filled with these biscuits and a small container of glaze, making them perfect for gifting or sharing at gatherings.
Make Ahead and Storage
Storing Leftovers
Store any leftover Apple Pie Biscuits in an airtight container at room temperature for up to two days. To keep them fresh longer, refrigeration is an option but may slightly affect the flakiness of the biscuit dough.
Freezing
If you want to stock up, freeze unbaked filled biscuits on a baking sheet until firm, then transfer them to a freezer bag. When ready, bake them straight from the freezer, adding a few extra minutes to the bake time. You can also freeze baked biscuits but reheat carefully to avoid drying them out.
Reheating
Warm leftovers in a 350-degree Fahrenheit oven for about 5-7 minutes to revive the crisp, flaky texture. Avoid microwaving if you want to keep that delightful crunch, though it’s fine for a quick heat-up in a pinch.
FAQs
Can I use homemade biscuit dough instead of refrigerated dough?
Absolutely! Homemade biscuit dough works wonderfully and can add an extra touch of freshness. Just make sure it’s rolled out to the right thickness for easy folding and sealing around the filling.
What type of apple pie filling is best for this recipe?
Choose your favorite apple pie filling—canned or homemade—just be sure it’s finely chopped so it fits nicely inside the biscuits without bursting out while baking.
Can I substitute the brown sugar in the filling?
Yes, you can swap brown sugar for white granulated sugar or even coconut sugar. Just keep in mind brown sugar adds moisture and a slight caramel flavor that complements the apples beautifully.
Is it possible to make these dairy-free?
Definitely! Use a dairy-free biscuit dough or twice the effort of your favorite biscuit recipe. Substitute melted butter with coconut oil or dairy-free margarine, and use a non-dairy milk like almond or oat milk in the glaze.
How long do Apple Pie Biscuits stay fresh out of the oven?
They’re best enjoyed the same day, fresh and warm, but can be stored at room temperature for up to two days. After that, they might lose some of their flaky appeal but can be revived with proper reheating.
Final Thoughts
There’s something undeniably joyful about Apple Pie Biscuits—they merge the best parts of a classic dessert with the ease and comfort of biscuits, making them a go-to for any occasion. I promise, once you try these little golden pockets of happiness, they’ll quickly become a favorite to bake and share with everyone you love. So grab your biscuit dough and get ready to fill your kitchen with irresistible aromas and warm memories!
PrintApple Pie Biscuits Recipe

These Apple Pie Biscuits are a delightful twist on classic biscuits, combining flaky, buttery dough with a sweet and spiced apple pie filling. Topped with a smooth vanilla glaze, they make a perfect comforting treat for breakfast, dessert, or anytime snacking.
- Prep Time: 15 minutes
- Cook Time: 18 minutes
- Total Time: 33 minutes
- Yield: 8 biscuits 1x
- Category: Breakfast, Snack, Dessert
- Method: Baking
- Cuisine: American
- Diet: Vegetarian
Ingredients
Dough
- 1 can (16.3 oz) refrigerated biscuit dough
Filling
- 1 cup apple pie filling (finely chopped)
- 2 tbsp brown sugar
- 1 tsp ground cinnamon
- 0.5 tsp vanilla extract
Topping
- 1 tbsp butter (melted, for brushing)
Glaze
- 0.5 cup powdered sugar
- 1–2 tbsp milk
- 0.5 tsp vanilla extract
Instructions
- Preheat Oven: Preheat the oven to 375°F (190°C). Line a baking sheet with parchment paper for easy cleanup.
- Prepare Filling: In a bowl, mix the finely chopped apple pie filling with brown sugar, ground cinnamon, and vanilla extract until well combined.
- Shape Biscuits: Flatten each refrigerated biscuit dough piece into a 4-inch circle using your hands or a rolling pin, lightly flouring your surface to prevent sticking.
- Fill Biscuits: Spoon about 1 tablespoon of the prepared apple filling into the center of each biscuit circle. Fold the edges up and pinch them together tightly to seal the filling inside without overfilling.
- Prepare for Baking: Place each filled biscuit seam-side down on the lined baking sheet. Brush the tops lightly with melted butter to help achieve a golden and flaky crust.
- Bake: Bake the biscuits in the preheated oven for 15–18 minutes until they turn golden brown and emit a fragrant apple and cinnamon aroma.
- Make Glaze: While the biscuits bake, whisk together powdered sugar, milk (start with 1 tablespoon and add more for desired consistency), and vanilla extract until smooth and drizzleable.
- Glaze and Serve: Remove biscuits from the oven and allow to cool slightly. Drizzle the vanilla glaze over the warm biscuits before serving for an extra touch of sweetness.
Notes
- To prevent dough from sticking, dust your surface lightly with flour before flattening biscuits.
- For a chunkier filling texture, chop the apple pie filling coarsely; for a smoother filling, chop finely.
- The glaze can be adjusted in thickness by varying the amount of milk.
- Serve warm for the best flavor and texture.
- Store leftovers in an airtight container at room temperature for up to 2 days or refrigerate for up to 4 days.
- To reheat, warm biscuits in a 350°F oven for 5–7 minutes.
Nutrition
- Serving Size: 1 biscuit
- Calories: 250
- Sugar: 15g
- Sodium: 350mg
- Fat: 10g
- Saturated Fat: 6g
- Unsaturated Fat: 3g
- Trans Fat: 0.1g
- Carbohydrates: 35g
- Fiber: 2g
- Protein: 3g
- Cholesterol: 25mg
Keywords: Apple pie biscuits, apple dessert biscuits, cinnamon biscuits, buttery biscuits with apple filling, quick apple treats


