
Cheesy Stuffed Garlic Butter Crescent Rolls Recipe
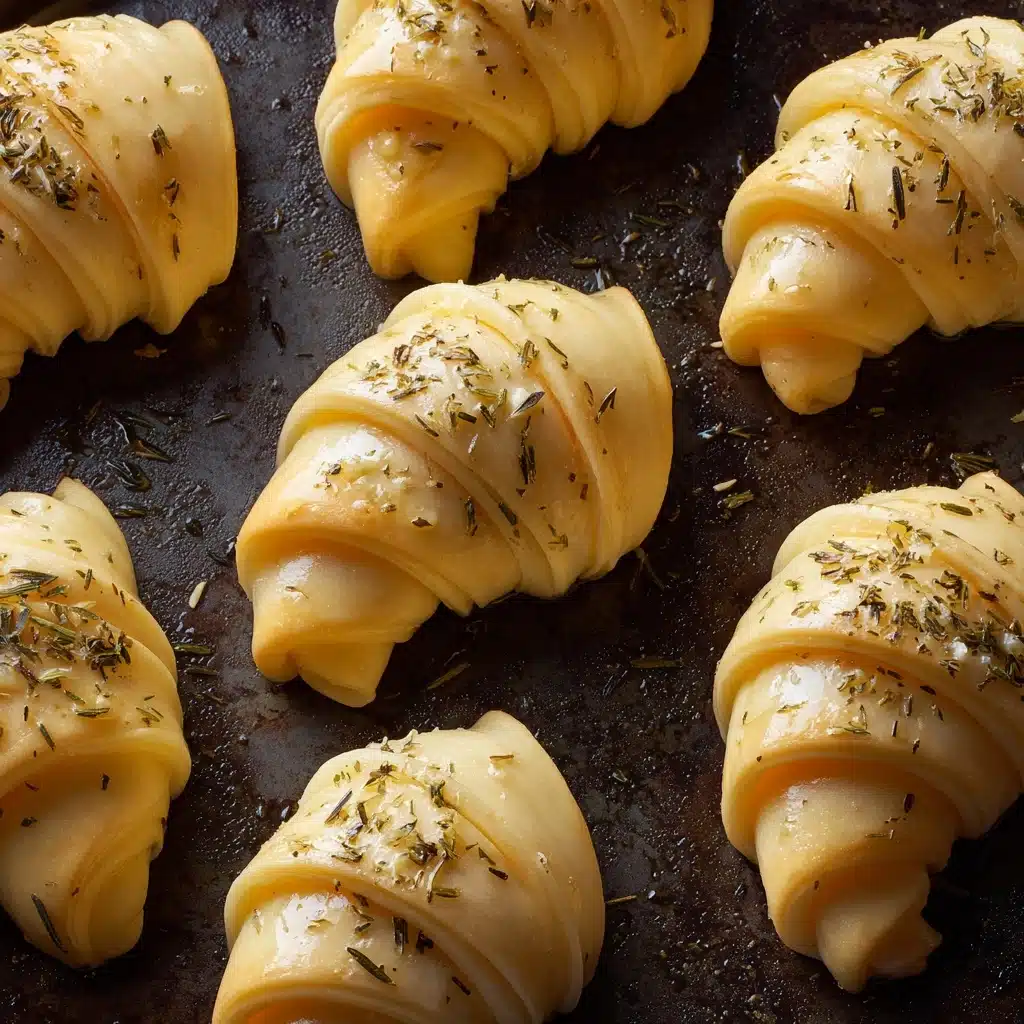
Bursting with gooey melted cheese, fragrant garlic, and buttery golden pastry, Cheesy Stuffed Garlic Butter Crescent Rolls are quite simply irresistible. Whether you need a quick snack, a stellar side, or the savory star of a brunch spread, these rolls deliver on every front. The pull-apart cheese, the glossy herbed butter, and the soft, flaky dough make each bite pure comfort. Once you make these, you’ll find yourself craving them again and again!

Ingredients You’ll Need
With just a handful of kitchen basics, you can whip up a batch of Cheesy Stuffed Garlic Butter Crescent Rolls in a flash. Every ingredient pulls its weight—bringing the cheese stretch, the pillowy layers, and that signature aromatic topping to life.
- Refrigerated crescent roll dough: The flaky, buttery foundation that makes prep quick and foolproof—no kneading required!
- String cheese: Melts into the most delightful, stretchy cheese core in each roll; go for mozzarella for classic flavor and meltiness.
- Butter (melted): Brushed on for rich flavor and moist, golden tops—don’t skimp on this!
- Italian seasoning: A blend of dried herbs that gives these rolls their unmistakable Italian-style aroma and taste.
- Fresh garlic (minced): Perfumes the butter with pungent garlicky magic—fresh is best here for maximum zing.
How to Make Cheesy Stuffed Garlic Butter Crescent Rolls
Step 1: Prepare Your Oven and Baking Sheet
Start by preheating your oven to 375 degrees F. Lining your baking sheet with parchment paper is a small task with huge payoff—it keeps the rolls from sticking and helps with even browning. Plus, cleanup is a breeze!
Step 2: Mix Up the Garlic Butter
In a small bowl, combine the melted butter, Italian seasoning, and minced garlic. This aromatic mixture is the flavor backbone of Cheesy Stuffed Garlic Butter Crescent Rolls and will infuse every bite with savory goodness.
Step 3: Prep the Crescent Dough
Pop open your can of crescent rolls and gently unroll the dough on a clean work surface. Separate along the perforated lines to create triangles. Now they’re ready to be transformed into cheesy perfection.
Step 4: Butter the Dough
Brush each triangle generously with the garlic butter mixture, but be sure to save some for later. Coating the dough before rolling guarantees every layer gets kissed with buttery, herby flavor.
Step 5: Add the String Cheese and Roll It Up
Place a halved piece of string cheese at the wide end of each triangle. Starting at this end, roll the dough around the cheese, tucking in the sides a bit to help seal in all that melty goodness as it bakes.
Step 6: Brush and Bake
Arrange your assembled rolls on the prepared baking sheet, then give their tops one more brush of the reserved garlic butter for that ultimate glossy, golden finish. Bake for 10 minutes, or just until puffed and lightly browned. Serve warm and watch them disappear!
How to Serve Cheesy Stuffed Garlic Butter Crescent Rolls
Garnishes
For a finishing flourish, sprinkle chopped fresh parsley, basil, or even a little extra Parmesan cheese over your warm Cheesy Stuffed Garlic Butter Crescent Rolls just before serving. This adds color, fresh aroma, and a hit of extra flavor.
Side Dishes
These rolls are perfect alongside a hot bowl of tomato soup, a crisp Caesar salad, or your favorite saucy pasta. They also shine next to roasted chicken or grilled veggies for an easy weeknight dinner.
Creative Ways to Present
Try stacking the rolls in a bread basket lined with a towel for a rustic look, or arrange them in a spiral on a big platter sprinkled with chopped herbs for a dinner party centerpiece. They’re also perfect for the holidays—pile them high and let guests pull them apart at the table!
Make Ahead and Storage
Storing Leftovers
Leftover Cheesy Stuffed Garlic Butter Crescent Rolls should be kept in an airtight container in the fridge. They’ll stay tasty for 3–4 days and can be enjoyed as a snack or a quick side.
Freezing
If you need to save some for later, let the baked rolls cool completely, then wrap tightly in foil or place in a freezer bag. Freeze for up to two months—just be sure to label and date them so you don’t forget!
Reheating
To bring your Cheesy Stuffed Garlic Butter Crescent Rolls back to life, reheat them at 300 degrees F in the oven for 6–8 minutes. This keeps the pastry crisp and the cheese deliciously melty. The microwave works too, but the oven or toaster oven is best for that fresh-baked texture.
FAQs
Can I use a different cheese instead of string cheese?
Absolutely! Any cheese that melts well, like cheddar, Monterey Jack, or provolone, will taste fantastic. Just cut it into sticks roughly the size of string cheese for easy rolling.
Do I have to use parchment paper on my baking sheet?
Parchment paper helps prevent sticking and makes cleanup super simple, but you can also use a silicone baking mat. If you skip both, just lightly grease the baking sheet to ensure the rolls release easily.
Can I make Cheesy Stuffed Garlic Butter Crescent Rolls ahead of time?
Yes! You can assemble the rolls a few hours in advance and refrigerate them (covered) until ready to bake. Brush with the reserved garlic butter right before they go in the oven for best flavor and texture.
How do I keep the cheese from leaking out?
Try to seal the dough well around the cheese and pinch the edges shut as you roll up the crescents. Some oozing is natural and part of the charm, but tighter wrapping helps keep more cheese inside the rolls.
Can I double the recipe for a crowd?
Definitely! Simply double (or triple) all ingredients, and bake in batches as needed. Cheesy Stuffed Garlic Butter Crescent Rolls are always a hit at parties and potlucks, so you may want to make extra!
Final Thoughts
You truly can’t go wrong with Cheesy Stuffed Garlic Butter Crescent Rolls—they’re quick, crowd-pleasing, and outrageously delicious. Whether you’re hosting friends or just need a clever way to jazz up dinner, give this recipe a try and see how quickly they vanish. Your kitchen will smell amazing, and your taste buds will thank you!
PrintCheesy Stuffed Garlic Butter Crescent Rolls Recipe

These Cheesy Stuffed Garlic Butter Crescent Rolls are a delectable and simple treat that is perfect for snacking or as a side dish. Flaky crescent rolls are filled with gooey string cheese and brushed with a flavorful garlic butter mixture before being baked to golden perfection.
- Prep Time: 10 minutes
- Cook Time: 10 minutes
- Total Time: 20 minutes
- Yield: 8 rolls 1x
- Category: Appetizer, Snack, Side Dish
- Method: Baking
- Cuisine: American
- Diet: Vegetarian
Ingredients
Cheesy Stuffed Garlic Butter Crescent Rolls:
- 1 8 oz. can refrigerated crescent rolls
- 4 string cheeses, halved crosswise
- 2 Tablespoons butter, melted
- 1/2 teaspoon Italian seasoning
- 1 clove garlic, minced
Instructions
- Preheat Oven: Preheat oven to 375 degrees F. Line a baking sheet with parchment paper.
- Prepare Garlic Butter: In a small bowl, combine melted butter with Italian seasoning and minced garlic.
- Assemble Rolls: Unroll crescent rolls and separate into triangles. Brush each triangle with the garlic butter mixture, saving some for brushing on top of the assembled rolls. Place a halved string cheese at the widest end of each triangle and roll up. Brush the tops with the remaining garlic butter.
- Bake: Bake the rolls for 10 minutes, or until they are lightly browned.
- Serve: Serve the Cheesy Stuffed Garlic Butter Crescent Rolls warm and enjoy!
Nutrition
- Serving Size: 1 roll
- Calories: 180
- Sugar: 2g
- Sodium: 380mg
- Fat: 12g
- Saturated Fat: 6g
- Unsaturated Fat: 4g
- Trans Fat: 0g
- Carbohydrates: 15g
- Fiber: 0g
- Protein: 5g
- Cholesterol: 20mg
Keywords: Cheesy Stuffed Garlic Butter Crescent Rolls, Crescent Roll Recipe, Cheese Stuffed Rolls, Garlic Butter Rolls


