
Chocolate Coconut Bars Recipe
Introduction
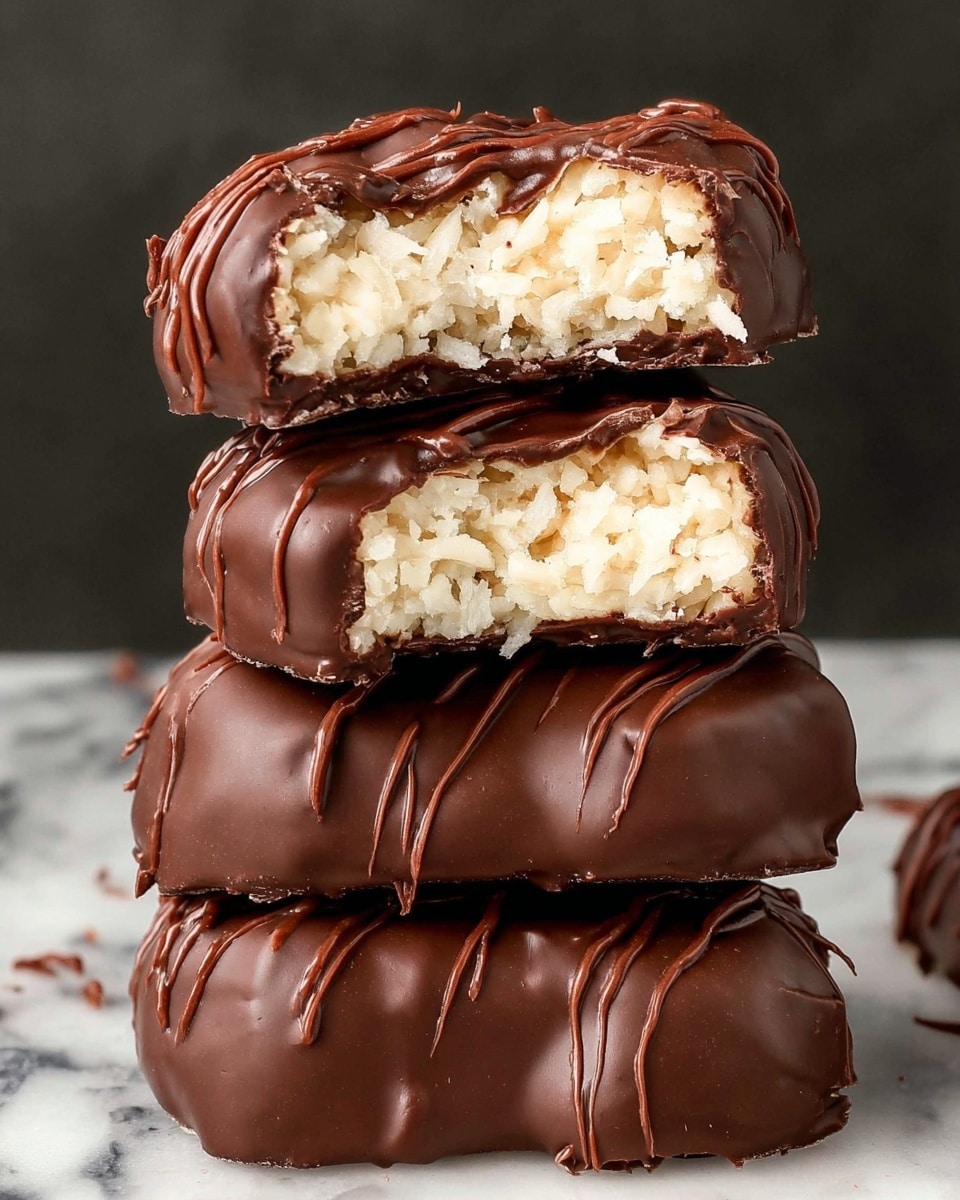
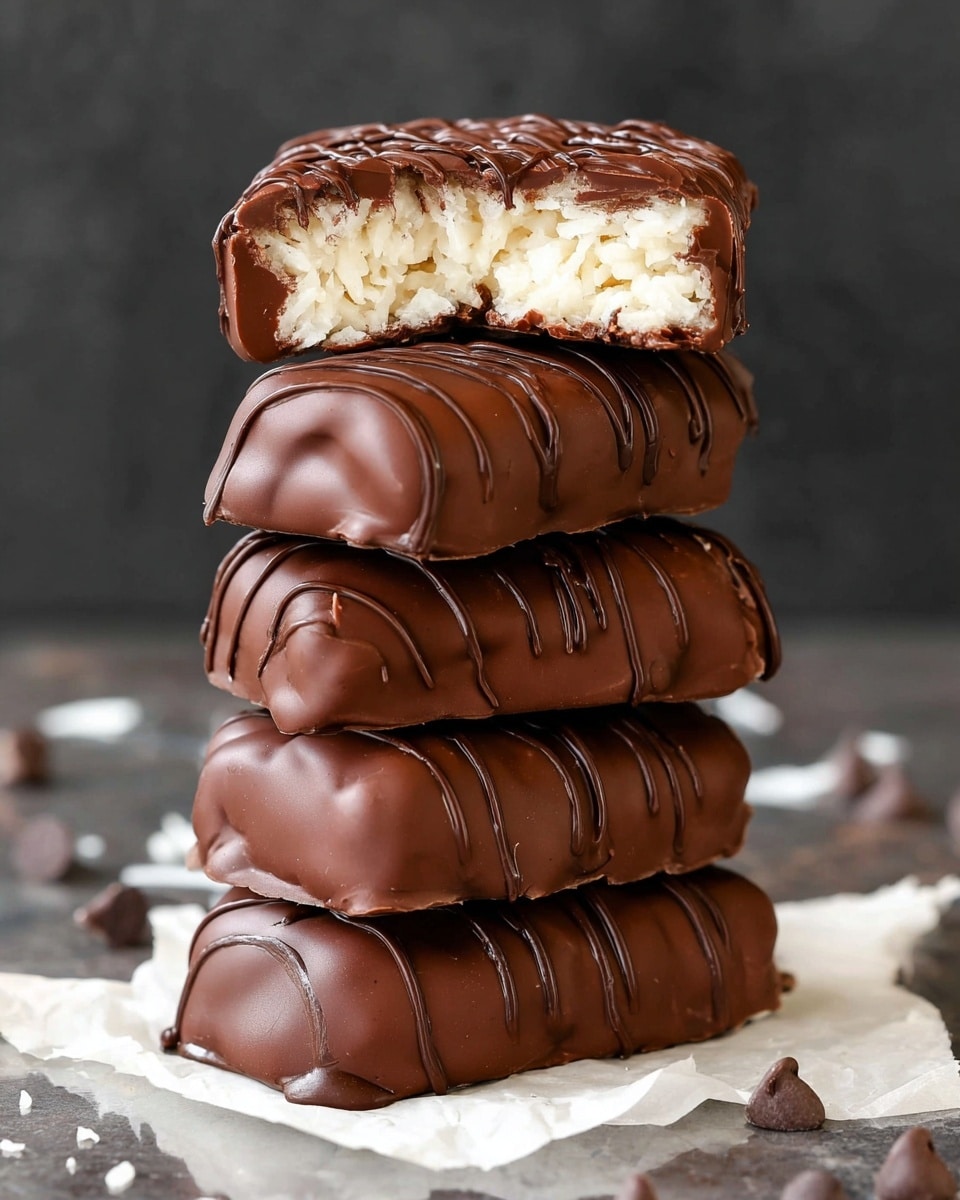
These chocolate coconut bars are a simple, no-bake treat perfect for satisfying your sweet tooth. Made with natural ingredients like shredded coconut and maple syrup, they offer a delightful combination of rich chocolate and tropical flavor.
Ingredients
- 4 cups unsweetened shredded coconut
- 1/2 cup coconut oil (melted)
- 3/4 cup maple syrup
- 1 cup chocolate
Instructions
- Step 1: Line an 8 x 8-inch pan with parchment paper and set aside.
- Step 2: Add the shredded coconut, melted coconut oil, and maple syrup to a food processor and blend until evenly mixed.
- Step 3: Transfer the mixture to the lined pan and press down firmly. Refrigerate for at least one hour to let it firm up.
- Step 4: Once firm, use a sharp knife to slice the mixture into bars.
- Step 5: Melt the chocolate in a microwave-safe bowl or on the stovetop. Quickly dip each coconut bar into the melted chocolate until fully coated. Place the coated bars on a lined plate and refrigerate until the chocolate hardens.
Tips & Variations
- For a nuttier flavor, add a handful of chopped almonds or walnuts to the coconut mixture before pressing into the pan.
- Use dark chocolate for a richer taste or milk chocolate for a sweeter finish.
- If you don’t have a food processor, mix the ingredients by hand, making sure the coconut oil is fully melted to help bind the mixture.
Storage
Store the chocolate coconut bars in an airtight container in the refrigerator for up to one week. To enjoy, remove them from the fridge about 10 minutes before serving to soften slightly. You can also freeze them for longer storage and thaw in the refrigerator before eating.
How to Serve
Serve this delicious recipe with your favorite sides.
FAQs
Can I use a different sweetener instead of maple syrup?
Yes, you can substitute maple syrup with honey or agave syrup, but the flavor and texture may vary slightly. Adjust sweetness to taste.
How do I melt chocolate without a microwave?
You can melt chocolate gently using a double boiler on the stovetop. Place a heatproof bowl over simmering water, stirring until smooth, and be careful to avoid steam or water mixing with the chocolate.
PrintChocolate Coconut Bars Recipe
These Chocolate Coconut Bars are a deliciously rich and naturally sweet treat combining the tropical flavor of shredded coconut with the smooth, decadent taste of chocolate. Made with simple, wholesome ingredients like coconut oil and maple syrup, these no-bake bars are easy to prepare and perfect for a healthy snack or dessert.
- Prep Time: 15 minutes
- Cook Time: 15 minutes (including chocolate melting and cooling time)
- Total Time: 1 hour 30 minutes
- Yield: 16 bars (approximate, depending on bar size) 1x
- Category: Dessert
- Method: No-Cook
- Cuisine: American
- Diet: Vegetarian
Ingredients
Main Ingredients
- 4 cups unsweetened shredded coconut
- 1/2 cup coconut oil (melted)
- 3/4 cup maple syrup
- 1 cup chocolate (for coating)
Instructions
- Prepare the Pan: Line an 8 x 8-inch baking pan with parchment paper to prevent sticking and set it aside.
- Mix the Base: Add the unsweetened shredded coconut, melted coconut oil, and maple syrup to a food processor. Blend until the mixture is evenly combined and sticky to hold shape.
- Shape and Chill: Transfer the mixture into the prepared pan. Press it down firmly and evenly with your hands or a spatula. Refrigerate the pan for at least one hour to allow the mixture to firm up and become easy to slice.
- Slice into Bars: Once firm, remove the mixture from the pan using the parchment paper. Use a sharp knife to cut it into bars of your desired size.
- Melt the Chocolate: Melt the chocolate either in a microwave-safe bowl by heating in short intervals and stirring in between or on the stovetop using a double boiler technique.
- Coat the Bars: Quickly dip each coconut bar into the melted chocolate, ensuring it is completely coated. Place the dipped bars on a lined plate or tray.
- Final Chill: Refrigerate the chocolate-coated bars until the chocolate is fully set and firm, about 20-30 minutes.
Notes
- Use high-quality unsweetened shredded coconut for the best flavor and texture.
- Coconut oil should be melted but not hot to avoid melting the chocolate when dipping.
- You can substitute maple syrup with honey or agave syrup if desired.
- Store the bars in an airtight container in the refrigerator to keep them fresh.
- If you prefer, sprinkle a pinch of sea salt on the bars before chocolate sets for a salted chocolate coconut variation.
- Make sure to work quickly when dipping bars in chocolate to prevent premature setting.
Keywords: Chocolate coconut bars, no bake dessert, healthy snack, vegan chocolate bars, maple syrup desserts