
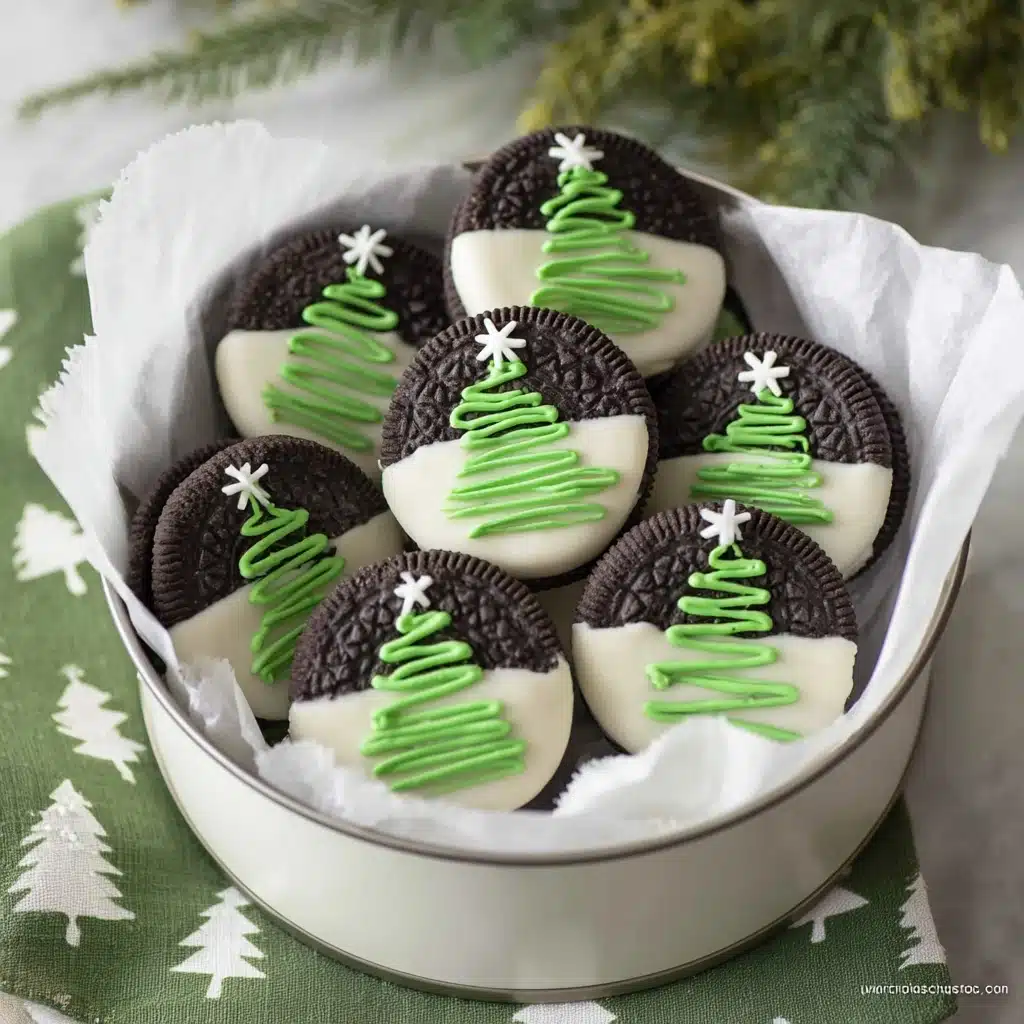
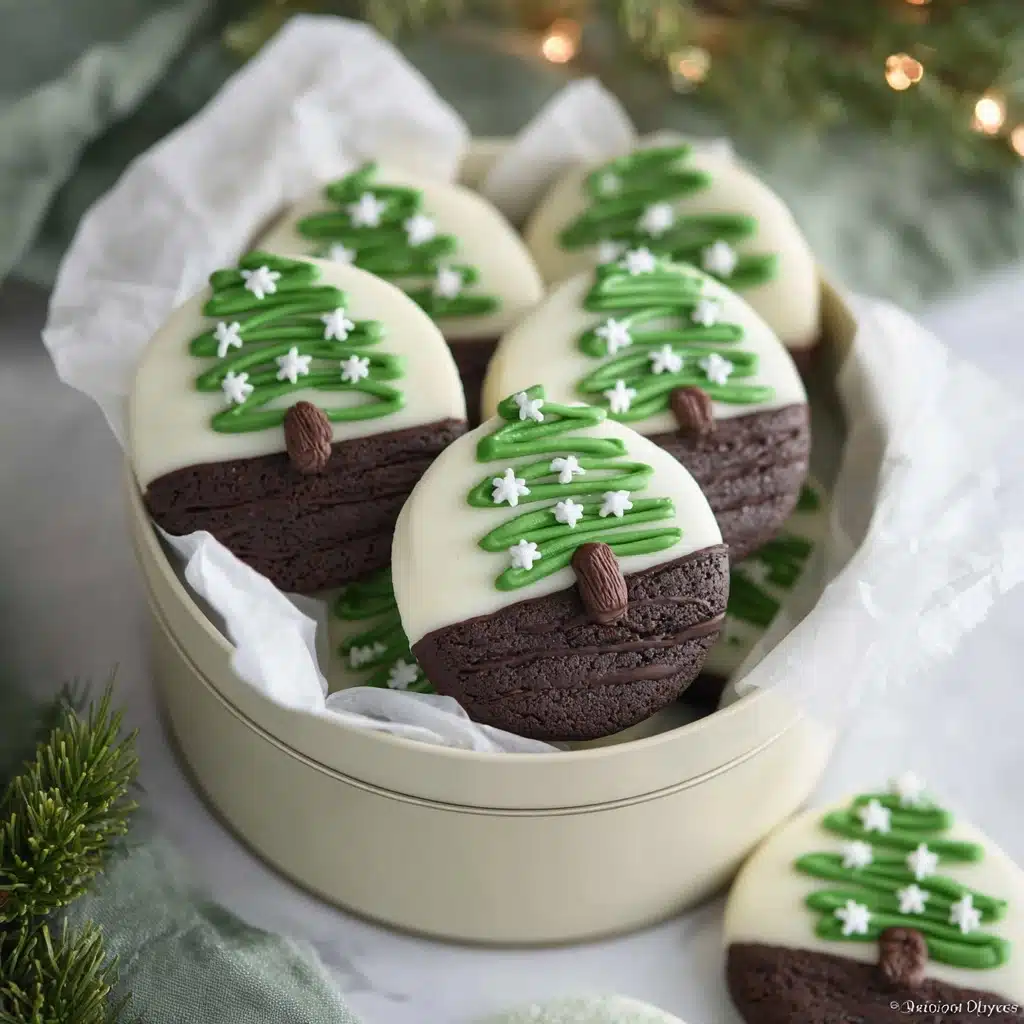
Christmas Oreos Recipe
If you’re looking for a fun, festive, and absolutely delicious treat to brighten up your holiday season, these Christmas Oreos are the perfect answer. Imagine classic Oreo cookies transformed with vibrant green chocolate trees, topped with sparkling candy stars and a cute little chocolate trunk—a bite-sized celebration of all things Christmas! These Christmas Oreos are not only a feast for your taste buds but also a cheerful addition to your holiday dessert table that will surely delight both kids and adults alike.
Ingredients You’ll Need
This recipe uses a handful of simple, yet essential ingredients that work together to create a stunning and tasty holiday treat. Each component brings a special touch—whether it’s the crunchy cookie base, the creamy white chocolate coating, or the festive green tree decoration with a shiny candy star topper.
- Oreo Cookies: Classic and beloved, these provide the crunchy base with a creamy center—essential for every Christmas Oreo.
- White Melting Chips (6 oz): Smooth, sweet, and perfect for dipping and coating half of the Oreo to create a snowy effect.
- Green Melting Wafers (3 oz): Ideal for piping crisp, vibrant Christmas trees on top of the white-coated Oreos for that festive green color.
- Candy Stars (15 pieces): These add a magical tree topper and a pop of sparkle that turns your Christmas Oreo into a miniature ornament.
- Chocolate Jimmies (1/4 cup, optional): Small chocolate sprinkles that make an adorable “tree trunk” at the base of each green Christmas tree.
How to Make Christmas Oreos
Step 1: Prepare Your Workspace
Start by lining a flat pan or baking sheet with parchment paper. This simple step ensures that your Christmas Oreos won’t stick to the surface when the chocolate sets, making it easier to handle and present your festive treats.
Step 2: Melt the White Chocolate Coating
Place your white melting chips in a microwave-safe bowl. Heat them for 30 seconds, then stir well to encourage even melting. Repeat the process until the chocolate is smooth and fully melted, keeping an eye to avoid burning. This creamy white chocolate will coat half of each Oreo, giving that perfect snowy backdrop for your green trees.
Step 3: Dip the Oreos
Now comes the fun part! Dip each Oreo halfway into the white chocolate. This creates a beautifully half-coated base that contrasts perfectly with the green tree you’ll pipe later. Place them on your parchment-lined pan to set and cool.
Step 4: Melt the Green Wafers
In another microwave-safe bowl, melt the green melting wafers using the same 30-second heating and stirring method until smooth. This bright green chocolate is what will bring your Christmas Oreos to life with festive tree designs.
Step 5: Pipe the Christmas Trees
Transfer the melted green chocolate into a piping bag or a resealable plastic bag with a tiny corner snipped off. Use a back-and-forth motion to pipe a stylized Christmas tree shape onto the white chocolate half of each Oreo. This is where your creativity shines as you create your own festive woodland scene right on a cookie!
Step 6: Add Tree Toppers and Trunks
Before the green chocolate hardens, place a candy star at the top of each piped tree to mimic the starry tip of a Christmas tree. Use a few chocolate jimmies at the base of the tree as a charming trunk, adding that finishing touch to your Christmas Oreos.
How to Serve Christmas Oreos
Garnishes
These cookies are so pretty on their own, but a little extra sparkle never hurts! Consider dusting them lightly with edible glitter or powdered sugar to mimic a fresh snowfall. You could also scatter some additional candy stars around the platter for a whimsical holiday display, making your Christmas Oreos look even more magical.
Side Dishes
Pair your Christmas Oreos with warm mugs of spiced hot chocolate or creamy peppermint-flavored coffee for an indulgent treat. These combinations enhance the sweet richness of the Oreos with cozy holiday flavors, turning any gathering into a heartwarming celebration.
Creative Ways to Present
Presentation is key during the holidays! Arrange your Christmas Oreos on a festive platter layered with holly leaves or edible greenery for a fresh, natural look. You can also stack them in clear jars tied with ribbon for thoughtful homemade gifts. Gift boxes decorated with some pine sprigs and cinnamon sticks make these treats feel even more special and festive.
Make Ahead and Storage
Storing Leftovers
You can store your Christmas Oreos in an airtight container at room temperature for up to a week. Keep them away from heat and direct sunlight to ensure that the chocolate decorations stay firm and glossy without melting or becoming sticky.
Freezing
If you want to make these ahead of time or save leftovers for later, freeze your Christmas Oreos by placing them in a single layer on a baking sheet until firm, then transfer to a freezer-safe container or bag. They freeze beautifully and can be kept for up to a month without losing flavor or texture.
Reheating
There’s no need to reheat Christmas Oreos—they’re best enjoyed chilled or at room temperature. If you prefer them slightly softer, simply leave them at room temperature for 15-20 minutes before serving to take the chill off without compromising the chocolate design.
FAQs
Can I use other types of cookies instead of Oreos?
Absolutely! While Oreos provide the perfect combination of crunchy cookie and creamy filling, you can experiment with sandwich cookies of similar shape and size. Just make sure they won’t crumble easily when dipped.
What if I don’t have melting chips or wafers?
You can substitute with good-quality white and green candy melts or even colored candy melts available at baking stores. Avoid regular chocolate chips as they don’t melt as smoothly for coating and piping.
How can I avoid the chocolate from cracking once it sets?
Make sure to melt the chocolate gently and avoid rapid temperature changes during cooling. Let the cookies set at room temperature rather than the fridge to prevent cracking caused by condensation.
Can I make these without a piping bag?
Yes! You can use a small plastic sandwich bag with a tiny corner snipped off to pipe the green chocolate trees. Just be patient and steady with your hand movements for best results.
Are Christmas Oreos allergen-friendly?
Oreos contain wheat and may have traces of dairy and soy. For allergy-friendly versions, seek out comparable allergen-free sandwich cookies and check the ingredients of your melting chocolates carefully.
Final Thoughts
There’s nothing quite like creating something joyful and tasty for the holidays, and these Christmas Oreos truly deliver on both counts. They’re easy to make, visually delightful, and guaranteed to bring smiles around your festive table. Don’t hesitate to roll up your sleeves and create your own batch of these charming Christmas Oreos—you’ll be glad you did!
PrintChristmas Oreos Recipe
Celebrate the holiday season with festive Christmas Oreos! These delightful treats feature classic Oreo cookies dipped in creamy white chocolate and decorated with green chocolate trees, candy star toppers, and optional chocolate jimmies to create a fun and festive look. Perfect for holiday parties, gift-giving, or just indulging in a sweet seasonal snack.
- Prep Time: 15 minutes
- Cook Time: 15 minutes
- Total Time: 30 minutes
- Yield: 15 decorated Oreo cookies 1x
- Category: Dessert, Holiday Treat
- Method: Dipping and Piping
- Cuisine: American
- Diet: Vegetarian
Ingredients
Cookies
- 15 Oreo Cookies
Chocolate Coating
- 6 oz White Melting Chips
- 3 oz Green Melting Wafers
Decorations
- 15 Candy Stars (tree toppers)
- 1/4 cup Chocolate Jimmies (optional, for tree trunk)
Instructions
- Prepare the workspace: Line a baking pan with parchment paper and set it aside for placing the decorated cookies.
- Melt white chocolate: Place 6 oz of white melting chips in a microwave-safe bowl. Heat in 30-second intervals, stirring after each, until completely melted and smooth.
- Dip Oreos: Dip each Oreo cookie halfway into the melted white chocolate, ensuring even coverage, then place on the parchment-lined pan to set.
- Melt green chocolate: In a separate microwave-safe bowl, melt the 3 oz of green melting wafers using the same 30-second heating and stirring method until smooth.
- Prepare piping bag: Transfer the melted green chocolate to a piping bag or sealable plastic bag, then cut a very small opening at one corner.
- Decorate trees: Using a back-and-forth motion, pipe green chocolate onto the white-coated half of each Oreo to form a stylized Christmas tree shape.
- Add finishing touches: Place a candy star on the top of each green tree. Optionally, use chocolate jimmies to create a trunk at the base of each tree.
- Set and serve: Allow the decorated Oreos to cool and the chocolate to harden fully before serving or packaging.
Notes
- Use high-quality melting wafers for smooth chocolate that sets well.
- If you don’t have a piping bag, use a zip-top plastic bag and cut a small corner to pipe.
- Chocolate jimmies are optional but add a charming touch to represent tree trunks.
- Store cookies in an airtight container at room temperature to maintain freshness.
- These treats make excellent homemade gifts during the holidays.
Nutrition
- Serving Size: 1 decorated Oreo cookie
- Calories: 160 kcal
- Sugar: 15 g
- Sodium: 85 mg
- Fat: 8 g
- Saturated Fat: 5 g
- Unsaturated Fat: 2 g
- Trans Fat: 0 g
- Carbohydrates: 22 g
- Fiber: 1 g
- Protein: 1 g
- Cholesterol: 5 mg
Keywords: Christmas Oreos, holiday treats, festive cookies, chocolate dipped Oreos, Christmas desserts

