
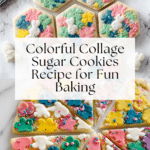
Collage Sugar Cookies Recipe
Introduction
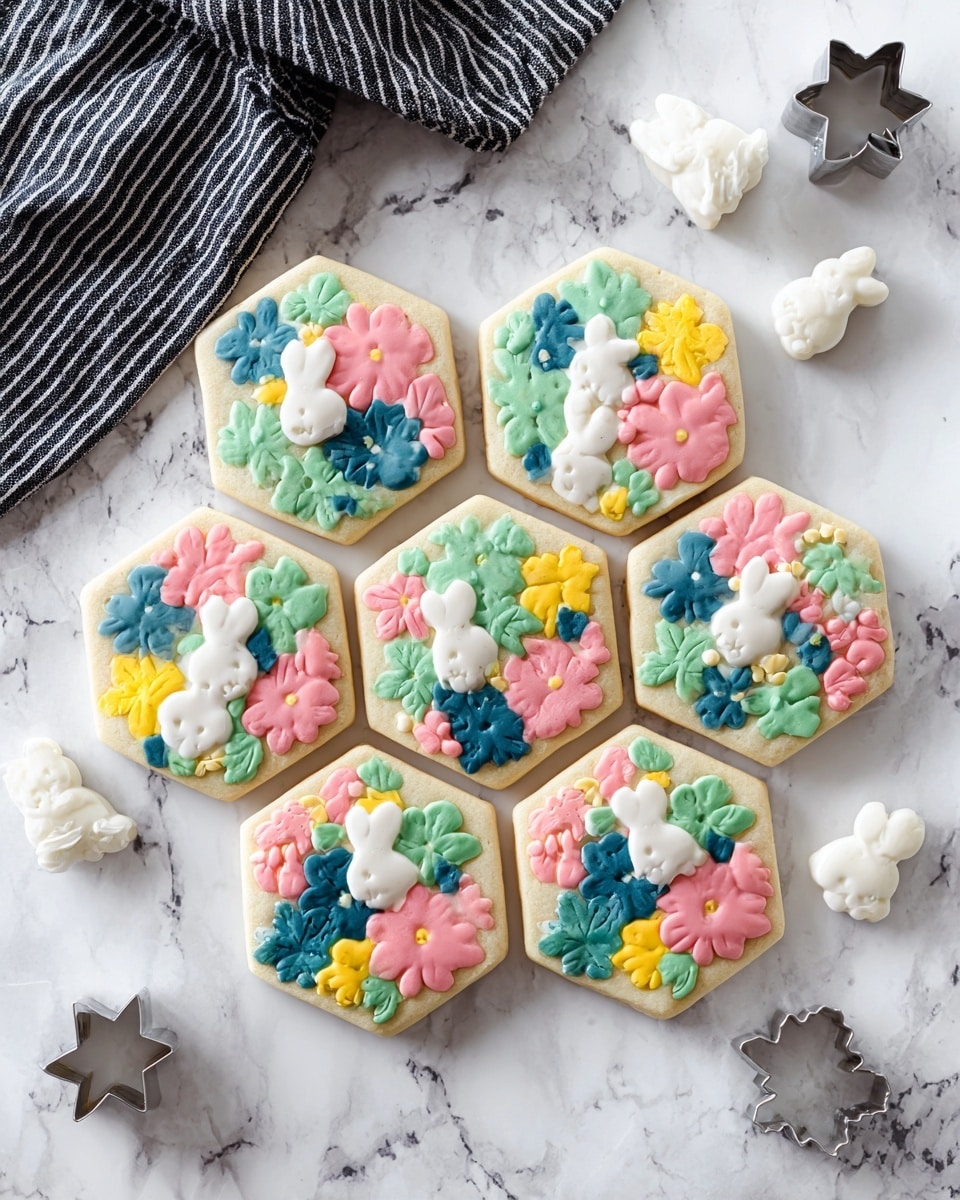
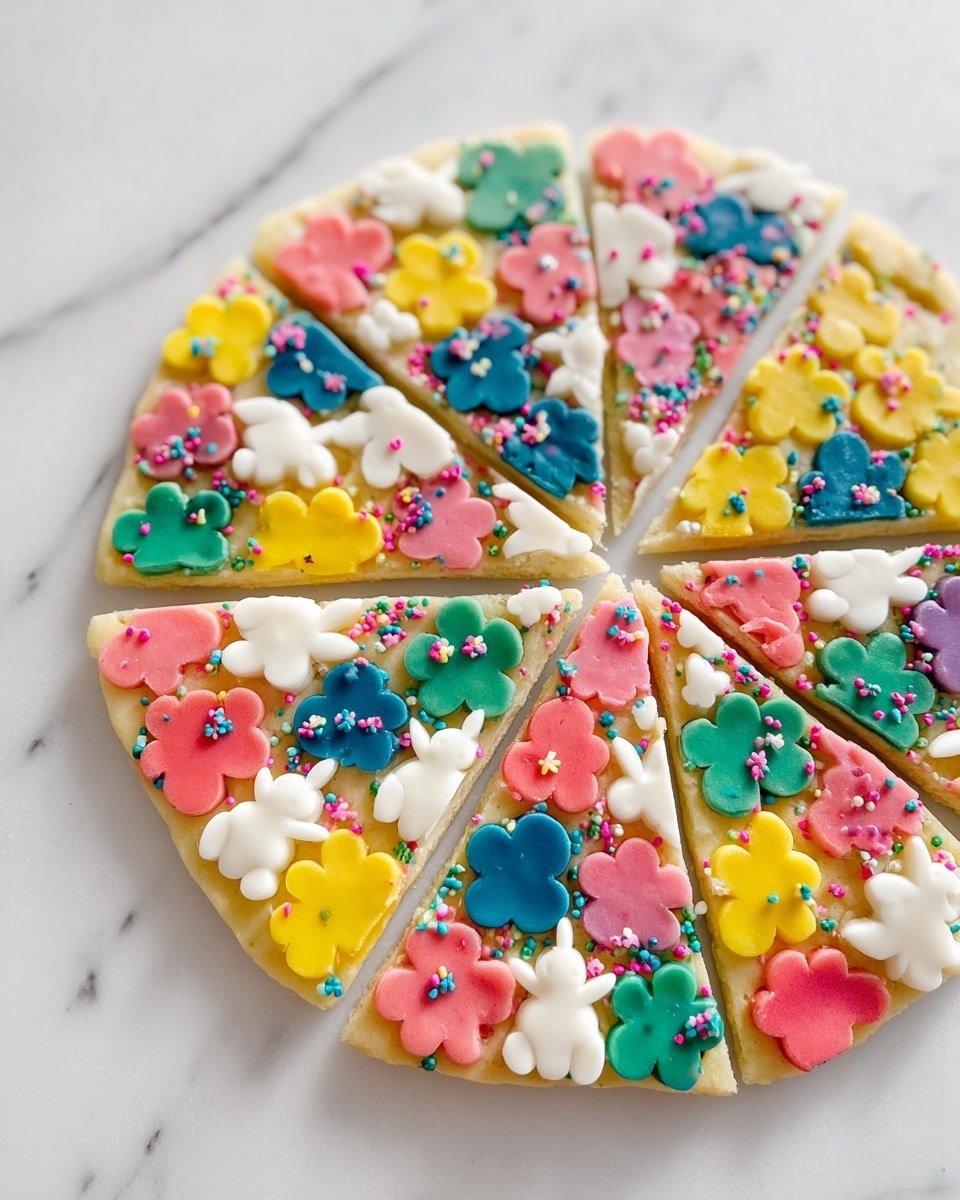
Collage Sugar Cookies are a fun and colorful twist on classic sugar cookies, perfect for any celebration or just brightening up your day. With vibrant layers of dyed dough arranged like a mosaic, these cookies are as beautiful as they are delicious.
Ingredients
- 1 1/2 cups salted butter (softened)
- 1 1/2 cups granulated sugar
- 1 egg
- 1 egg white
- 3 tsp vanilla extract
- 4 1/2 cups all purpose flour
- 3 tsp baking powder
- Gel food coloring (various colors)
Instructions
- Step 1: In the bowl of a stand mixer, cream together the softened butter and sugar for 2 minutes until light and fluffy.
- Step 2: Scrape down the sides of the bowl, then add the egg, egg white, and vanilla extract. Mix until well combined.
- Step 3: Scrape down the bowl again, add the flour and baking powder, then mix until the dough forms. This may take a minute or two; keep mixing until it comes together.
- Step 4: Turn the dough out onto the counter and knead for about 30 seconds. It should feel similar to play dough. If it seems dry or crumbly, add 1-2 teaspoons of water and knead again.
- Step 5: Divide the dough in half. Wrap one half in plastic wrap and set aside.
- Step 6: Divide the other half into smaller portions based on how many colors you want to create.
- Step 7: Wearing gloves, knead gel food coloring into each portion using plastic wrap on your counter to avoid stains. For variations, mix some white dough with colored dough to create lighter shades or combine colors for new hues.
- Step 8: Roll out each colored dough portion to about 1/8 inch thick and use small cookie cutters to cut out shapes. Set these aside.
- Step 9: Preheat your oven to 350° F (175° C).
- Step 10: Unwrap the plain half of the dough and roll it out on a lightly floured surface to about 1/2 inch thickness.
- Step 11: Arrange your colored cut-out shapes onto the thick plain dough in any pattern you like, overlapping if desired.
- Step 12: Cover with a large piece of parchment paper and gently press the dough down using a rolling pin or a cookie sheet to about just under 1/2 inch thick. Using a rolling pin will cause slightly more distortion of shapes.
- Step 13: Remove the parchment paper and use a larger cookie cutter to cut your final cookie shapes from the layered dough.
- Step 14: Place the cut cookies on a parchment-lined baking sheet.
- Step 15: Bake at 350° F for 7 to 9 minutes, until the centers puff up and are no longer wet or glossy.
- Step 16: Remove from the oven and allow the cookies to cool on the baking sheet.
- Step 17: Store the cooled cookies in an airtight container. Optional: make sandwich cookies by adding frosting between two cookies.
Tips & Variations
- Use gloves when handling gel food coloring to avoid staining your hands and workspace.
- To create softer colors, mix colored dough with plain dough in different proportions before cutting shapes.
- If your dough feels too dry when rolling out, sprinkle a little flour on your surface instead of adding water to prevent cookies from becoming tough.
- Try different shapes and arrangements of colored dough for unique collage effects.
Storage
Store cooled cookies in an airtight container at room temperature for up to one week. To keep them fresh longer, refrigerate for up to two weeks or freeze for up to three months. Reheat frozen cookies briefly in a low oven or microwave before serving to refresh their texture.
How to Serve
Serve this delicious recipe with your favorite sides.
FAQs
Can I make the dough ahead of time?
Yes, you can prepare the dough up to two days in advance. Wrap it tightly in plastic wrap and keep it refrigerated. Bring it to room temperature before rolling and cutting.
What if I don’t have gel food coloring?
Gel food coloring is recommended for its vibrant color and minimal impact on dough consistency, but you can use liquid food coloring. Keep in mind it may make the dough softer, so add flour gradually if needed.
PrintCollage Sugar Cookies Recipe

These Collage Sugar Cookies are a colorful and fun twist on the classic sugar cookie. Soft, buttery, and rich in vanilla flavor, these cookies are decorated with vibrant pieces of dough in varying colors, creating a beautiful collage effect. Perfect for festive occasions or creative baking sessions, they are easy to prepare and offer customizable color combinations for a personalized touch.
- Prep Time: 30 minutes
- Cook Time: 8 minutes
- Total Time: 38 minutes
- Yield: About 24–30 medium-sized cookies 1x
- Category: Dessert
- Method: Baking
- Cuisine: American
- Diet: Vegetarian
Ingredients
Cookie Dough
- 1 1/2 cups salted butter (softened)
- 1 1/2 cups granulated sugar
- 1 egg
- 1 egg white
- 3 tsp vanilla extract
- 4 1/2 cups all purpose flour
- 3 tsp baking powder
Decoration
- Gel food coloring (various colors as desired)
Instructions
- Make Sugar Cookie Dough: In the bowl of a stand mixer, cream together the softened butter and granulated sugar for 2 minutes until light and fluffy.
- Add Eggs and Vanilla: Scrape down the sides of the bowl, then add in the egg, egg white, and vanilla extract. Mix until all ingredients are well combined.
- Add Dry Ingredients: Scrape the bowl again, then add the all-purpose flour and baking powder. Mix on low until the dough begins to come together.
- Knead Dough: Turn the dough onto a clean surface and knead for about 30 seconds until it feels pliable like play-dough. If the dough is crumbly or not sticking together well, add 1-2 teaspoons of water and knead again.
- Divide Dough: Split the dough in half. Wrap one half in plastic wrap and set aside for later use. Divide the other half into smaller portions based on how many colors you plan to use.
- Color the Dough: Wearing gloves, place plastic wrap on the counter and knead gel food coloring into each portion of dough until fully tinted. To make color variations, mix small amounts of colored dough with white plain dough to create lighter shades.
- Roll and Cut Colored Dough: Roll out each colored dough portion to about 1/8 inch thick. Use small cookie cutters to cut shapes and set aside on parchment paper. Repeat with all colored dough portions.
- Prepare Base Dough: Preheat the oven to 350°F (175°C). Unwrap the plain half of dough and roll it out on a lightly floured surface to approximately 1/2 inch thick.
- Arrange Colored Shapes: Place the small colored dough shapes onto the plain rolled dough in the desired arrangement. Overlapping is allowed for creative effects.
- Press the Dough: Cover the arranged dough with a large sheet of parchment paper. Press down gently using a rolling pin or by placing a cookie sheet on top to flatten the dough to just under 1/2 inch thick. Remove the parchment paper.
- Cut Final Cookies: Use a large cookie cutter to cut out the final cookie shapes from the collage dough. Transfer the cut cookies to a parchment-lined baking sheet.
- Bake: Bake in the preheated oven at 350°F for 7-9 minutes, or until the centers puff up and lose their wet, glossy appearance.
- Cool and Store: Remove from the oven and allow the cookies to cool on the baking sheet. Once cooled, store in an airtight container. Optionally, assemble sandwich cookies by adding frosting between two cookies.
Notes
- Use gloves when handling food coloring to avoid staining your hands.
- If dough is too dry during kneading, add small amounts of water to help it come together smoothly.
- Keep unused dough covered with plastic wrap to prevent drying out.
- For softer cookies, do not overbake; watch for the puffed centers as an indicator of doneness.
- Customize your collage by mixing colors or layering shapes for unique designs.
- Sandwich these cookies with frosting for a delicious treat.
Keywords: sugar cookies, colorful cookies, fun cookies, collage cookies, holiday cookies, vanilla sugar cookies, decorated cookies, baking with kids


