
Crispy Dill Chicken Sandwich Recipe
Introduction
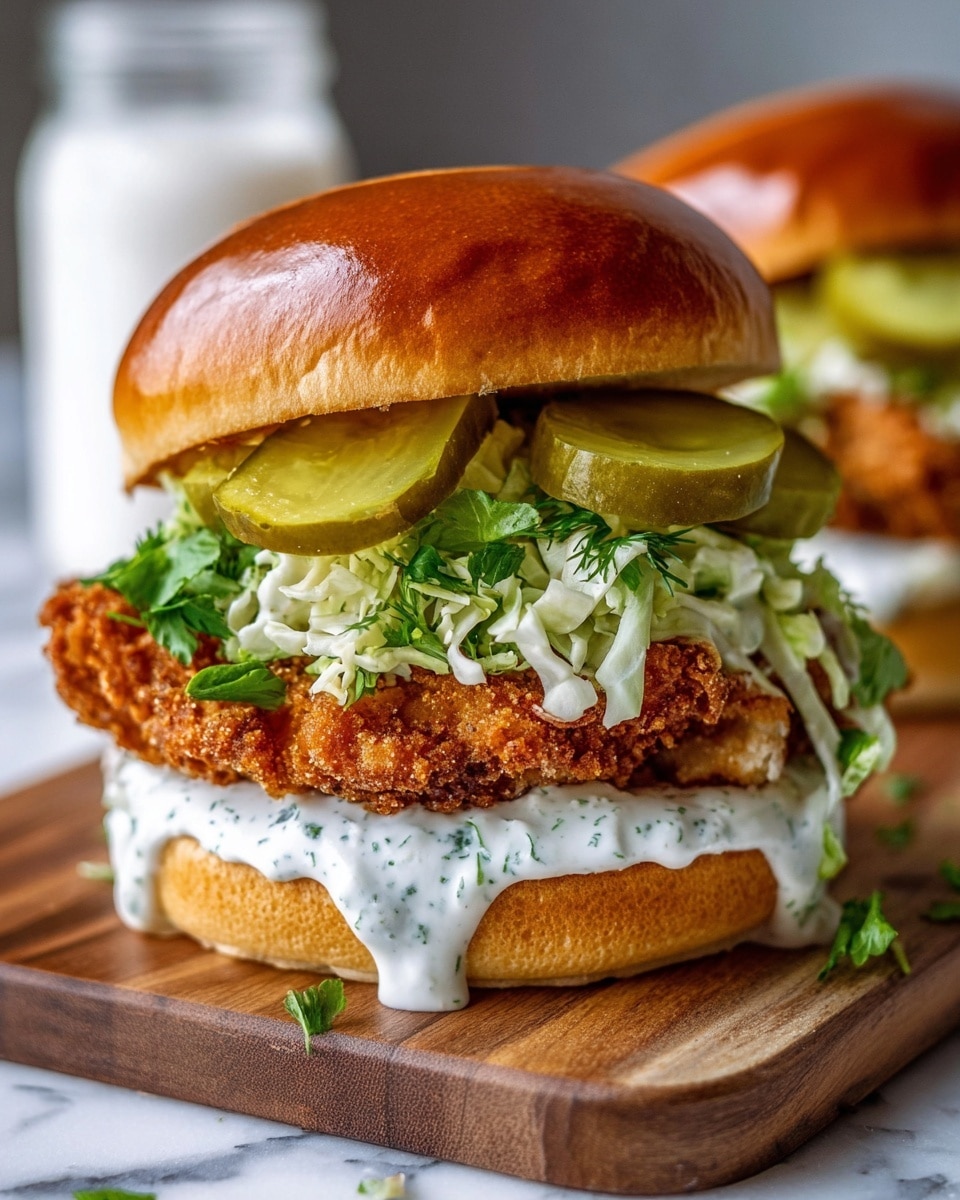
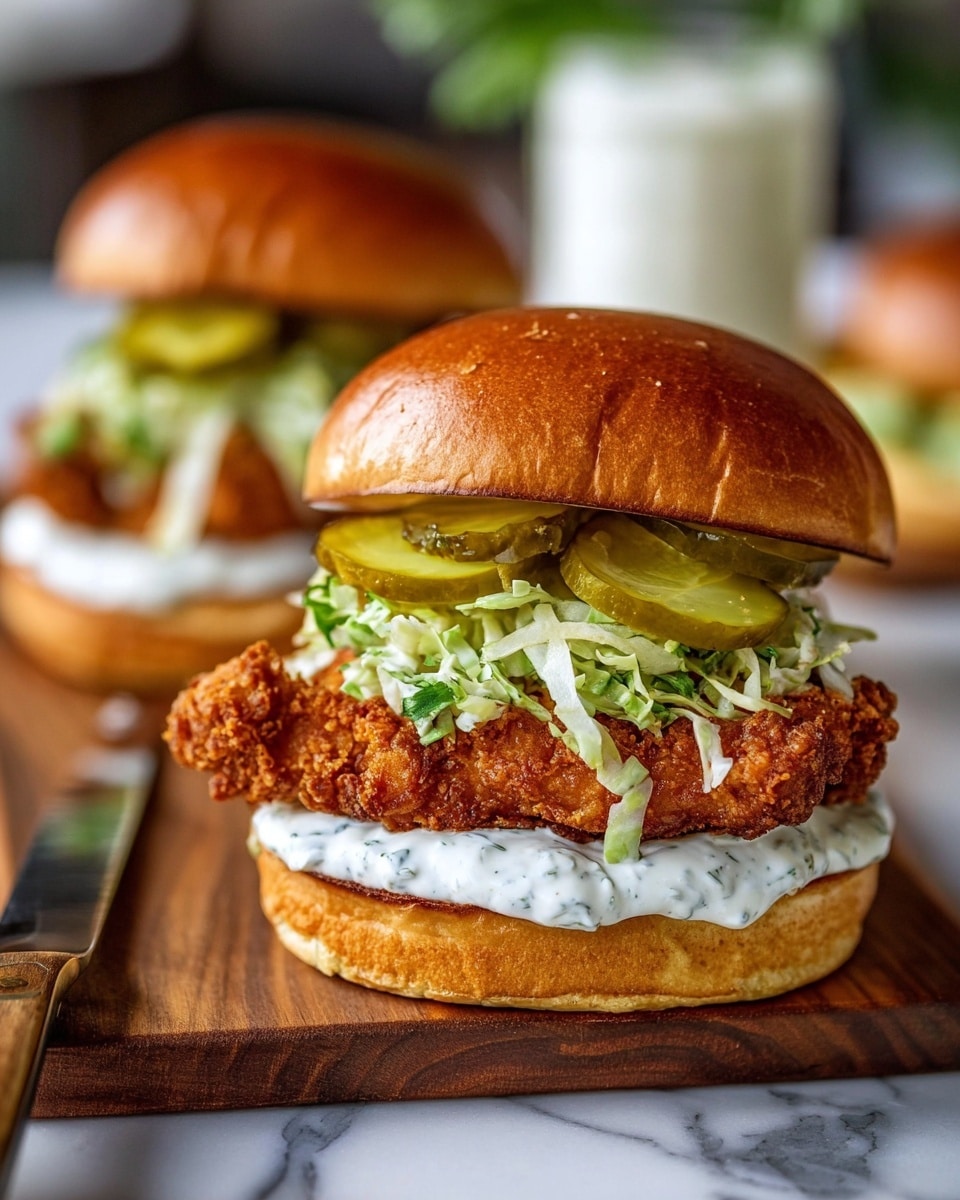
This Crispy Dill Chicken Sandwich combines tender, juicy chicken with a zesty dill-infused crust and a creamy dill aioli. Perfectly toasted brioche buns, sharp cheddar, and crunchy pickles round out these flavorful sandwiches, making them a delicious treat for any meal.
Ingredients
- 2 large boneless, skinless chicken breasts (about 6-8 ounces each)
- 1 cup buttermilk
- 2 tablespoons dill pickle juice
- 1 large egg
- 1 teaspoon salt
- 1/2 teaspoon black pepper
- 1/2 teaspoon garlic powder
- 1/4 teaspoon paprika
- 2 cups all-purpose flour
- 1/2 cup cornstarch
- 1 tablespoon dried dill weed
- 1 teaspoon baking powder
- 1 teaspoon salt
- 1/2 teaspoon black pepper
- 1 cup mayonnaise
- 2 tablespoons finely chopped fresh dill
- 1 tablespoon lemon juice
- 1 clove garlic, minced
- 1 teaspoon Dijon mustard
- Salt and pepper to taste
- 4 brioche buns, split
- 4 slices cheddar cheese (or your favorite cheese)
- 1 cup shredded lettuce
- 1/2 cup dill pickle chips
- 2 tablespoons butter, melted (for toasting buns)
- Vegetable oil, for frying (about 4-6 cups)
Instructions
- Step 1: In a medium bowl, whisk together the buttermilk, dill pickle juice, egg, salt, black pepper, garlic powder, and paprika. Submerge the chicken breasts in the mixture, cover, and refrigerate for at least 2 hours or preferably overnight to tenderize and infuse flavor.
- Step 2: In a large, shallow dish, combine the all-purpose flour, cornstarch, dried dill weed, baking powder, salt, and black pepper. Whisk thoroughly to evenly distribute the seasoning.
- Step 3: Remove a chicken breast from the marinade, letting excess drip off. Press it firmly into the flour mixture, coating both sides completely. Shake off excess flour. Repeat with remaining chicken breasts. For extra crispiness, optionally double dredge by dipping back into buttermilk, then flour again.
- Step 4: Pour vegetable oil into a large heavy-bottomed pot or Dutch oven deep enough to submerge the chicken 2-3 inches. Heat over medium-high heat until the oil reaches 350°F (175°C).
- Step 5: Carefully place one or two chicken breasts into the hot oil, avoiding overcrowding. Fry for about 6-8 minutes per side, turning once, until golden brown and the internal temperature reaches 165°F (74°C).
- Step 6: Remove fried chicken with a slotted spoon or tongs and transfer to a wire rack lined with paper towels to drain excess oil and maintain crispiness.
- Step 7: In a small bowl, mix mayonnaise, finely chopped fresh dill, lemon juice, minced garlic, and Dijon mustard. Season with salt and pepper to taste. Chill for at least 30 minutes to allow flavors to meld.
- Step 8: Brush melted butter on the cut sides of brioche buns. Place butter-side down on a skillet over medium heat and toast for 1-2 minutes until golden and crispy.
- Step 9: Spread a generous layer of dill aioli on both top and bottom buns. On the bottom bun, add shredded lettuce, then place the crispy fried chicken breast. Top with a slice of cheddar cheese, followed by dill pickle chips. Close with the top bun.
- Step 10: Serve the sandwiches hot to enjoy the contrast of crispy chicken and flavorful toppings at their best.
Tips & Variations
- For extra crunch, double dredge the chicken by dipping it back into the buttermilk marinade before coating with flour mixture a second time.
- Swap cheddar for pepper jack or Swiss cheese for a different flavor profile.
- Use a thermometer to ensure the oil is at the right temperature and the chicken cooks evenly.
- Add a slice of tomato or red onion for additional freshness and texture.
Storage
Store any leftover fried chicken in an airtight container in the refrigerator for up to 3 days. Reheat in a 350°F (175°C) oven for about 10 minutes to maintain crispiness. It’s best to assemble sandwiches fresh to keep buns from becoming soggy.
How to Serve
Serve this delicious recipe with your favorite sides.
FAQs
Can I use a different cut of chicken for this sandwich?
Boneless, skinless chicken breasts work best for even cooking and classic sandwich size, but chicken thighs can be used for juicier, more flavorful results. Adjust frying time accordingly.
How do I keep the fried chicken crispy after frying?
Drain the chicken on a wire rack instead of paper towels to prevent steam buildup. Avoid covering the chicken while it cools to maintain crispiness.
PrintCrispy Dill Chicken Sandwich Recipe

This Crispy Dill Chicken Sandwich features juicy, buttermilk-marinated fried chicken breasts coated in a flavorful dill-infused batter, topped with a fresh dill aioli, shredded lettuce, cheddar cheese, and dill pickle chips, all sandwiched between toasted brioche buns. Perfectly crispy on the outside and tender inside, this sandwich combines tangy, herbal, and savory flavors for a deliciously satisfying meal.
- Prep Time: 15 minutes
- Cook Time: 16 minutes
- Total Time: 2 hours 31 minutes
- Yield: 4 sandwiches 1x
- Category: Sandwiches
- Method: Frying
- Cuisine: American
Ingredients
Chicken and Marinade
- 2 large boneless, skinless chicken breasts (about 6–8 ounces each)
- 1 cup buttermilk
- 2 tablespoons dill pickle juice
- 1 large egg
- 1 teaspoon salt
- 1/2 teaspoon black pepper
- 1/2 teaspoon garlic powder
- 1/4 teaspoon paprika
Dredging Mixture
- 2 cups all-purpose flour
- 1/2 cup cornstarch
- 1 tablespoon dried dill weed
- 1 teaspoon baking powder
- 1 teaspoon salt
- 1/2 teaspoon black pepper
Dill Aioli
- 1 cup mayonnaise
- 2 tablespoons finely chopped fresh dill
- 1 tablespoon lemon juice
- 1 clove garlic, minced
- 1 teaspoon Dijon mustard
- Salt and pepper to taste
Sandwich Assembly
- 4 brioche buns, split
- 4 slices cheddar cheese (or your favorite cheese)
- 1 cup shredded lettuce
- 1/2 cup dill pickle chips
- 2 tablespoons butter, melted (for toasting buns)
- Vegetable oil, for frying (about 4-6 cups)
Instructions
- Marinate the Chicken: In a medium bowl, whisk together the buttermilk, dill pickle juice, egg, salt, black pepper, garlic powder, and paprika. Submerge the chicken breasts in this marinade, cover, and refrigerate for at least 2 hours or preferably overnight to tenderize and infuse flavor.
- Prepare Dredging Station: Combine all-purpose flour, cornstarch, dried dill weed, baking powder, salt, and black pepper in a large shallow dish. Whisk thoroughly to ensure even seasoning.
- Dredge the Chicken: Remove chicken breasts from marinade, allowing excess to drip off. Firmly press each piece into the flour mixture, coating both sides completely, then shake off excess flour. For extra crispiness, optionally double dredge by dipping back into the buttermilk marinade and then flour again.
- Heat the Oil: Pour vegetable oil into a heavy-bottomed pot or Dutch oven deep enough to submerge the chicken (2-3 inches). Heat over medium-high heat until oil reaches 350°F (175°C), using a deep-fry thermometer for accuracy.
- Fry the Chicken: Carefully place one or two coated chicken breasts into the hot oil, avoiding overcrowding. Fry for 6-8 minutes per side, turning once, until golden brown and the internal temperature reaches 165°F (74°C).
- Drain the Chicken: Remove chicken with a slotted spoon or tongs and transfer to a wire rack lined with paper towels to drain excess oil and keep the coating crisp.
- Make the Dill Aioli: In a small bowl, mix mayonnaise, chopped fresh dill, lemon juice, minced garlic, and Dijon mustard. Season with salt and pepper to taste. Chill for at least 30 minutes to meld flavors.
- Toast the Buns: Brush melted butter on the cut sides of brioche buns. Place butter-side down on a skillet over medium heat and toast for 1-2 minutes until golden and crispy.
- Assemble the Sandwich: Spread a generous layer of dill aioli on both top and bottom buns. On the bottom bun, layer shredded lettuce, then the crispy chicken breast, followed by a slice of cheddar cheese and dill pickle chips. Close with the top bun.
- Serve Immediately: Enjoy the sandwiches hot to appreciate the contrast of the crispy chicken and fresh, flavorful toppings at their best.
Notes
- For best flavor and tenderness, marinate chicken overnight if possible.
- Double dredging the chicken ensures an extra crispy crust.
- Use a thermometer to maintain oil temperature to avoid greasy or undercooked chicken.
- Dill aioli can be made ahead and refrigerated for up to 2 days.
- Butter the buns lightly for a crisp, golden texture without overwhelming richness.
- Adjust seasoning of aioli to taste before assembling the sandwich.
Keywords: crispy dill chicken sandwich, fried chicken sandwich, dill aioli sandwich, buttermilk fried chicken, homemade chicken sandwich


