
How to Make a Sourdough Starter Recipe
Introduction
Making your own sourdough starter is a rewarding way to bring natural fermentation into your baking. This simple starter requires just flour and water and will develop into a bubbly, active base for delicious sourdough breads. With patience and care, you’ll have a thriving starter ready to bake with in about a week.
Ingredients
- 1 cup unbleached all-purpose flour (King Arthur recommended)
- 1 cup filtered water
Instructions
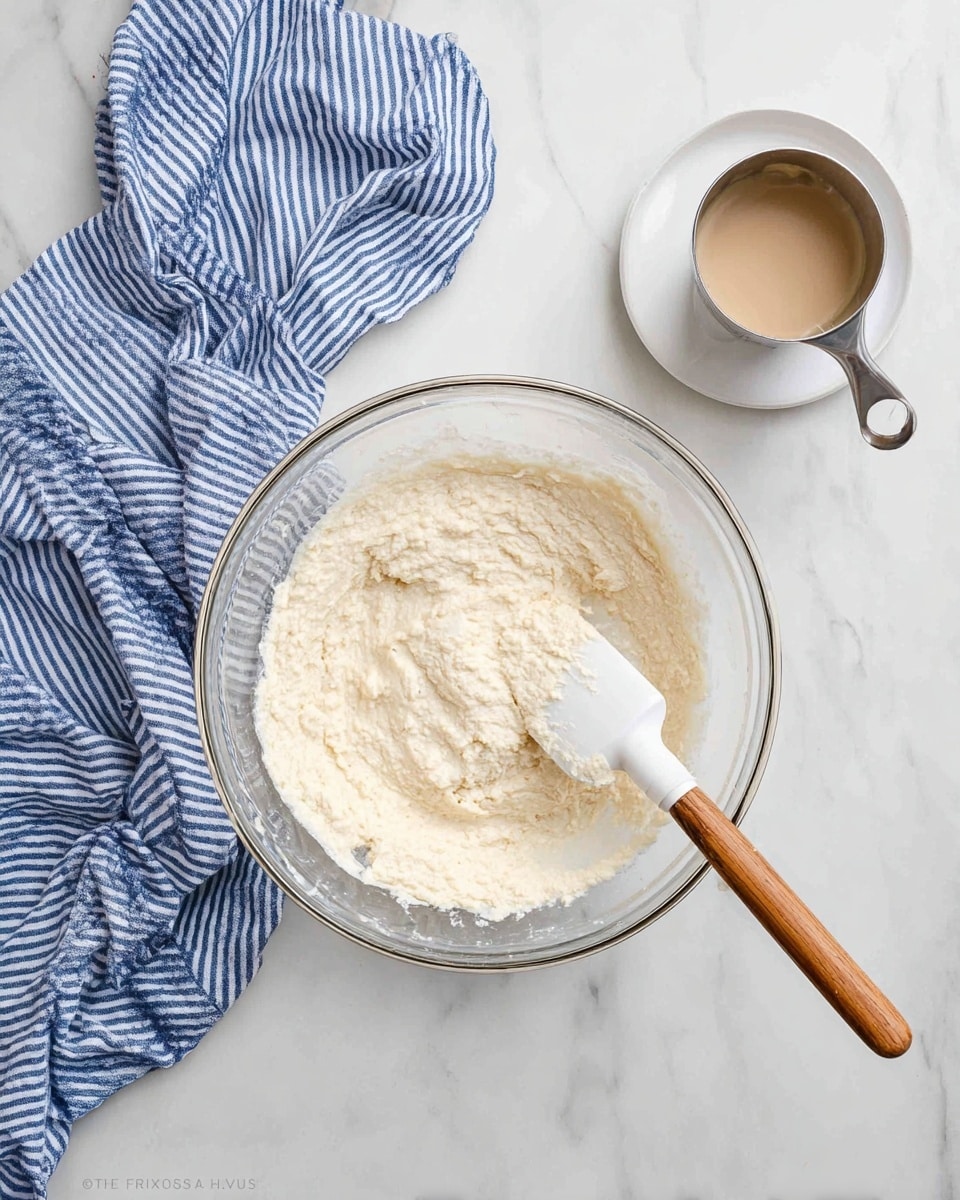
- Day 1: Combine 1 cup of flour and 1 cup of water in a clean glass bowl. Stir thoroughly, scraping the sides to fully mix. Cover with a tea towel and let sit at room temperature for 24 hours.
- Days 2–5: Each day, discard half of the starter. Feed the remaining starter with 1 cup flour and 1 cup water. Stir well, cover, and let rest for 24 hours.
- Days 6–7: Feed the starter every 12 hours instead of once per day. Continue discarding half and adding 1 cup each of flour and water at each feeding.
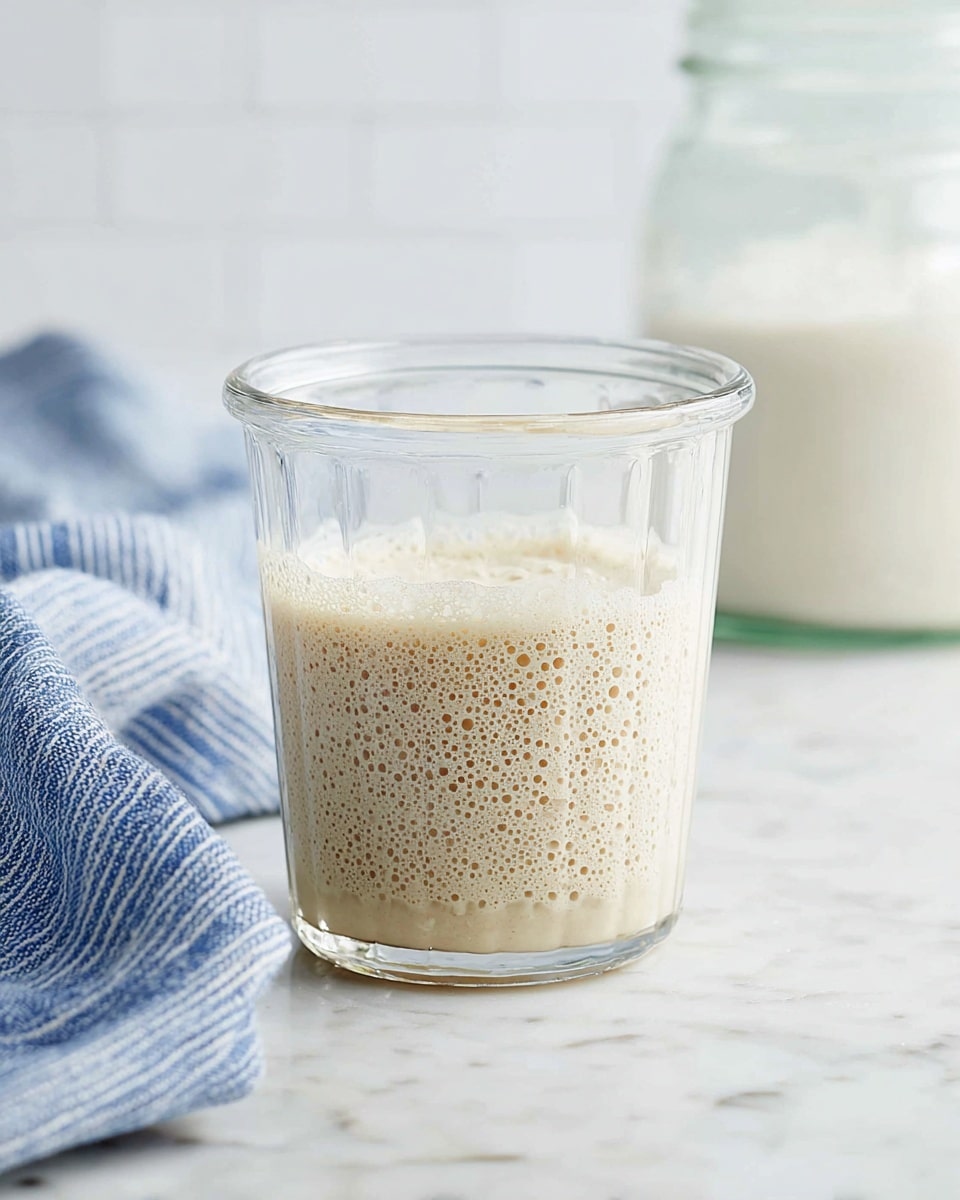
- By Day 7: The starter should be bubbly, active, and roughly double in size after feeding. It’s ready for baking.
Tips & Variations
- If your starter isn’t ready by day 7, this is common. Continue feeding it every 12 hours and keep it in a warm spot (around 75–80°F) to encourage yeast activity.
- Use the float test to check readiness: drop a small dollop of starter into room-temperature water—it should float when active.
- If sluggish, try mixing in whole wheat or rye flour. These whole grain flours contain more natural yeast and nutrients that help speed up fermentation.
- Mark the container after feeding to monitor if the starter doubles in size, an important sign of strength.
Storage
Keep your starter loosely covered at room temperature during feeding times to allow airflow, then return it to storage after a few hours. For long-term storage, use an airtight container and refrigerate. When refrigerated, feed it at least once a week to maintain its activity. Clean the container occasionally to prevent crust buildup.
How to Serve
Serve this delicious recipe with your favorite sides.
FAQs
What if my starter is not ready on day 7?
It’s normal for some starters to take longer, sometimes up to 14 days. Continue feeding every 12 hours, keep it warm, and be patient. Look for bubbles throughout and perform the float test to check progress.
How do I know when my starter is ready to use?
When your starter doubles in size a few hours after feeding, is bubbly throughout, and passes the float test (floating dollop), it’s active and ready for baking.
PrintHow to Make a Sourdough Starter Recipe
Learn how to create a lively and bubbly sourdough starter from scratch using just flour and filtered water. This step-by-step guide takes you through the feeding process across 7 days, ensuring your starter is active and ready for baking delicious sourdough bread and other fermented recipes.
- Prep Time: 5 minutes initial mixing + 7 days of continuous feeding
- Cook Time: N/A
- Total Time: 7 days (including resting and feeding periods)
- Yield: Approximately 2 cups of active sourdough starter 1x
- Category: Starter Preparation
- Method: No-Cook
- Cuisine: Universal
- Diet: Vegan
Ingredients
Starter Ingredients
- 1 cup unbleached all-purpose flour (King Arthur recommended)
- 1 cup filtered water
Instructions
- Day 1: Initial Mix Combine 1 cup of unbleached all-purpose flour and 1 cup of filtered water in a clean glass bowl. Stir thoroughly, scraping the sides to fully mix the ingredients. Cover the bowl with a tea towel and let it sit at room temperature for 24 hours to start the fermentation process.
- Days 2–5: Daily Feeding Each day, discard half of the starter mixture. Then feed the remaining starter with 1 cup of flour and 1 cup of filtered water. Stir well to combine, cover again with the tea towel, and let it rest at room temperature for another 24 hours. Repeat this process daily to encourage yeast growth.
- Days 6–7: Twice Daily Feeding Increase feeding frequency to every 12 hours instead of once a day. Continue discarding half the starter and feeding it with 1 cup of flour and 1 cup of water each time. Stir well and cover. This accelerates the fermentation and builds a strong starter.
- By Day 7: Check Readiness By the seventh day, the starter should exhibit bubbles throughout, be active, and roughly double in size a few hours after feeding. Perform the float test by dropping a small dollop into room-temperature water; if it floats, your starter is ready for baking.
Notes
- If your starter is not bubbly or doubling by day 7, it is normal for some starters to take up to 14 days to develop completely depending on environmental factors.
- Maintain consistent feedings every 12 hours with discarding half and adding 1 cup of flour and water each time.
- Keep your starter in a warm spot around 75–80°F to encourage yeast activity, such as near a stove or on top of the refrigerator.
- Use the float test as an indicator of readiness: if the starter floats in water, it’s active; otherwise, continue feeding.
- If fermentation seems slow, try mixing in whole wheat or rye flour, which contain more natural yeast and nutrients to boost activity.
- Once active, mark the starter’s level after feeding to watch for doubling in size—a key sign of strength.
- For longer storage, keep the starter in an airtight container in the refrigerator and clean the container occasionally to prevent crust buildup.
Keywords: sourdough starter, homemade starter, fermentation, baking starter, sourdough bread preparation, natural yeast


