
Japanese Strawberry Cake Recipe
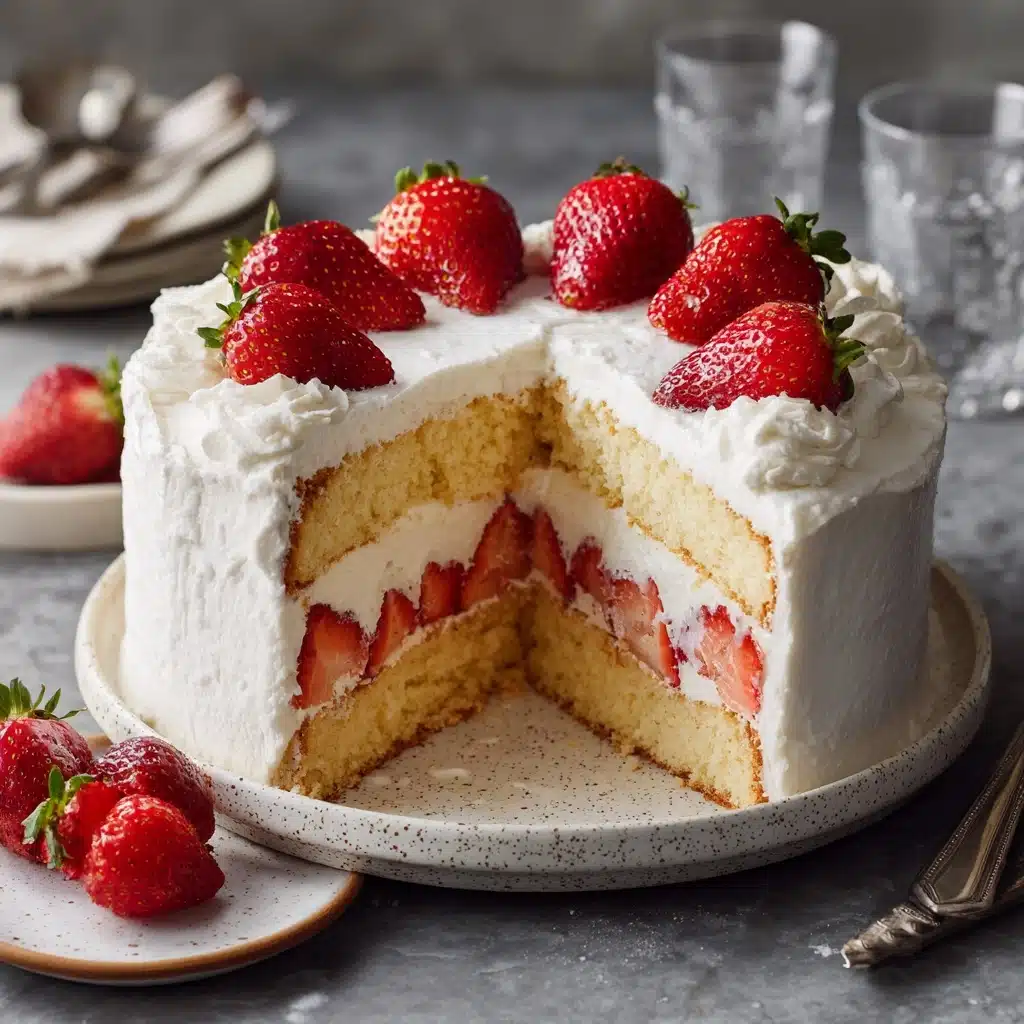
If you’re looking for a dessert that dazzles with both its ethereal beauty and cloud-like texture, Japanese Strawberry Cake is your showstopper! With layers of dreamy sponge cake, a whisper-light cream, and juicy, jewel-like strawberries, this cake is an ode to the Japanese art of simplicity and elegance. Every bite brings the softest crumb, pockets of fresh strawberries, and whipped cream so delicate it practically melts on your tongue. Whether it’s for birthdays, spring celebrations, or any occasion that deserves a sweet statement, you’ll fall head over heels for this Japanese Strawberry Cake.
Ingredients You’ll Need
Japanese Strawberry Cake is built from humble, everyday ingredients, each playing a critical role in creating the delicate structure, flavor, and visual appeal of this beloved dessert. Pay close attention to the quality of your ingredients—your cake will be as extraordinary as the care you put into every element!
- Whole milk: Adds moisture and enhances the creamy, rich texture of the sponge.
- Unsalted butter: Provides a tender crumb and subtle richness without overpowering the strawberry flavor.
- Cake flour: Guarantees a fine, soft texture and helps achieve that signature airy sponge.
- Egg yolks: Bring golden color and a smooth, rich taste to the cake layers.
- Egg whites: When whipped, give the sponge its lift and signature lightness.
- Sugar (caster sugar if available): Sweetens everything and helps create a glossy, fluffy meringue.
- Strawberries, divided: The heart of this cake—choose ripe, fragrant berries for maximum flavor and beauty.
- Sugar (for macerating strawberries): Draws out juices and intensifies the fresh strawberry taste.
- Heavy whipping cream: Whips up into a pillowy layer that brings silkiness to every bite.
- Confectioners sugar: Sweetens and smooths the whipped cream.
- Gelatin (optional): Stabilizes the whipped cream if you want to make the cake in advance (especially helpful on warm days!).
- Cold water (optional): Used to bloom the gelatin if you choose the stabilized cream method.
- Sugar (for syrup): Combines with water—and reserved berry juices if desired—for a moistening syrup that enhances both texture and flavor.
- Hot water (for syrup): Dissolves sugar quickly for a silky cake syrup.
How to Make Japanese Strawberry Cake
Step 1: Prepare and Line the Cake Pan
Start by tracing the bottom of an 8-inch round cake pan onto parchment paper and cutting it out to fit snugly. Line the pan with the parchment to prevent sticking and ensure a beautiful, intact sponge when you unmold the cake later—a little effort here goes a long way!
Step 2: Preheat and Prepare for the Water Bath
Set your oven to 325°F (160°C). Prepare a larger baking dish or roasting pan that your cake pan can sit within comfortably; this water bath is the secret to the Japanese Strawberry Cake’s ultra-tender, cloudlike crumb. Boil a small pot of water to have ready, and if using a springform pan, wrap the outside well in foil to keep water from seeping in.
Step 3: Create the Sponge Batter Base
In a medium heatproof bowl, melt the milk and butter together, either in the microwave or over a double boiler. Stir until completely smooth, then sift in the cake flour. Gently fold with a spatula until no lumps remain and you have a silky batter base. Incorporate the egg yolks until the mixture is glossy and even—this forms the rich backbone of your sponge.
Step 4: Whip the Egg Whites and Fold
Whip the egg whites in a clean, dry bowl using a hand or stand mixer. When frothy, sprinkle in the sugar little by little, whipping until shiny, billowy, soft-medium peaks form (think fluffy clouds that hold a gentle swoop). Gently fold a quarter of the egg whites into the yolk mixture to lighten it, then delicately fold this mixture back into the remaining whites. This folding technique preserves precious air and delivers the lightness Japanese Strawberry Cake is known for.
Step 5: Bake in a Water Bath
Pour your batter into the prepared cake pan, then tap it lightly on the counter to pop any large bubbles. Place the pan in your water bath, pour in enough hot water to come up about an inch up the side, and slide the whole setup into the oven. Bake for 90 minutes, resisting the urge to open the oven for the first hour. When a skewer comes out clean and the cake edges have pulled away, it’s ready. Run a thin knife around the edges and turn it out onto a rack to cool completely—patience here delivers the finest crumb.
Step 6: Macerate the Strawberries
As the cake cools, slice about 8 ounces of strawberries and toss them with sugar. Let them sit for an hour or two; watch as they become glossy, plump, and intensely sweet. Save the syrupy juices left in the bowl—they’ll infuse your cake layers with even more authentic strawberry flavor.
Step 7: Mix the Syrup
Stir together sugar and hot water until dissolved to create a simple syrup. If you want that signature strawberry hue and an added punch of berry flavor, go ahead and swirl in the reserved strawberry juices. This moistens the cake and kicks up its fruitiness.
Step 8: Whip the Cream (Stabilized or Regular)
For stabilized cream, bloom gelatin in cold water, melt it, then incorporate it into softly whipped cream with sifted confectioners sugar. If using regular cream, simply whip it with the sugar until you see firm, but not stiff peaks. Don’t overwhip—stop as soon as you see lovely, smooth mounds form for the fluffiest finish.
Step 9: Slice and Layer the Cake
Once the cake is completely cool, use toothpicks to guide even horizontal slices, carefully sawing off the domed top (if needed) and splitting the cake into two even layers. A steady hand and patience lead to slices worthy of a patisserie!
Step 10: Assemble and Decorate
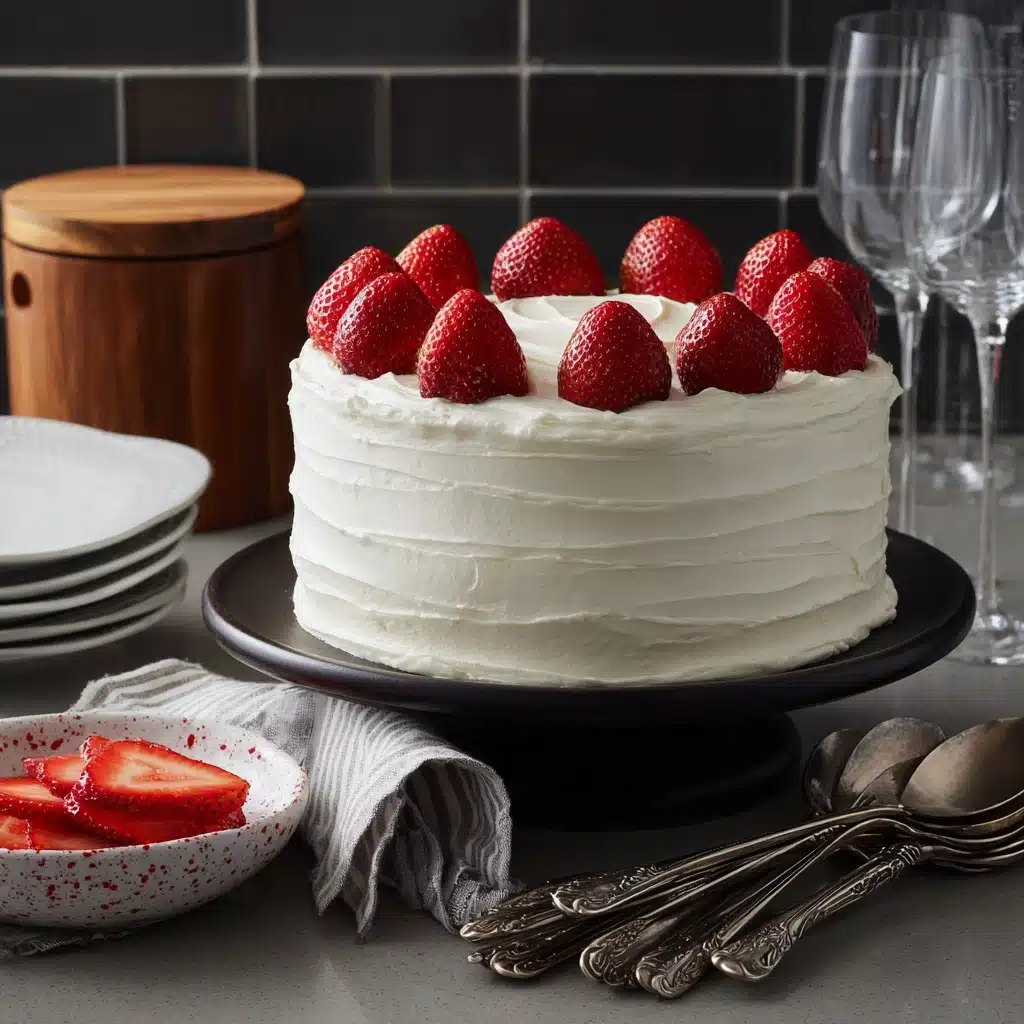
Place one cake layer cut side up on your serving plate or spinning stand. Brush generously with syrup. Spread on a pillow of whipped cream, scatter on as many juicy strawberry slices as you can fit, then another blanket of cream. Position the second sponge layer on top, brush with more syrup, and frost the top and sides in a feathery layer of cream. Smooth it out, let your creativity shine with more piped cream or decorative strawberry halves, and let it chill to set (especially if using stabilized cream). Your Japanese Strawberry Cake is now ready for its grand debut!
How to Serve Japanese Strawberry Cake
Garnishes
Finish your Japanese Strawberry Cake with an array of gleaming strawberry halves or slices arranged artfully on top. For an elegant look, add a few sprigs of fresh mint or delicate white chocolate curls. If you’re feeling extra indulgent, a dusting of confectioners sugar right before serving adds a touch of festive sparkle.
Side Dishes
While this cake stands beautifully on its own, you can make your dessert course extra special with a scoop of vanilla bean ice cream or a handful of mixed berries on the side. A pot of green tea or a frothy matcha latte is the perfect partner, balancing the cake’s sweetness and giving you a taste of authentic Japanese café culture.
Creative Ways to Present
For celebrations, assemble your Japanese Strawberry Cake as a multi-tiered masterpiece, or slice it into dainty squares for a sophisticated afternoon tea. Miniature versions make stunning plated desserts—just use smaller ring molds for individual cakes. Want to play with flavor? Drizzle a little berry coulis or serve with a dollop of lightly sweetened yogurt for a modern twist!
Make Ahead and Storage
Storing Leftovers
To keep your cake slices as fresh and luscious as possible, store leftovers in an airtight container in the refrigerator. The cream and strawberries will stay perky and delicious for up to 2 days—just be sure to keep everything covered to prevent drying out or absorbing other fridge odors.
Freezing
Though best enjoyed fresh, you can freeze unfilled layers of sponge cake for up to a month, tightly wrapped in plastic and foil. For fully assembled Japanese Strawberry Cake, freezing is not recommended due to the cream and berries, which can become watery upon thawing and lose their irresistible texture.
Reheating
Japanese Strawberry Cake is meant to be enjoyed cold or at cool room temperature. If you’ve used stabilized whipped cream and want the silkiest texture, take the cake out of the fridge about an hour before serving to let the cream soften just slightly. No reheating required—just slice, serve, and savor!
FAQs
Can I use regular all-purpose flour instead of cake flour?
While you can technically use all-purpose flour in a pinch, cake flour delivers a much finer, tender crumb. If you only have all-purpose flour, try replacing 1 tablespoon per cup with cornstarch and sifting well, but cake flour is highly recommended for classic Japanese Strawberry Cake texture.
Do I need to stabilize my whipped cream?
If you’re serving the cake right away, regular whipped cream is perfect. For gatherings or warm weather, stabilized cream (with a bit of gelatin) holds its shape longer and keeps your Japanese Strawberry Cake looking gorgeous for hours.
Can I use frozen strawberries?
Fresh strawberries are best for both flavor and appearance. While you can use thawed frozen berries inside the cake in a pinch, they tend to release more liquid and can make the layers a bit soggy—so save frozen berries for sauces or decoration rather than layering.
How do I keep my sponge cake from deflating?
Be gentle when folding your egg whites into the batter and take care not to over-bake. Baking with a water bath and cooling the cake gradually are keys to maintaining that trademark fluffy structure Japanese Strawberry Cake is loved for!
Can I make this cake gluten free?
Yes, you can try using a gluten-free cake flour blend in place of regular cake flour. Look for blends designed for delicate cakes to get a texture that’s soft, airy, and genuinely close to the original Japanese Strawberry Cake.
Final Thoughts
Now that you’ve seen just how much love and joy goes into crafting the perfect Japanese Strawberry Cake, I can’t recommend enough that you try making it at home. It’s the kind of treat that brings smiles, elevates special occasions, and showcases just how delightful simple ingredients can be. Happy baking, and may your cake be the star of every gathering!
PrintJapanese Strawberry Cake Recipe

This Japanese Strawberry Cake is a light and airy dessert that combines fluffy sponge cake with fresh strawberries and whipped cream. Perfect for special occasions or a delightful treat any time!
- Prep Time: 30 minutes
- Cook Time: 1 hour 30 minutes
- Total Time: 2 hours
- Yield: 1 8-inch cake 1x
- Category: Dessert
- Method: Baking
- Cuisine: Japanese
- Diet: Vegetarian
Ingredients
Cake:
- 80 g (1/3 cup) whole milk
- 50 g (3 1/2 tablespoons) unsalted butter
- 75 g (1/2 cup + 1/2 tablespoon) cake flour
- 4 large egg yolks
- 4 large egg whites
- 70 g (5 1/2 tablespoons) sugar (caster sugar if available)
Strawberries:
- 12 oz to 1 lb (340 g to 450 g) strawberries, divided
- 1 1/2 teaspoons sugar
Whipped Cream:
- 280 g (10 oz) heavy whipping cream
- 2 tablespoons confectioners sugar
- 3/4 teaspoon gelatin (Optional)
- 2 tablespoons cold water (Optional)
- 2 tablespoons sugar
- 3 tablespoons hot water
Instructions
- Prepare the cake: Cut parchment paper to fit an 8” round cake pan. Preheat oven to 325°F. Prepare a water bath. Melt butter with milk, mix with sifted flour, and egg yolks. Beat egg whites with sugar until medium peaks. Fold egg yolk mixture into whites. Bake in water bath for 1 hour 30 minutes.
- Prepare the macerated strawberries: Slice strawberries and toss with sugar. Let sit for 1-2 hours.
- Prepare the cream: Whip cream with confectioners sugar until soft peaks form. For stabilized cream, add gelatin mixture.
- Assemble the cake: Cut cake into layers, brush with syrup, add cream and strawberries between layers. Decorate with cream and strawberries.
- Refrigerate: Chill the cake for at least 30 minutes if using stabilized cream before serving.
Notes
- For a lighter cake, gently fold the batter to avoid deflating the egg whites.
- If using stabilized cream, refrigerate the cake to set the cream before serving.
Nutrition
- Serving Size: 1 slice
- Calories: 240
- Sugar: 14g
- Sodium: 45mg
- Fat: 16g
- Saturated Fat: 10g
- Unsaturated Fat: 5g
- Trans Fat: 0g
- Carbohydrates: 21g
- Fiber: 1g
- Protein: 4g
- Cholesterol: 95mg
Keywords: Japanese Strawberry Cake, Strawberry Sponge Cake, Japanese Dessert Recipe
