
No-Bake Butterfinger Pie Recipe
Introduction
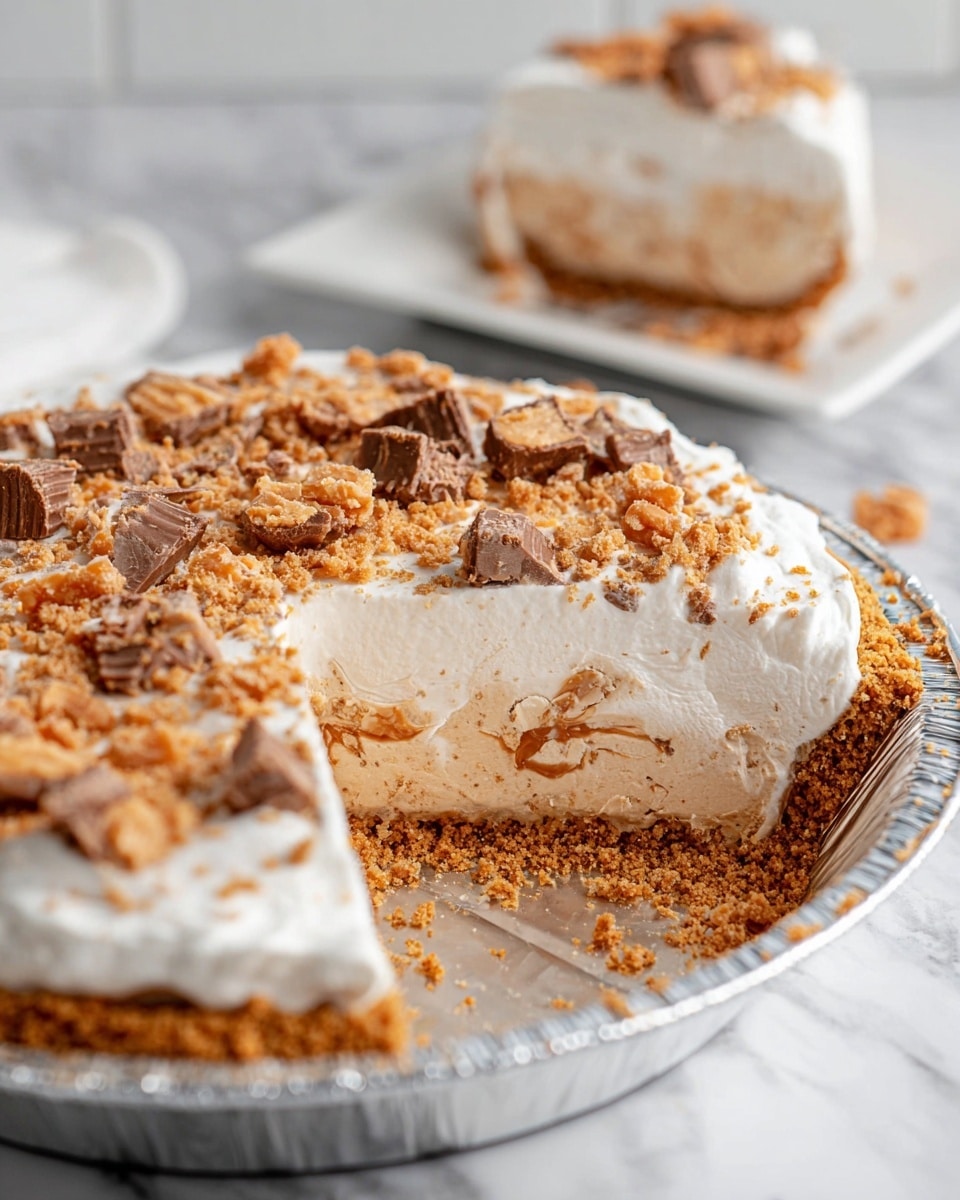
This No-Bake Butterfinger Pie is a delightful treat that combines creamy peanut butter, rich cream cheese, and crunchy Butterfinger candy in a graham cracker crust. It’s an easy dessert to prepare and perfect for sharing at any gathering.
Ingredients
- 8 ounces cream cheese, softened to room temperature
- ¾ cup creamy peanut butter
- 10.2 ounces bag of fun size Butterfingers, unwrapped and chopped
- 12 ounces whipped topping, divided
- 1 pre-made graham cracker pie crust
Instructions
- Step 1: In a large bowl, use an electric or hand mixer to beat together the cream cheese and peanut butter until smooth.
- Step 2: Gently fold in half of the whipped topping until just combined.
- Step 3: Stir in half of the chopped Butterfingers into the peanut butter mixture.
- Step 4: Pour the mixture into the prepared pie crust and smooth out the top with a spatula or frosting knife.
- Step 5: Spread the remaining whipped topping evenly over the top of the pie filling.
- Step 6: Sprinkle the remaining chopped Butterfingers over the whipped topping as a garnish.
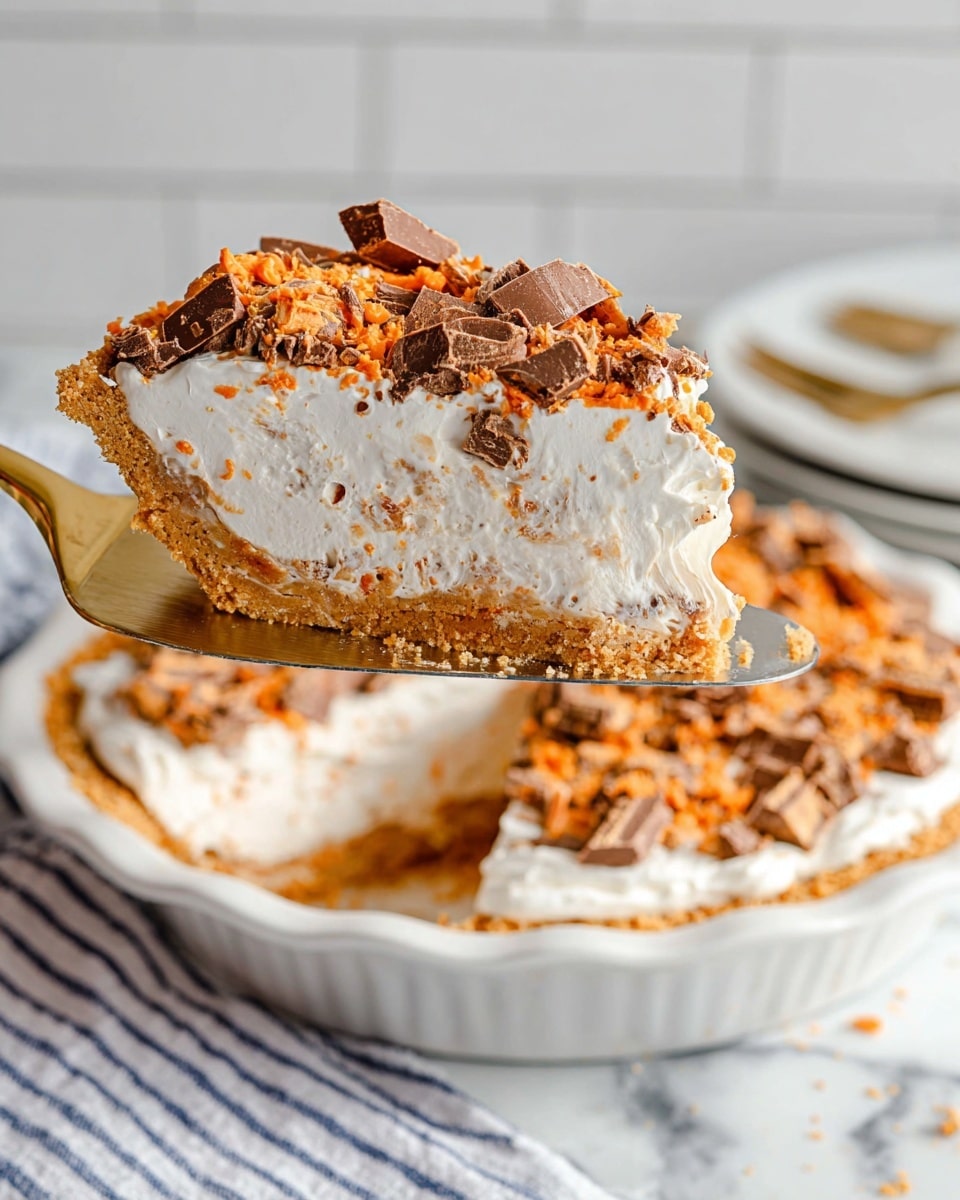
- Step 7: Refrigerate the pie for 2 to 4 hours, or overnight, to allow it to firm up. Slice and serve.
Tips & Variations
- For extra crunch, add chopped peanuts or crushed graham crackers inside the filling or as a topping.
- Substitute creamy peanut butter with almond or cashew butter for a different nutty flavor.
- Use a homemade graham cracker crust if you prefer a fresher base.
- Allow the pie to chill overnight for the best texture and flavor balance.
Storage
Store the pie covered in the refrigerator for up to 3 days. To serve, let it sit at room temperature for about 10 minutes for easier slicing. Avoid freezing, as the whipped topping can change texture when thawed.
How to Serve
Serve this delicious recipe with your favorite sides.
FAQs
Can I use regular-sized Butterfingers instead of fun size?
Yes, you can chop regular-sized Butterfingers into small pieces to match the amount and size needed for the recipe.
Is this pie suitable for freezing?
Freezing is not recommended because the whipped topping may separate or become watery when thawed, affecting the texture of the pie.
PrintNo-Bake Butterfinger Pie Recipe

This creamy and indulgent No-Bake Butterfinger Pie combines smooth cream cheese, rich peanut butter, whipped topping, and crunchy chopped Butterfinger candy bars in a pre-made graham cracker crust. Simple to prepare and chilled to set, this dessert is perfect for any occasion when you want a quick, delicious treat without turning on the oven.
- Prep Time: 15 minutes
- Cook Time: 0 minutes
- Total Time: 2 hours 15 minutes (including chilling time)
- Yield: 8 servings 1x
- Category: Dessert
- Method: No-Cook
- Cuisine: American
Ingredients
Filling
- 8 ounces cream cheese, softened to room temperature
- ¾ cup creamy peanut butter
- 10.2 ounces fun size Butterfingers, unwrapped and chopped
- 12 ounces whipped topping, divided
Crust
- 1 pre-made graham cracker pie crust
Instructions
- Prepare the cream cheese and peanut butter mixture. In a large bowl, use an electric or hand mixer to beat together the softened cream cheese and creamy peanut butter until the mixture is smooth and fully combined, ensuring there are no lumps.
- Fold in whipped topping. Gently fold in half of the 12 ounces of whipped topping into the peanut butter and cream cheese mixture until just combined, maintaining a light and airy texture.
- Add chopped Butterfingers. Stir in half of the chopped Butterfinger pieces into the peanut butter mixture, distributing them evenly.
- Fill the pie crust. Pour the peanut butter mixture into the prepared graham cracker pie crust, then smooth the top evenly with a spatula or frosting knife.
- Top with remaining whipped topping. Spread the remaining whipped topping over the surface of the pie filling in an even layer.
- Garnish with Butterfinger pieces. Sprinkle the remaining chopped Butterfinger pieces over the whipped topping for a decorative and crunchy finish.
- Chill the pie. Refrigerate the pie for 2 to 4 hours, or ideally overnight, to allow it to firm up properly before slicing and serving.
Notes
- Make sure the cream cheese is softened to room temperature to ensure a smooth filling.
- Chilling the pie overnight improves the texture and makes it easier to slice.
- Use fun size Butterfingers for the perfect bite-sized candy pieces in the filling and topping.
- This pie is best served cold and should be stored in the refrigerator.
- You can substitute whipped topping with homemade whipped cream for a fresher taste.
Keywords: no bake pie, Butterfinger pie, peanut butter dessert, easy no bake, candy bar pie


