
No Knead Seeded Oat Bread Recipe
Introduction
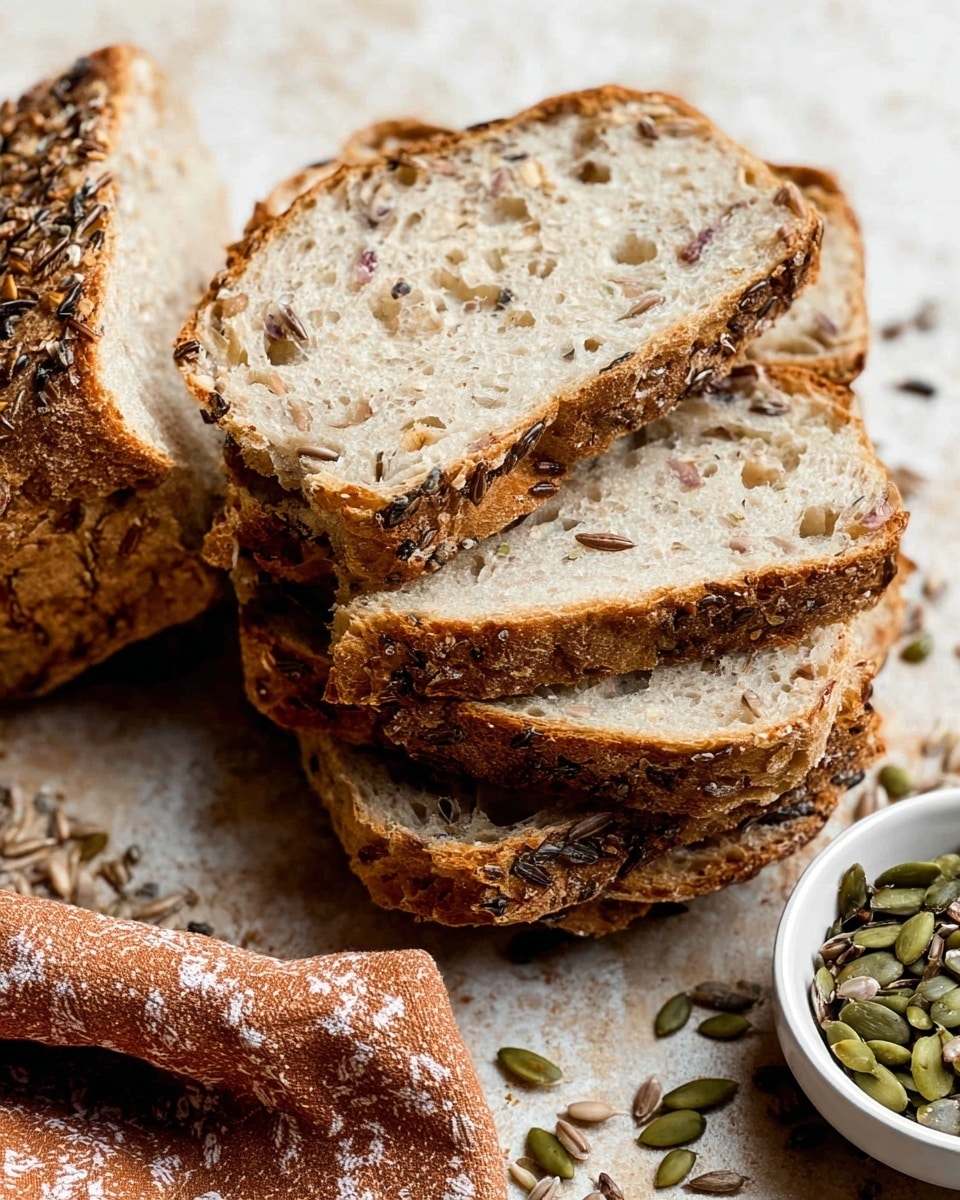
This No Knead Seeded Oat Bread is a simple, wholesome loaf packed with hearty oats and a mix of seeds. It requires minimal effort but yields a beautifully textured bread with a crisp crust and a tender crumb, perfect for breakfast or sandwiches.

Ingredients
- 3 cups (390g) bread flour (spooned & leveled), plus more as needed for shaping and pan
- 2 teaspoons (about 6g) Platinum Yeast from Red Star instant yeast
- 1 cup (85g) old-fashioned whole rolled oats
- 1/4 cup (30g) unsalted pumpkin seeds (pepitas)
- 1/4 cup (30g) salted or unsalted sunflower seeds
- 2 Tablespoons (18g) flax seeds or sesame seeds
- 2 teaspoons coarse salt
- 2 Tablespoons (43g) honey
- 1 and 1/2 cups (360ml) warm water (about 95°F / 35°C)
- Optional: cornmeal for dusting pan
- For topping:
- 1 Tablespoon (5g) old-fashioned whole rolled oats
- 1 Tablespoon (8g) pumpkin seeds (pepitas)
- 1 Tablespoon (8g) sunflower seeds
- 1 teaspoon flax seeds or sesame seeds
Instructions
- Step 1: In a large un-greased mixing bowl, whisk together the flour and yeast. Add the oats, pumpkin seeds, sunflower seeds, flax or sesame seeds, and salt; whisk to combine.
- Step 2: Mix the honey and warm water in a separate container, then pour over the dry ingredients. Use a silicone spatula or wooden spoon to gently stir until all the flour is moistened. The dough will be dry and shaggy at first; continue mixing until evenly combined. If needed, use your hands to work the dough—it will be very sticky. Shape it into a ball in the bowl.
- Step 3: Cover the dough tightly with plastic wrap or foil and let it rise at room temperature for 3 hours. It should nearly double in size and develop air bubbles.
- Step 4: For best flavor and texture, refrigerate the covered dough for at least 12 hours and up to 3 days. The dough may puff up and then deflate slightly—that’s normal.
- Step 5: Lightly dust a large nonstick baking sheet with flour and/or cornmeal. With generously floured hands, gently shape the risen dough into a ball without deflating it.
- Step 6: Transfer the dough to the prepared baking sheet. Mix the topping ingredients and sprinkle them evenly over the dough, pressing lightly to help them stick. Loosely cover and let rest for 45 minutes.
- Step 7: Preheat the oven to 425°F (218°C) during the dough’s resting period.
- Step 8: Score the dough with a sharp knife or bread lame by making a slash or an X about 1/2 inch deep. If the dough flattens, gently reshape it with floured hands.
- Step 9: Place the dough in the preheated oven on the center rack.
- Step 10: (Optional) For a crisper crust, place a shallow metal pan on the bottom oven rack and carefully pour 3–4 cups of boiling water into it just after placing the dough in the oven. Quickly close the door to trap steam.
- Step 11: Bake for 40 minutes or until the crust is golden brown. If browning too quickly, tent the bread with foil. The bread is done when it sounds hollow when tapped or reaches 195°F (90°C) internally.
- Step 12: Remove the bread from the oven and cool for at least 10–20 minutes before slicing and serving.
Tips & Variations
- Use warm water (around 95°F / 35°C) to help activate the yeast without killing it.
- Try substituting seeds based on your preference—chia seeds or hemp seeds work well too.
- Letting the dough rest overnight in the fridge enhances the flavor and texture.
- For a softer crust, skip the boiling water steam step.
- If you want to bake in a Dutch oven or on a pizza stone, make sure to adjust the resting and baking method accordingly.
Storage
Store leftover bread loosely covered at room temperature for up to 3 days to keep the crust crisp. For longer storage, refrigerate for up to 10 days. To refresh the crust when reheating, warm the bread in a 350°F (175°C) oven for 5–10 minutes.
How to Serve
Serve this delicious recipe with your favorite sides.
FAQs
Can I use active dry yeast instead of instant yeast?
Yes, but you’ll need to activate active dry yeast by dissolving it in warm water with a pinch of sugar before adding it to the flour. Use the same amount and allow about 5–10 minutes for it to foam.
Do I have to refrigerate the dough after the first rise?
No, the bread can be baked immediately after the 3-hour room temperature rise, but refrigerating for at least 12 hours improves flavor and texture.
PrintNo Knead Seeded Oat Bread Recipe
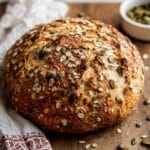
This No Knead Seeded Oat Bread is a wholesome, hearty loaf featuring a mix of bread flour, oats, and a variety of nutritious seeds including pumpkin, sunflower, and flax. With just a simple mixing and a long rise, this bread delivers a tender crumb and a crunchy seed crust, perfect for sandwiches or enjoying with butter. The recipe requires no kneading and utilizes easy, straightforward steps for homemade artisan bread with minimal effort.
- Prep Time: 20 minutes
- Cook Time: 40 minutes
- Total Time: 3 hours 1 hour 10 minutes (including rises and resting) up to 3 days if refrigerated
- Yield: 1 medium loaf (about 12 slices) 1x
- Category: Bread
- Method: Baking
- Cuisine: American
- Diet: Vegetarian
Ingredients
Dough Ingredients
- 3 cups (390g) bread flour (spooned & leveled), plus more as needed for shaping and pan
- 2 teaspoons (about 6g) Platinum Yeast from Red Star instant yeast
- 1 cup (85g) old-fashioned whole rolled oats
- 1/4 cup (30g) unsalted pumpkin seeds (pepitas)
- 1/4 cup (30g) salted or unsalted sunflower seeds
- 2 Tablespoons (18g) flax seeds or sesame seeds
- 2 teaspoons coarse salt
- 2 Tablespoons (43g) honey
- 1 and 1/2 cups (360ml) warm water (about 95°F / 35°C)
- Optional: cornmeal for dusting pan
Topping Ingredients
- 1 Tablespoon (5g) old-fashioned whole rolled oats
- 1 Tablespoon (8g) pumpkin seeds (pepitas)
- 1 Tablespoon (8g) sunflower seeds
- 1 teaspoon flax seeds or sesame seeds
Instructions
- Prepare the dry ingredients: In a large ungreased mixing bowl, whisk together the bread flour and instant yeast. Add the oats, pumpkin seeds, sunflower seeds, flax or sesame seeds, and coarse salt. Whisk again to combine evenly.
- Mix wet ingredients and combine: In a separate container, mix the honey and warm water until the honey is dissolved. Pour this mixture over the dry ingredients. Using a silicone spatula or a wooden spoon, gently mix the dough until all the flour is moistened. The dough will look dry and shaggy at first but keep mixing. If needed, use your hands to fully combine; the dough will be very sticky.
- First rise: Shape the sticky dough into a ball inside the bowl as best as you can. Cover the bowl tightly with plastic wrap or foil and let the dough rise at room temperature for 3 hours. It should almost double in size and develop plenty of air bubbles.
- Optional extended refrigeration: For enhanced flavor and texture, transfer the covered dough to the refrigerator to rest for at least 12 hours and up to 3 days. The dough will continue to puff but might deflate slightly after 2 days; this is normal.
- Shape the dough: Lightly dust a large nonstick baking sheet with flour and/or cornmeal. Using generously floured hands and gentle pressure to avoid deflating the dough, shape the risen dough into a round loaf ball. This can be done in the bowl or on a floured surface. Transfer the shaped dough onto the prepared baking sheet.
- Add topping and final rest: Combine the topping oats and seeds in a small bowl. Sprinkle this mixture over the top of the dough. If seeds do not stick easily, gently press them into the dough. Loosely cover the dough and let it rest for 45 minutes at room temperature.
- Preheat the oven: While the dough rests, preheat your oven to 425°F (218°C).
- Score the dough: Use a sharp knife, bread lame, or kitchen shears to score the dough with a slash or X about 1/2 inch deep. If the dough has flattened during resting, reshape it gently with floured hands.
- Prepare for baking: Place the scored dough on the center rack of the preheated oven. For extra crust crispness, optionally place a shallow metal or cast iron pan on the bottom rack and pour 3–4 cups boiling water into it to create steam. Quickly close the oven door to trap steam.
- Bake the bread: Bake the bread for 40 minutes or until the crust turns a deep golden brown. If the crust browns too quickly, tent the loaf with aluminum foil. The bread is done when tapping the bottom produces a hollow sound or when an instant-read thermometer registers 195°F (90°C) in the center.
- Cool and serve: Remove the bread from the oven and let it cool on a rack for at least 10–20 minutes before slicing to allow the crumb to set.
- Storage: Store leftover bread loosely covered at room temperature for up to 3 days or refrigerate for up to 10 days.
Notes
- The dough is very sticky and too wet for a mixer, so mixing by hand is recommended.
- Using a pizza stone or Dutch oven can also be done to improve crust quality, but baking on a nonstick baking sheet works well for this recipe.
- Creating steam during baking helps develop a crispier crust; this is optional but recommended.
- Extended refrigeration improves flavor and texture, but even a couple of hours makes a difference.
- Flour or cornmeal dusting prevents sticking on the baking sheet.
Keywords: no knead bread, seeded oat bread, homemade bread, easy bread recipe, artisan bread, bread with seeds, no knead oat bread


