
Red Velvet Blossom Cookies Recipe
Introduction
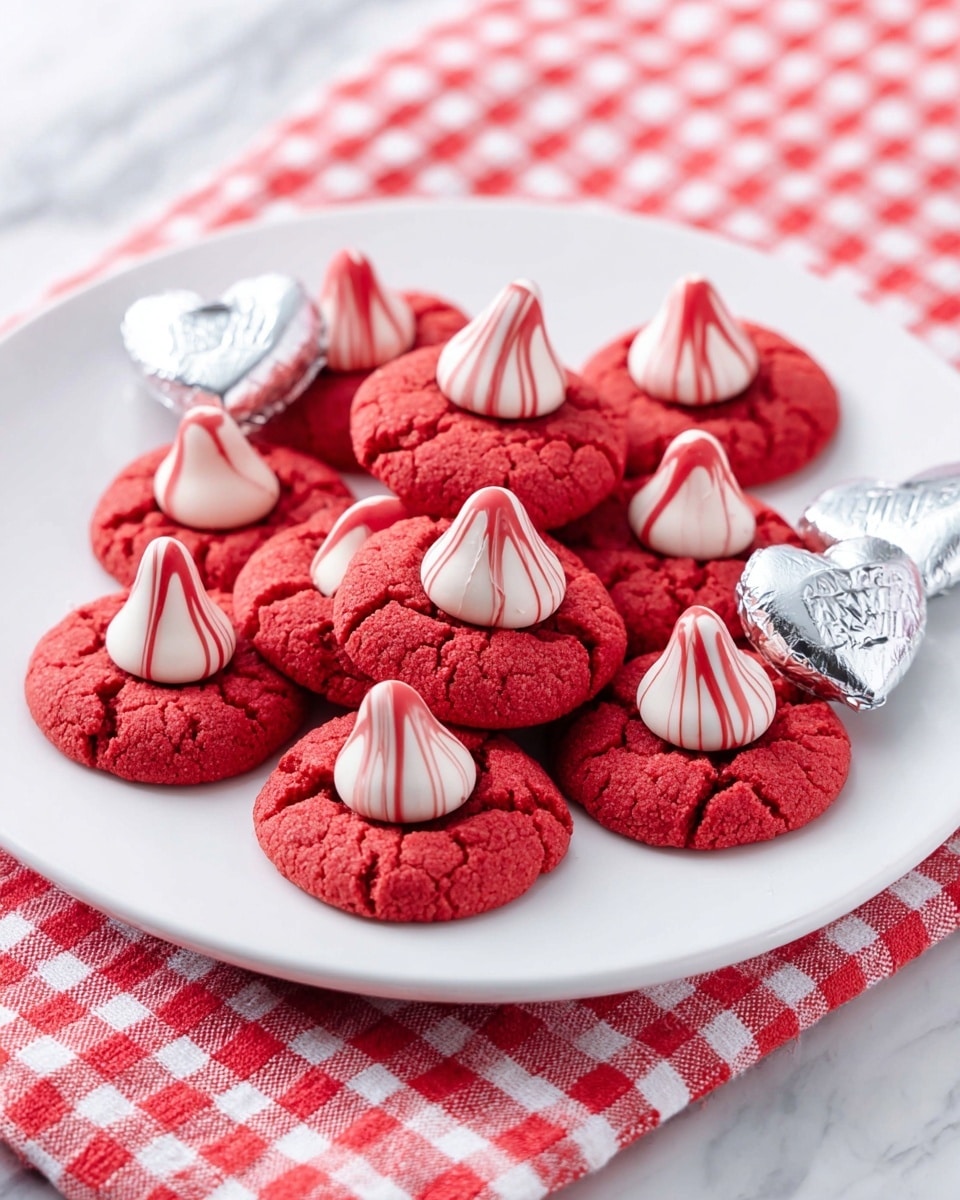
Red Velvet Blossom Cookies are a delightful treat that combines the rich flavors of cocoa and red velvet with a sweet, melty chocolate center. These soft and tender cookies are perfect for festive occasions or whenever you’re craving a special homemade dessert.
Ingredients
- 1 ¾ cups flour
- ½ teaspoon baking soda
- ¼ teaspoon salt
- ¼ cup cocoa powder
- ½ cup (1 stick) unsalted butter, room temperature
- 1 cup sugar
- 1 egg
- 1 ½ teaspoon vanilla extract
- 1 tablespoon milk
- 1 tablespoon red food coloring
- 24 Hershey’s Hug candies (unwrapped)
Instructions
- Step 1: Preheat the oven to 350 degrees Fahrenheit. Line a large baking sheet with parchment paper.
- Step 2: In a medium bowl, whisk together the flour, baking soda, salt, and cocoa powder. Set aside.
- Step 3: Beat the butter on medium speed using a hand or stand mixer for 5 minutes. Scrape down the sides of the bowl as needed. Add the sugar and continue beating for 5 to 7 minutes until the mixture is fluffy.
- Step 4: Add the egg, vanilla extract, and red food coloring to the butter-sugar mixture, beating until fully combined. Gradually add the flour mixture and mix until well incorporated.
- Step 5: With the mixer running, slowly add milk just until the dough softens and comes together.
- Step 6: Using a small cookie scoop or tablespoon, shape the dough into heaping balls. Place them about 1 inch apart on the prepared baking sheet.
- Step 7: Bake the cookies for 8 to 10 minutes, or until they are puffed and the edges are set but the centers remain soft.
- Step 8: Let the cookies cool on the baking sheet for 5 minutes, then gently press one unwrapped Hershey’s Hug candy into the center of each cookie.
- Step 9: Transfer the cookies to a wire rack to cool completely. The chocolate will soften and appear melted, but will resolidify as the cookies cool.
- Step 10: Store the cooled cookies in an airtight container.
Tips & Variations
- For a deeper flavor, use Dutch-processed cocoa powder instead of natural cocoa.
- Substitute Hershey’s Hugs with your favorite chocolate candies like kisses or mini peanut butter cups.
- If you prefer a softer cookie, slightly underbake by a minute or two.
- Use gel food coloring for a more vibrant red without thinning the dough.
Storage
Store the cookies in an airtight container at room temperature for up to 1 week. For longer storage, refrigerate up to 3 weeks. You may also freeze cooled cookies, but be aware that sudden temperature changes can cause the candy centers to bloom—a harmless white coating that affects appearance but not taste. Reheat gently if desired before serving.
How to Serve

Serve this delicious recipe with your favorite sides.
FAQs
Can I use a different type of chocolate candy for the centers?
Yes, you can substitute Hershey’s Hugs with other small candies like Kisses or mini peanut butter cups. Just be mindful of melting points and flavors to suit your preference.
Why do the candy centers look melted and shiny after baking?
The candies soften from the residual heat of the cookies. As they cool completely, the chocolate will resolidify and retain their shape, giving the cookies their signature blossom appearance.
PrintRed Velvet Blossom Cookies Recipe

These Red Velvet Blossom Cookies are soft, fluffy, and perfectly rich with a hint of cocoa and a vibrant red color. Each cookie is topped with a melty Hershey’s Hug candy, creating a delightful combination of textures and flavors. Perfect for festive occasions or as a sweet treat any time, these cookies are easy to prepare and bake to perfection.
- Prep Time: 15 minutes
- Cook Time: 10 minutes
- Total Time: 25 minutes
- Yield: 24 cookies 1x
- Category: Dessert
- Method: Baking
- Cuisine: American
Ingredients
Dry Ingredients
- 1 ¾ cups flour
- ½ teaspoon baking soda
- ¼ teaspoon salt
- ¼ cup cocoa powder
Wet Ingredients
- ½ cup (1 stick) unsalted butter, room temperature
- 1 cup sugar
- 1 egg
- 1 ½ teaspoon vanilla extract
- 1 tablespoon milk
- 1 tablespoon red food coloring
Topping
- 24 Hershey’s Hug candies (unwrapped)
Instructions
- Preheat and prepare baking sheet: Preheat your oven to 350°F (175°C). Line a large baking sheet with parchment paper to prevent sticking and to ensure easy cleanup.
- Combine dry ingredients: In a medium-sized bowl, whisk together the flour, baking soda, salt, and cocoa powder. Set this mixture aside for later.
- Cream the butter and sugar: Using a hand mixer or stand mixer on medium speed, beat the room temperature butter for 5 minutes until smooth. Scrape down the sides of the bowl to incorporate all butter. Add the sugar and continue beating for an additional 5 to 7 minutes until the mixture is light and fluffy.
- Add egg, vanilla, and food coloring: Incorporate the egg, vanilla extract, and red food coloring into the butter-sugar mixture, mixing well until the color and ingredients are evenly distributed.
- Mix in dry ingredients: Gradually add the flour mixture to the wet ingredients and beat until just combined.
- Soften dough with milk: Slowly add the milk to the dough while the mixer is running, adding just enough to soften the dough to a scoopable consistency.
- Shape cookies: Using a small cookie scoop, scoop heaping tablespoons of dough and roll them into balls. Place the dough balls about 1 inch apart on the prepared baking sheet.
- Bake: Bake in the preheated oven at 350°F for 8 to 10 minutes, or until the cookies have puffed up and the edges look set but soft.
- Cool and add candy: Allow the cookies to cool on the baking sheet for 5 minutes before gently pressing one unwrapped Hershey’s Hug candy into the center of each cookie.
- Final cooling and storage: Transfer the cookies to a wire rack to cool completely. The candies will look melted but will harden again in the perfect shape. Store the cookies in an airtight container for up to 1 week, refrigerate for up to 3 weeks, or freeze. Note that freezing may cause the candy to bloom, which is harmless but affects appearance.
Notes
- Use room temperature butter for best creaming results and fluffy cookies.
- If the dough is too stiff, add a little more milk, a teaspoon at a time, to achieve the right consistency.
- Do not disturb the candies while cooling; let them resolidify naturally for the best bloom effect.
- Red food coloring intensity can be adjusted according to desired color vibrance.
- Cookies can be frozen but may experience candy bloom; thaw gently to preserve appearance.
Keywords: Red Velvet Cookies, Blossom Cookies, Hershey’s Hugs Cookies, Holiday Cookies, Valentine’s Day Cookies, Red Velvet Dessert


