
Rosemary and Roasted Garlic Artisan Bread Recipe
Introduction
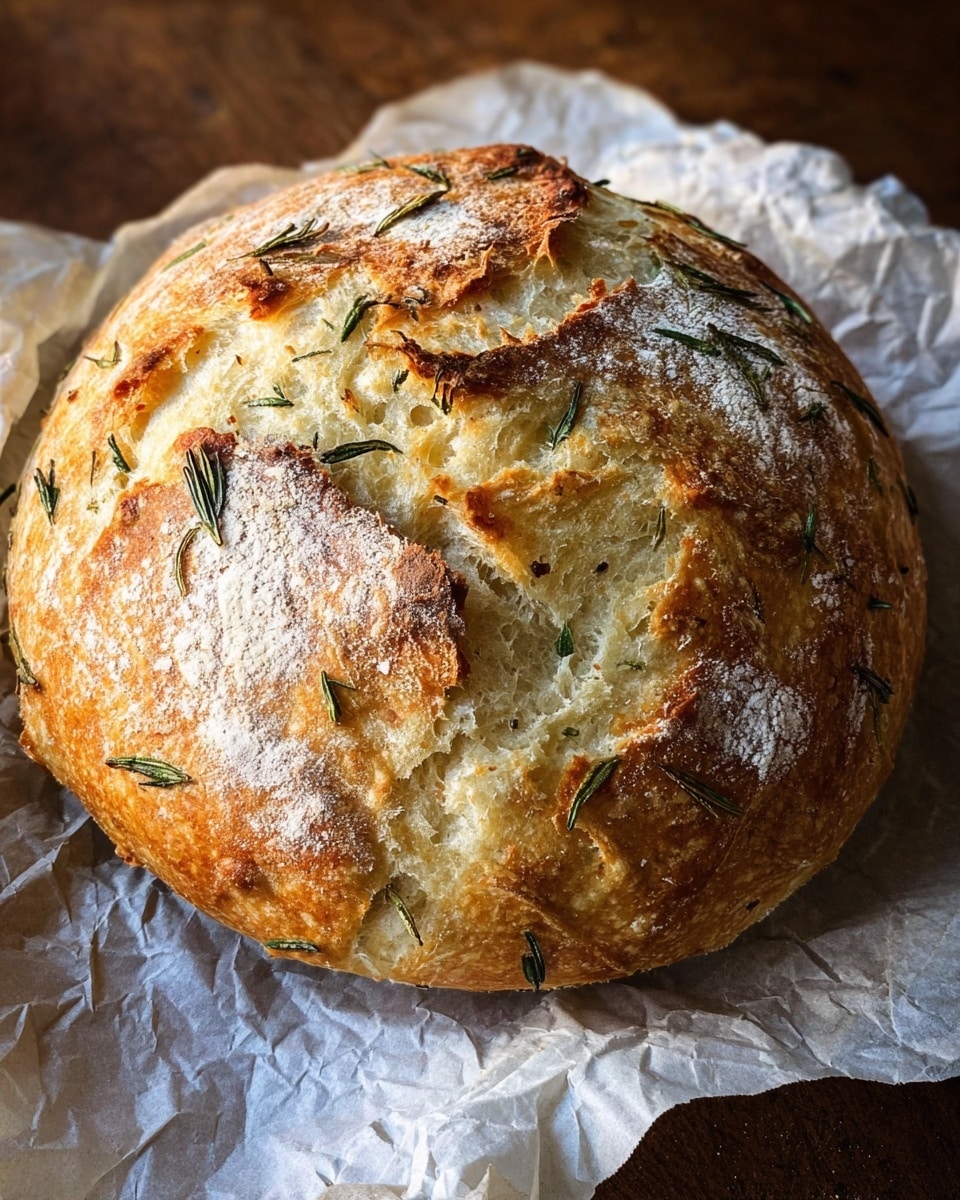
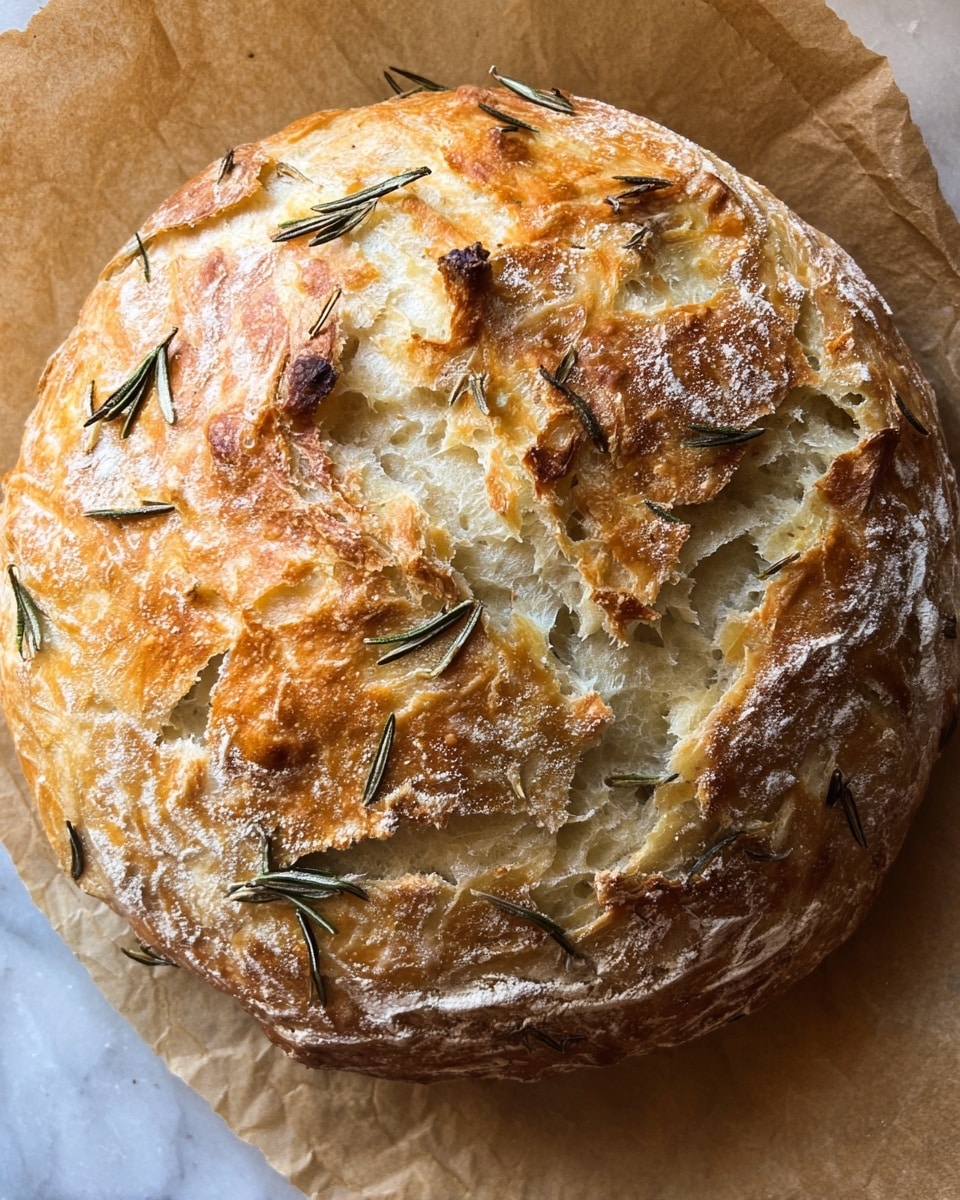
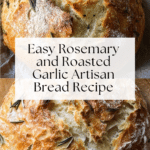
This Rosemary and Roasted Garlic Artisan Bread is a fragrant, flavorful loaf perfect for sharing. The slow fermentation and roasted garlic create a soft, aromatic crumb with a crispy crust that pairs wonderfully with any meal or on its own.
Ingredients
- 1 head garlic
- Extra-virgin olive oil
- Coarse sea salt and freshly ground black pepper
- 1½ cups water, room temperature (at or near 70°F/21°C)
- 1 teaspoon active dry yeast
- 3 cups bread or all-purpose flour, plus more for dusting
- ½ teaspoon dried oregano
- 1 teaspoon kosher or fine sea salt
- 2 teaspoons finely chopped rosemary (plus more to sprinkle across the top)
- 1 whole head roasted garlic (smashed)
- 1 tablespoon extra-virgin olive oil
Instructions
- Step 1: Slice the garlic head in half. Drizzle the exposed cloves with olive oil and season with salt and pepper. Wrap in foil and roast on a baking sheet at 400ºF (204ºC) for 40 minutes. Let cool, remove cloves from their skins and set aside.
- Step 2: When ready to bake, sprinkle the yeast over the water and let it sit for 10-15 minutes. In a large bowl, stir together flour, oregano, salt, and rosemary and set aside.
- Step 3: Add the yeast mixture, roasted garlic, and olive oil to the bowl. Use a rubber spatula to mix just until combined. The dough will look sticky and stringy, with some flour remaining around the edges.
- Step 4: Cover and let rise in a warm place until doubled in size, about 8-10 hours.
- Step 5: Once risen, turn the dough out onto a floured surface. Gently fold into itself several times until a soft, flour-covered ball forms. Place seam side up into a flour-dusted bowl, dust with flour, cover, and refrigerate overnight. It can stay up to 48 hours if needed.
- Step 6: Preheat oven to 450ºF (232ºC) with a Dutch oven inside.
- Step 7: Remove cover and invert dough onto a lightly floured surface, seam side down. Shape gently into a loaf. Place on parchment paper and score the top with a sharp knife or razor blade to allow steam to escape.
- Step 8: Transfer the dough on the parchment into the preheated Dutch oven. Cover and bake for 30 minutes. Remove the cover and bake for another 15 minutes until browned and hollow sounding when tapped.
- Step 9: Using the parchment edges, lift the bread out and transfer to a wire rack. Let cool up to one hour before slicing.
Tips & Variations
- If you don’t have a Dutch oven, bake the bread on a preheated baking stone or tray and place a pan of hot water in the oven to create steam for a crisp crust.
- Add a sprinkle of coarse rosemary and sea salt on top before baking for extra flavor and a beautiful finish.
- For a quicker rise, place the dough in a slightly warmer spot, but avoid temperatures above 85°F (29°C) to keep flavor development balanced.
Storage
Store the bread in a paper bag or loosely wrapped in a clean kitchen towel at room temperature for up to 3 days. To refresh the crust, warm the bread in a 350ºF (175ºC) oven for 5-10 minutes. For longer storage, slice and freeze the bread, then toast slices directly from the freezer.
How to Serve
Serve this delicious recipe with your favorite sides.
FAQs
Can I use fresh yeast instead of active dry yeast?
Yes, you can substitute fresh yeast. Use about three times the amount and dissolve it in the water before mixing with flour.
Why does the dough need to rise for so long?
The extended rise time allows the yeast to slowly ferment, developing deeper flavor and a better texture in the bread.
PrintRosemary and Roasted Garlic Artisan Bread Recipe
This Rosemary and Roasted Garlic Artisan Bread is a flavorful homemade loaf infused with roasted garlic, fresh rosemary, and aromatic herbs. The bread features a crispy crust and a tender, chewy crumb, perfect for sandwiches, dipping in olive oil, or enjoying alongside soups and salads. Using a Dutch oven baking method creates a restaurant-quality artisan loaf right in your own kitchen.
- Prep Time: 20 minutes (plus 8-10 hours rising and overnight refrigeration)
- Cook Time: 45 minutes
- Total Time: Approximately 10-12 hours including rising and refrigeration
- Yield: 1 medium artisan loaf (about 8–10 servings) 1x
- Category: Bread
- Method: Baking
- Cuisine: Artisan, European-style
Ingredients
Roasted Garlic
- 1 head garlic
- Extra-virgin olive oil (for drizzling)
- Coarse sea salt and freshly ground black pepper (to season)
Dough
- 1½ cups water, room temperature (at or near 70ºF/21ºC)
- 1 teaspoon active dry yeast
- 3 cups bread or all-purpose flour, plus more for dusting
- ½ teaspoon dried oregano
- 1 teaspoon kosher or fine sea salt
- 2 teaspoons finely chopped rosemary (plus more to sprinkle on top)
- 1 whole head roasted garlic (smashed)
- 1 tablespoon extra-virgin olive oil
Instructions
- Roast the Garlic: Slice the garlic head in half horizontally, drizzle the exposed cloves with olive oil, and season with salt and pepper. Wrap it tightly in foil and roast on a baking sheet in the oven at 400ºF (204ºC) for 40 minutes. Allow it to cool, then remove the cloves from their skins and set aside.
- Activate the Yeast: Sprinkle the yeast over the warm water and let it sit undisturbed for 10-15 minutes until it becomes foamy, indicating the yeast is active and ready for use.
- Mix Dry Ingredients: In a large mixing bowl, combine the flour, dried oregano, kosher salt, and chopped rosemary. Stir these together so that the herbs and salt are evenly distributed.
- Combine Ingredients: Add the yeast mixture, smashed roasted garlic, and olive oil to the dry ingredients. Using a rubber spatula, mix gently until just combined. The dough will appear sticky and stringy with some flour still visible at the edges.
- First Rise: Cover the bowl with a clean towel or plastic wrap and place it somewhere warm to allow the dough to rise. Let it rise for about 8-10 hours or until it doubles in size.
- Shape the Dough: Once risen, lightly flour a clean surface. Transfer the dough onto it and with floured hands, fold the dough over itself several times to create a soft, smooth ball. Place the dough seam side up in a floured bowl, dust with additional flour, cover, and refrigerate overnight or up to 48 hours.
- Preheat the Oven and Dutch Oven: When ready to bake, preheat your oven to 450ºF (232ºC) and place a Dutch oven inside to heat thoroughly.
- Prepare the Loaf for Baking: Remove the dough from the refrigerator. Uncover and invert the bowl to release the dough onto a lightly floured surface with the seam side down. Shape gently as needed into a loaf. Place on a piece of parchment paper and score the top with a sharp knife or razor blade to allow steam escape during baking.
- Bake the Bread: Remove the hot Dutch oven from the oven carefully. Transfer the dough along with the parchment paper into the Dutch oven. Cover and bake for 30 minutes. Then remove the lid and bake for an additional 15 minutes until the crust is golden brown and the loaf sounds hollow when tapped.
- Cool the Bread: Using the edges of the parchment paper, lift the bread out of the Dutch oven and transfer to a wire rack. Let cool for up to one hour before slicing to ensure the crumb sets properly.
Notes
- For best flavor, use fresh rosemary and freshly roasted garlic.
- The long rise time helps develop flavor; you can let the dough rise overnight in a warm place.
- You can refrigerate the dough for up to 48 hours after shaping for more convenience and flavor development.
- Using a Dutch oven mimics professional steam ovens, yielding a crusty exterior.
- Scoring the bread allows steam to escape and prevents random cracking in the crust.
Keywords: artisan bread, roasted garlic bread, rosemary bread, homemade bread, Dutch oven bread, crusty bread, savory bread, slow rise bread


