
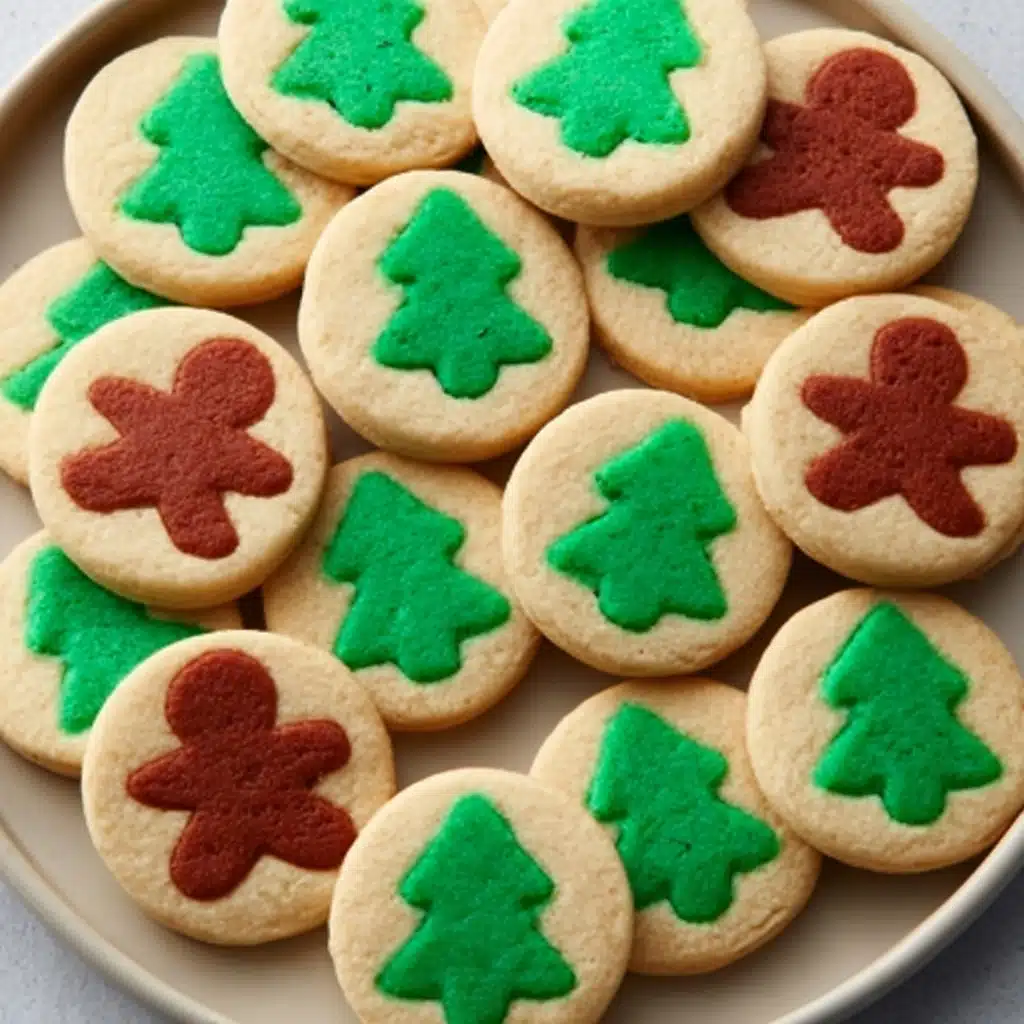
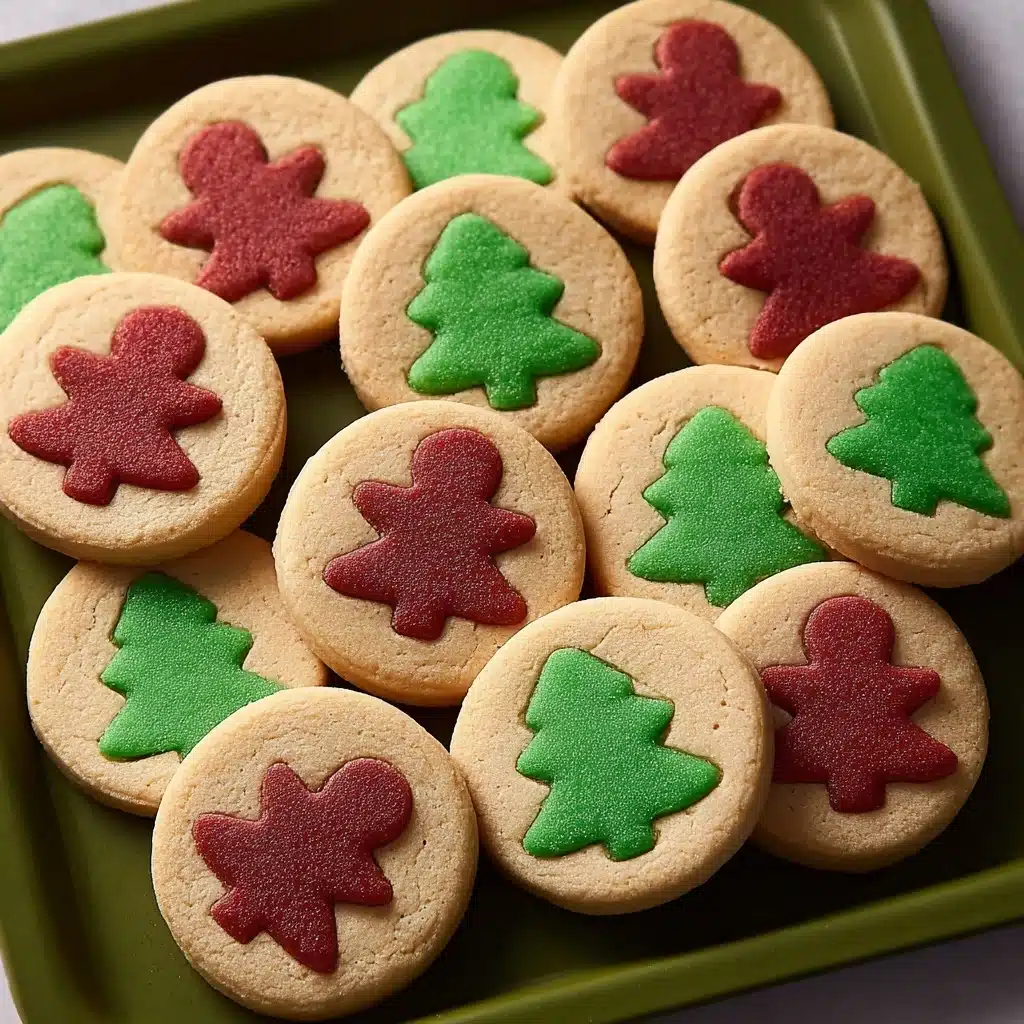
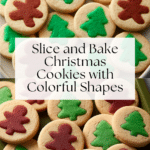
Slice and Bake Christmas Cookies Recipe
If you love festive baking that feels both fun and effortless, you are going to adore this recipe for Slice and Bake Christmas Cookies. These charming cookies combine buttery richness with vibrant holiday colors, all rolled into one easy log of dough that you slice and pop in the oven. The beauty of this approach is how simple it is to prepare stunning, uniform cookies that make your kitchen smell heavenly and your holiday gatherings sparkle with charm. Whether you’re decking the halls or gifting to friends, these cookies are a surefire way to spread joy and deliciousness.
Ingredients You’ll Need
The magic of these Slice and Bake Christmas Cookies lies in the straightforward ingredients that come together to create a perfect balance of flavor, texture, and color. Each item plays an important role, from the creamy butter for tenderness to the vibrant food coloring that adds that special festive touch.
- 2 1/2 cups all purpose flour: This forms the sturdy base of your cookie dough, ensuring it holds shape when sliced.
- 1 cup granulated sugar: Adds just the right amount of sweetness to brighten the buttery flavor.
- 3/4 cups unsalted butter, softened: Gives the cookies their tender, melt-in-your-mouth texture.
- 2 large eggs: Bind everything together while enriching the dough with moisture.
- 1 teaspoon baking powder: Provides a subtle lift, keeping your cookies lightly airy.
- 1 teaspoon vanilla extract: Infuses a warm, comforting aroma that makes each bite irresistible.
- 1/2 teaspoon kosher salt: Balances the sweetness and enhances the overall flavor.
- A few drops of food coloring: Choose gel or natural options for vibrant holiday hues that catch the eye.
How to Make Slice and Bake Christmas Cookies
Step 1: Cream the Butter and Sugar
Start by beating your softened butter with sugar and vanilla extract in a large bowl until light and fluffy. This step is crucial because it incorporates air into the mixture, creating that wonderfully delicate texture your cookies will have.
Step 2: Add the Eggs
Next, add the eggs one at a time, mixing until just combined. This gentle approach keeps the dough tender without overworking it, which means your cookies will bake up soft yet structured.
Step 3: Mix Dry Ingredients
In a separate bowl, whisk together the flour, baking powder, and salt. This ensures that the raising agent and salt are evenly distributed, preventing clumps and ensuring consistent flavor.
Step 4: Combine Wet and Dry Ingredients
Add the dry ingredients to the butter mixture in batches, mixing gently until the dough comes together. If it feels too sticky—especially if you used natural food coloring—add a tablespoon or two of extra flour until it’s just right.
Step 5: Color and Chill The Dough
Remove about 1/3 of your dough and add the food coloring. Mix this portion thoroughly, then chill in the freezer briefly to firm it up. Firm dough is much easier to roll out and cut into shapes without losing definition.
Step 6: Cut Out Cookie Shapes and Assemble
After rolling the colored dough into a rectangle, cut out small shapes with a cookie cutter. Use a tiny dab of water to stick the colored cutouts to plain dough pieces, then arrange them into a log. This layering gives your cookies a delightful, festive swirl once sliced.
Step 7: Freeze and Wrap the Log
Freeze the assembled log solid, then press plain dough all around it, smoothing into an even cylinder. Wrap this log tightly with plastic wrap and chill in the fridge to rest before baking.
Step 8: Slice and Bake
Finally, preheat your oven, slice the dough log into 1/4-inch rounds, and lay them out on parchment-lined baking sheets. Bake until the bottoms just turn a pale golden brown, then let cool and enjoy the beautiful, buttery cookies you’ve created.
How to Serve Slice and Bake Christmas Cookies
Garnishes
While these cookies are lovely on their own, you can dress them up by adding a light dusting of powdered sugar or a drizzle of white chocolate for extra holiday sparkle. Tiny sprinkles or edible glitter can also make each cookie feel like a special treat.
Side Dishes
These slice and bake cookies pair wonderfully with classic holiday beverages. Think hot cocoa topped with whipped cream, a fragrant cup of spiced apple cider, or even eggnog. Each sip complements the buttery sweetness perfectly.
Creative Ways to Present
For a festive touch, stack a few cookies tied with a ribbon as charming gifts. You can also arrange them on a decorative platter surrounded by pine branches and cinnamon sticks for a centerpiece that invites guests to dig in. Wrapping individual cookies in cellophane bags with a tag makes for a delightful party favor.
Make Ahead and Storage
Storing Leftovers
If you happen to have leftover cookies, store them in an airtight container at room temperature for up to a week. This keeps them fresh and maintains their tender texture without drying out.
Freezing
You can freeze the dough log before slicing to bake later—just wrap it tightly in plastic wrap and foil. When you’re ready, thaw slightly before slicing and bake as usual. Baked cookies also freeze well; store cooled cookies in a sealed bag for up to three months.
Reheating
To refresh your cookies, warm them briefly in a low oven or microwave for about 10 seconds. This makes them soft and aromatic again, as if they just came out of the oven.
FAQs
Can I use gluten-free flour for Slice and Bake Christmas Cookies?
Yes! Substitute with a gluten-free all-purpose blend, but be mindful that texture might vary slightly. You might need to adjust the flour amount to get a dough that holds together well.
How long can I keep the dough log in the freezer?
You can safely store the dough log in the freezer for up to one month. Just be sure it’s tightly wrapped to prevent freezer burn and loss of flavor.
Can I make these cookies without food coloring?
Absolutely! The dough is delicious as is. The food coloring just adds a festive flair, so feel free to skip it or experiment with natural colorings like beet juice or spinach powder.
What cookie cutters work best?
Small shapes around 1.5 inches wide are perfect. They bake evenly and allow you to assemble a detailed log. Holiday shapes like stars, trees, or snowflakes add an extra seasonal touch!
Can I add flavors like almond or citrus?
Definitely! Try swapping the vanilla extract for almond or lemon extract to give your Slice and Bake Christmas Cookies a unique twist. Just use a small amount so it doesn’t overpower the dough.
Final Thoughts
There’s something truly special about sharing homemade desserts during the holidays, and these Slice and Bake Christmas Cookies really make that easy and joyful. From their gorgeous swirled design to their melt-in-your-mouth texture, they have all the hallmarks of a new classic. Give this recipe a try and watch as your kitchen fills with warmth, color, and the sweet spirit of the season.
PrintSlice and Bake Christmas Cookies Recipe

These Slice and Bake Christmas Cookies feature a buttery, tender dough flavored with vanilla and a touch of food coloring for festive shapes. This easy-to-make recipe involves preparing a colorful dough, freezing it in a log, then slicing into perfect cookie rounds for a delightful holiday treat.
- Prep Time: 20 minutes
- Cook Time: 12 minutes per batch
- Total Time: 3 hours including chilling and freezing time
- Yield: About 40 cookies (depending on size and thickness) 1x
- Category: Dessert
- Method: Baking
- Cuisine: American
- Diet: Vegetarian
Ingredients
Dry Ingredients
- 2 1/2 cups all purpose flour (spooned and leveled)
- 1 teaspoon baking powder
- 1/2 teaspoon kosher salt
Wet Ingredients
- 3/4 cup unsalted butter, softened to room temperature
- 1 cup granulated sugar
- 2 large eggs
- 1 teaspoon vanilla extract
Additional
- A few drops of food coloring (gel or natural)
Instructions
- Cream Butter and Sugar: Add butter, sugar, and vanilla extract to a large mixing bowl or stand mixer. Beat at medium speed until light and fluffy, about 3 minutes, which incorporates air and creates a smooth base.
- Add Eggs: Add eggs one at a time, mixing just until combined after each addition to keep a smooth texture without curdling.
- Mix Dry Ingredients: In a separate bowl, whisk together the flour, baking powder, and salt to ensure even distribution.
- Combine Wet and Dry: Add the dry ingredients to the wet ingredients in 3-4 batches, mixing until the dough comes together. Add 1-2 tablespoons more flour if the dough seems too wet, especially if using natural food coloring which can add moisture.
- Color Portion of Dough: Remove about 10 ounces (approximately 1/3) of the dough and place in a separate bowl. Add several drops of food coloring and mix thoroughly until evenly colored.
- Chill and Roll Colored Dough: Place the colored dough in the freezer for 5-10 minutes to firm up, then roll it out into a rectangle about 1/2-inch thick on a lightly floured surface. Return it to the freezer for 30 minutes so it is easier to cut shapes from.
- Cut Shapes and Assemble Log: Use a small cookie cutter (around 1.5 inches across) to cut out shapes. Lightly wet the floured side of each shape with a finger dipped in water before sticking two shapes together to create a 3D look. Repeat until you have a log about 10 inches long. Freeze the log for 2 hours or until solid.
- Coat and Roll Log: Remove the frozen log and gently press the plain cookie dough onto and around the colored shapes, filling any gaps to create an even outer layer. Roll into a smooth log on a lightly floured surface with the ends open to gauge dough amount.
- Chill the Log: Wrap the cookie log in plastic wrap and chill in the refrigerator for at least 30 minutes to firm up before slicing.
- Preheat Oven and Prepare Baking Sheets: Preheat the oven to 350ºF (175ºC) and line two baking sheets with parchment paper to prevent sticking and promote even baking.
- Slice and Bake Cookies: Slice the chilled dough log into 1/4-inch rounds using a sharp knife. Space slices 2 inches apart on prepared baking sheets. Bake for approximately 12 minutes, or until the bottoms are lightly golden brown. Remove from oven and cool completely on wire racks before serving.
Notes
- Use gel food coloring for more vibrant colors without altering dough consistency.
- If using natural food coloring, you might need to add extra flour to compensate for moisture.
- Chilling and freezing steps are critical to achieving clean shapes and easy slicing.
- Store baked cookies in an airtight container at room temperature for up to one week.
- For a festive touch, decorate with icing or sprinkles after the cookies have cooled.
Nutrition
- Serving Size: 2 cookies (about 30g)
- Calories: 140 kcal
- Sugar: 8 g
- Sodium: 70 mg
- Fat: 7 g
- Saturated Fat: 4.5 g
- Unsaturated Fat: 2.5 g
- Trans Fat: 0 g
- Carbohydrates: 18 g
- Fiber: 0.5 g
- Protein: 2 g
- Cholesterol: 35 mg
Keywords: Slice and bake cookies, Christmas cookies, vanilla cookies, holiday cookies, easy Christmas baking
