Slice and Bake Christmas Cookies Recipe
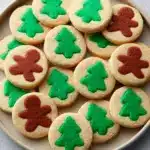
These Slice and Bake Christmas Cookies feature a buttery, tender dough flavored with vanilla and a touch of food coloring for festive shapes. This easy-to-make recipe involves preparing a colorful dough, freezing it in a log, then slicing into perfect cookie rounds for a delightful holiday treat.
- Prep Time: 20 minutes
- Cook Time: 12 minutes per batch
- Total Time: 3 hours including chilling and freezing time
- Yield: About 40 cookies (depending on size and thickness) 1x
- Category: Dessert
- Method: Baking
- Cuisine: American
- Diet: Vegetarian
Ingredients
Scale
Dry Ingredients
- 2 1/2 cups all purpose flour (spooned and leveled)
- 1 teaspoon baking powder
- 1/2 teaspoon kosher salt
Wet Ingredients
- 3/4 cup unsalted butter, softened to room temperature
- 1 cup granulated sugar
- 2 large eggs
- 1 teaspoon vanilla extract
Additional
- A few drops of food coloring (gel or natural)
Instructions
- Cream Butter and Sugar: Add butter, sugar, and vanilla extract to a large mixing bowl or stand mixer. Beat at medium speed until light and fluffy, about 3 minutes, which incorporates air and creates a smooth base.
- Add Eggs: Add eggs one at a time, mixing just until combined after each addition to keep a smooth texture without curdling.
- Mix Dry Ingredients: In a separate bowl, whisk together the flour, baking powder, and salt to ensure even distribution.
- Combine Wet and Dry: Add the dry ingredients to the wet ingredients in 3-4 batches, mixing until the dough comes together. Add 1-2 tablespoons more flour if the dough seems too wet, especially if using natural food coloring which can add moisture.
- Color Portion of Dough: Remove about 10 ounces (approximately 1/3) of the dough and place in a separate bowl. Add several drops of food coloring and mix thoroughly until evenly colored.
- Chill and Roll Colored Dough: Place the colored dough in the freezer for 5-10 minutes to firm up, then roll it out into a rectangle about 1/2-inch thick on a lightly floured surface. Return it to the freezer for 30 minutes so it is easier to cut shapes from.
- Cut Shapes and Assemble Log: Use a small cookie cutter (around 1.5 inches across) to cut out shapes. Lightly wet the floured side of each shape with a finger dipped in water before sticking two shapes together to create a 3D look. Repeat until you have a log about 10 inches long. Freeze the log for 2 hours or until solid.
- Coat and Roll Log: Remove the frozen log and gently press the plain cookie dough onto and around the colored shapes, filling any gaps to create an even outer layer. Roll into a smooth log on a lightly floured surface with the ends open to gauge dough amount.
- Chill the Log: Wrap the cookie log in plastic wrap and chill in the refrigerator for at least 30 minutes to firm up before slicing.
- Preheat Oven and Prepare Baking Sheets: Preheat the oven to 350ºF (175ºC) and line two baking sheets with parchment paper to prevent sticking and promote even baking.
- Slice and Bake Cookies: Slice the chilled dough log into 1/4-inch rounds using a sharp knife. Space slices 2 inches apart on prepared baking sheets. Bake for approximately 12 minutes, or until the bottoms are lightly golden brown. Remove from oven and cool completely on wire racks before serving.
Notes
- Use gel food coloring for more vibrant colors without altering dough consistency.
- If using natural food coloring, you might need to add extra flour to compensate for moisture.
- Chilling and freezing steps are critical to achieving clean shapes and easy slicing.
- Store baked cookies in an airtight container at room temperature for up to one week.
- For a festive touch, decorate with icing or sprinkles after the cookies have cooled.
Nutrition
- Serving Size: 2 cookies (about 30g)
- Calories: 140 kcal
- Sugar: 8 g
- Sodium: 70 mg
- Fat: 7 g
- Saturated Fat: 4.5 g
- Unsaturated Fat: 2.5 g
- Trans Fat: 0 g
- Carbohydrates: 18 g
- Fiber: 0.5 g
- Protein: 2 g
- Cholesterol: 35 mg
Keywords: Slice and bake cookies, Christmas cookies, vanilla cookies, holiday cookies, easy Christmas baking