
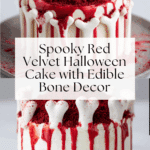
This Gloriously Ghoulish Red Velvet Cake Recipe
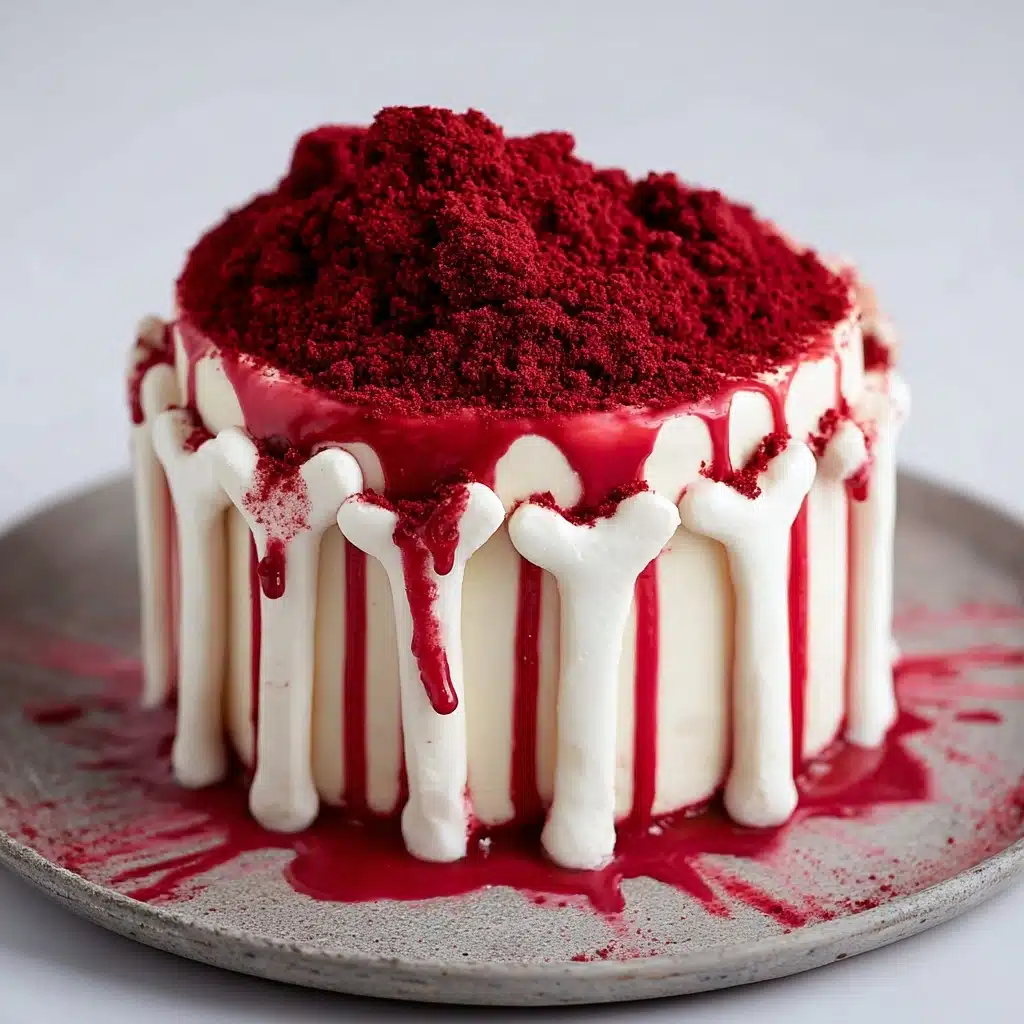
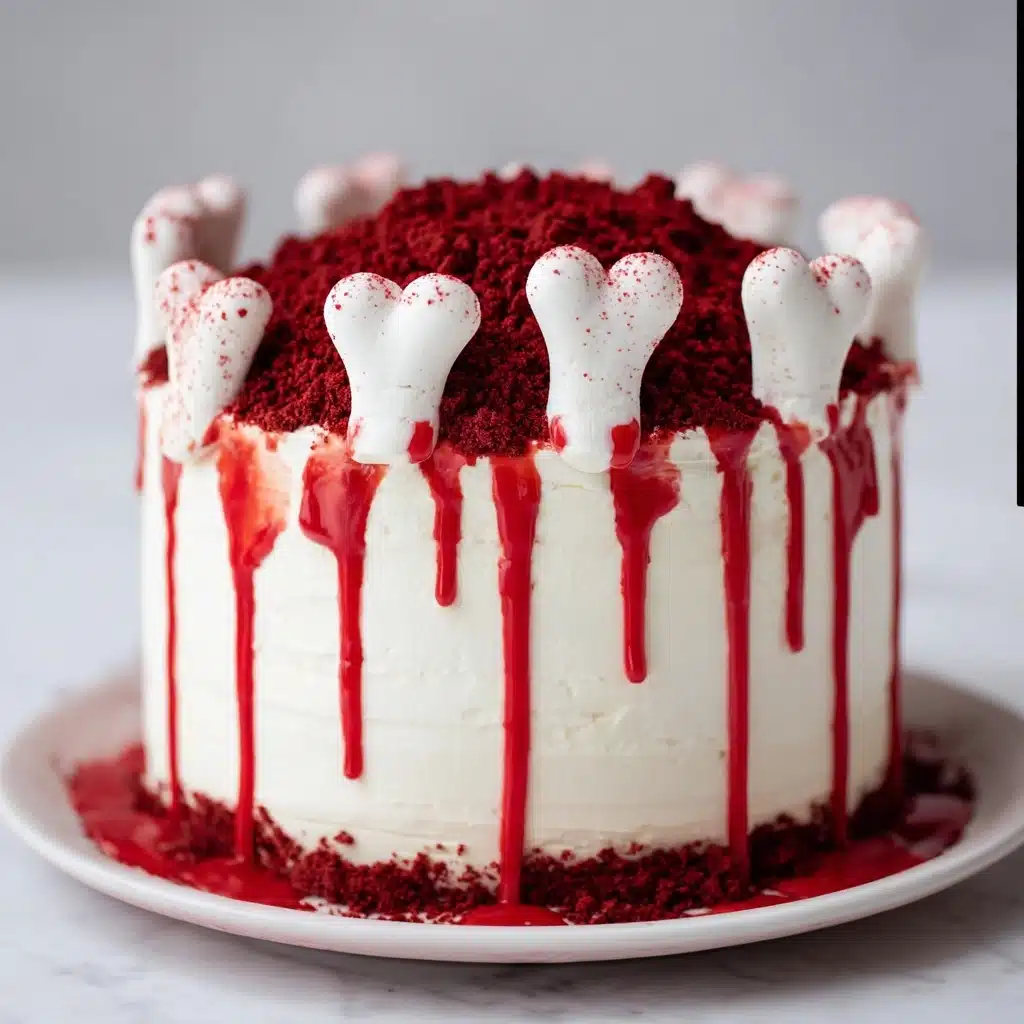
This Gloriously Ghoulish Red Velvet Cake is more than just a dessert; it’s a showstopper that perfectly captures the spooky spirit of Halloween with its vibrant red layers and eerie bone decorations. Rich yet delicate, this cake delivers that classic red velvet flavor with a deliciously moist crumb and a smooth mascarpone frosting that melts in your mouth. Whether you’re hosting a party or just craving something spectacular, this cake brings a wickedly fun twist that’s sure to impress everyone sitting at your table.
Ingredients You’ll Need
Gathering the right ingredients is the secret to nailing this recipe every time. Each component plays a vital role, from the tangy buttermilk that keeps the cake tender to the vibrant gel paste food coloring that gives it that signature deep red hue.
- Soft unsalted butter (4 ounces): For that creamy richness and tender crumb.
- Sugar (11 ounces): Adds the perfect sweetness and moisture balance.
- Large eggs (2, lightly beaten): Helps bind ingredients and adds structure.
- Self-rising flour (10 ounces): Brings lightness without extra leavening steps.
- Cocoa powder (2 level tablespoons): Adds subtle chocolatey depth essential for red velvet.
- Buttermilk (8 1/2 ounces): Makes the cake moist and tender with a slight tang.
- Gel paste food coloring (1/4 teaspoon): The key to that fierce, ghoulish red color.
- Vanilla extract (1 teaspoon): Enhances all the flavors beautifully.
- White vinegar (2 teaspoons): Reacts with baking soda for a fluffy rise.
- Baking soda (1 teaspoon): Provides lift and lightness.
- Cake release spray: Ensures your cakes come out perfectly every time.
- Liquid egg whites or eggs (5 1/2 ounces or 5 eggs): For crafting those spooky meringue bones.
- Cream of Tartar (1/4 teaspoon): Stabilizes your meringue for crisp, sturdy bones.
- Full-fat mascarpone cheese (1 pound): Gives luscious creaminess to the frosting.
- Icing sugar (7 ounces): Sweetens and smooths the frosting.
- Heavy cream (1/2 cup): Whipped in for a light yet rich frost.
- Blackberry syrup: For that dramatic blood-spattered decoration effect.
How to Make This Gloriously Ghoulish Red Velvet Cake
Step 1: Prepare Your Cake Tins and Dry Ingredients
Start by preheating your oven to 330 degrees Fahrenheit. Spray three 6-inch cake tins with cake release and line their bottoms with baking paper to prevent sticking. Next, sift together the self-rising flour and cocoa powder. This ensures there are no lumps and that your cocoa is evenly distributed, which helps create that signature velvety texture in every bite.
Step 2: Cream the Butter and Sugar
Using a stand mixer fitted with a paddle attachment, cream the soft unsalted butter and sugar together until pale and fluffy. Don’t forget to pause halfway and scrape down the sides and bottom of the bowl for even mixing. This step is essential to incorporate air, making the cake light and tender.
Step 3: Add Eggs and Color
Mix the eggs with vanilla extract and gradually add them to the butter-sugar mixture, beating constantly. If the batter curdles, simply add a spoonful of flour to keep it smooth. Then, combine your gel paste food coloring with a few tablespoons of buttermilk, ensuring that the red is deep and even. Pour this colored buttermilk into the batter, mixing well.
Step 4: Alternate Flour and Buttermilk
Alternate adding the sifted flour and remaining buttermilk into the batter, starting and ending with flour. The final fold is best done by hand to avoid over-mixing, which can make the cake dense. The alternating additions help create a perfectly balanced batter with a delicate crumb.
Step 5: Add Vinegar and Baking Soda
Mix the white vinegar and baking soda in the empty buttermilk jug. The mixture will froth beautifully – immediately fold it into your batter. This reaction is what helps your cake rise and stay soft and airy.
Step 6: Bake the Cake Layers
Divide the batter evenly between your prepared tins and smooth the tops. Bake in the preheated oven for 30 to 35 minutes, or until a skewer comes out clean and the cakes spring back to the touch. Allow the cakes to cool in their tins for 15 minutes before gently turning them out onto a rack to cool completely. Chilling them for an hour in the fridge helps firm up the layers, making them easier to frost later.
Step 7: Make the Meringue Bones
Preheat your oven to 215 degrees Fahrenheit. Whip egg whites and cream of tartar until frothy, then add sugar gradually while whisking until stiff, glossy peaks form. Pipe spooky bone shapes onto lined trays and bake for 1 hour and 30 minutes or until dry and crisp. Leaving them to cool inside the slightly ajar oven makes sure they dry completely for that perfect snap.
Step 8: Prepare the Mascarpone Frosting
Whisk mascarpone, heavy cream, icing sugar, and vanilla extract together until smooth with firm peaks, being careful not to overmix. Keep chilled until ready to use. This frosting is rich but airy, providing the perfect counterpoint to the tender cake layers.
Step 9: Assemble the Cake
Secure the first cake layer on your stand with a dab of frosting. Pipe or spread frosting evenly over each layer and stack them carefully. Apply a thin crumb coating over the entire cake and chill until firm. Finally, smooth on your final layer of frosting and decorate with crushed red velvet crumbs and the delicate meringue bones. Finish by drizzling blackberry syrup for that gloriously gory blood-spattered effect.
How to Serve This Gloriously Ghoulish Red Velvet Cake
Garnishes
Add an extra touch of drama by using deep red velvet crumbs and the meringue bones as garnishes. A drizzle of the glossy blackberry syrup over the bones creates an eerie, blood-splattered appearance that is sure to wow your guests and set the Halloween mood.
Side Dishes
This cake stands wonderfully as the centerpiece of any spooky spread but pairs beautifully with simple accompaniments like fresh berries, whipped cream, or even a scoop of vanilla bean ice cream to complement its rich, tangy sweetness without overpowering it.
Creative Ways to Present
Try placing the cake on a rustic wooden board or a black cake stand to enhance the Halloween vibe. You could also nestle small plastic spiders or edible glitter around the base to make the presentation creepier, turning this treat into an unforgettable spectacle.
Make Ahead and Storage
Storing Leftovers
Once frosted, keep your cake covered in the refrigerator to maintain freshness. Make sure it’s in an airtight container or well wrapped to prevent it from absorbing other fridge odors. It should remain delicious for up to 3 days.
Freezing
This Gloriously Ghoulish Red Velvet Cake freezes well if you want to prepare ahead. Wrap the baked and cooled layers tightly in cling film and foil before freezing. When ready, thaw in the refrigerator overnight, then frost and decorate as usual.
Reheating
Red velvet cake is best enjoyed cold or at room temperature, so avoid reheating. If you want to soften the frosting slightly, leave the cake out for about 30 minutes before serving to reach the perfect texture.
FAQs
Can I use regular food coloring instead of gel paste?
Gel paste food coloring is preferred because it provides a more intense, vibrant red without thinning the batter, but you can use regular food coloring. Just add it carefully and keep an eye on the consistency of your batter.
What makes this cake “red velvet” instead of just chocolate?
The combination of mild cocoa powder, buttermilk’s tang, and vinegar’s reaction with baking soda sets red velvet apart from regular chocolate cakes, creating a unique flavor and texture.
Can I make the meringue bones ahead of time?
Absolutely! The meringue bones can be baked and stored in an airtight container for several days before assembling the cake, making them perfect for prepping in advance.
Is mascarpone necessary for the frosting?
Mascarpone creates a luxuriously creamy and smooth frosting that balances the cake’s texture perfectly, but you could substitute with cream cheese if needed for a slightly tangier taste.
How long will this cake last once decorated?
For the best taste and texture, enjoy the cake within 24 hours of decorating as the meringue bones will soften over time, though the cake itself remains moist and delicious for a few days refrigerated.
Final Thoughts
If you want to add a dramatic, irresistible dessert to your Halloween festivities, This Gloriously Ghoulish Red Velvet Cake is absolutely the way to go. From its rich flavors to creepy-cute decoration, it’s a fantastic conversation starter and a joy to make. I hope you have as much fun creating and sharing this wonderfully spooky treat as I do every time I bring it out. Happy baking and haunting!
PrintThis Gloriously Ghoulish Red Velvet Cake Recipe
This Gloriously Ghoulish Red Velvet Cake is a perfect spooky treat for Halloween, featuring moist red velvet cake layers layered with creamy mascarpone frosting and decorated with delicate meringue bones for a fun and festive presentation.
- Prep Time: 30 minutes
- Cook Time: 2 hours 10 minutes
- Total Time: 2 hours 40 minutes
- Yield: One 3-layer 6-inch cake (about 8 servings) 1x
- Category: Dessert
- Method: Baking
- Cuisine: American
- Diet: Vegetarian
Ingredients
For the Cake Layers
- 4 ounces soft unsalted butter
- 11 ounces sugar
- 2 large eggs, lightly beaten
- 10 ounces self-rising flour
- 2 level tablespoons cocoa powder
- 8 1/2 ounces buttermilk
- 1/4 teaspoon gel paste food coloring
- 1 teaspoon vanilla extract
- 2 teaspoons white vinegar
- 1 teaspoon baking soda
- Cake release spray
For the Bones
- 5 1/2 ounces liquid egg whites (or 5 eggs)
- 11 ounces sugar
- 1/4 teaspoon cream of tartar
For the Frosting
- 1 pound full-fat mascarpone cheese
- 7 ounces icing sugar
- 1/2 cup heavy cream
- 2 teaspoons vanilla extract
- Blackberry syrup (store-bought or homemade)
Instructions
- Prepare Cake Pans: Preheat the oven to 330°F. Spray three 6-inch cake tins with cake release and line the bottoms with baking paper.
- Sift Dry Ingredients: Sift the self-rising flour and cocoa powder into a bowl and set aside.
- Cream Butter and Sugar: Using a stand mixer fitted with the paddle attachment, cream the soft unsalted butter and sugar until pale and fluffy, scraping the bowl halfway through.
- Add Eggs and Vanilla: Mix the lightly beaten eggs with vanilla extract, gradually add to the butter mixture while beating constantly; if it curdles, add a spoonful of flour.
- Mix Food Coloring and Buttermilk: Combine the gel paste food coloring with a few tablespoons of buttermilk, then transfer into a measuring jug and mix with the remaining buttermilk until evenly colored.
- Combine Dry and Wet Ingredients: Alternate adding the sifted flour mixture and colored buttermilk into the batter, starting and ending with flour; fold the last addition by hand gently.
- Add Vinegar and Baking Soda: Mix the white vinegar and baking soda in the buttermilk jug (it will froth), then immediately fold into the batter.
- Bake Cake Layers: Divide the batter evenly into the prepared tins, smooth the tops, and bake for 30-35 minutes, or until a skewer comes out clean and cakes spring back when touched.
- Cool Cakes: Cool cakes in tins for 15 minutes, then turn out onto a wire rack to cool completely. Chill in the fridge for 1 hour before leveling tops.
- Make Red Velvet Crumbs: Level cake tops and keep scraps; dry scraps in a 215°F oven for 10 minutes, then blitz to fine crumbs for decoration.
- Prepare Meringue Bones: Preheat oven to 215°F. In a clean bowl, whisk liquid egg whites and cream of tartar on low until frothy. Gradually add sugar one tablespoon at a time once soft peaks form, then whisk on high until glossy firm peaks form.
- Pipe and Bake Bones: Pipe the meringue into bone shapes on greaseproof paper-lined trays. Bake for 1 hour 30 minutes or until dry and easily lifted. Cool in oven with door ajar. Store in airtight container.
- Make Frosting: Whisk mascarpone, icing sugar, heavy cream, and vanilla on low speed until combined, then increase to high until firm peaks form. Avoid overmixing; keep chilled.
- Assemble the Cake: Place a small amount of frosting on cake stand to secure bottom layer. Pipe and spread frosting over bottom cake layer and level. Repeat with second and third layers.
- Crumb Coat and Chill: Apply a thin layer of frosting over entire cake and freeze until firm for easier handling.
- Final Frosting and Decoration: Smooth full layer of frosting on chilled cake (using a turntable if possible). Sprinkle with red velvet crumbs on top, arrange meringue bones around the cake, breaking if needed to fit.
- Add Blackberry Syrup: Reduce or use store-bought blackberry syrup to a viscous consistency. Drizzle over meringue bones to mimic blood spatters. Serve immediately to maintain bone crispness.
Notes
- Use cake release spray for easy removal of cake layers.
- Gel paste food coloring provides vibrant color without adding extra liquid.
- Folding in last of the flour by hand prevents overmixing and keeps the cake tender.
- Chilling the cakes before frosting helps achieve clean, level layers.
- Drying cake scraps to crumbs is a creative way to decorate and reduce waste.
- Meringue bones must be baked low and slow for crispness and to hold shape.
- Blackberry syrup adds a realistic ‘bloody’ effect and a tangy flavor contrast.
- Serve promptly to enjoy the crunchy meringue; they soften over time.
Nutrition
- Serving Size: 1 slice (1/8 of cake)
- Calories: 420 kcal
- Sugar: 38 g
- Sodium: 220 mg
- Fat: 23 g
- Saturated Fat: 14 g
- Unsaturated Fat: 7 g
- Trans Fat: 0.5 g
- Carbohydrates: 47 g
- Fiber: 2 g
- Protein: 5 g
- Cholesterol: 80 mg
Keywords: Red Velvet Cake, Halloween Cake, Meringue Bones, Mascarpone Frosting, Spooky Dessert, Festive Cake, Red Velvet