Easy Gluten Free English Muffins Recipe
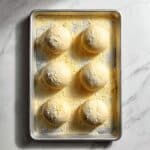
These Easy Gluten Free English Muffins are soft, fluffy, and full of delightful nooks and crannies, perfect for toasting and topping with your favorite spreads. Made with a combination of gluten-free flours and psyllium husk for texture and structure, these muffins are an excellent homemade alternative for anyone avoiding gluten without sacrificing flavor or texture.
- Prep Time: 20 minutes
- Cook Time: 24 minutes
- Total Time: 1 hour 44 minutes
- Yield: 8 English muffins 1x
- Category: Breakfast
- Method: Stovetop
- Cuisine: Gluten Free
- Diet: Gluten Free
Ingredients
Scale
Dry Ingredients
- 20 g (4 tbsp) whole/rough psyllium husk (If using psyllium husk powder, use only 17g)
- 160 g (1⅓ cups + 1 tbsp) tapioca starch (or cornstarch, potato starch, arrowroot starch)
- 140 g (1 cup + ½ tbsp) millet flour (plus extra for flouring the surface, or brown rice flour)
- 120 g (¾ cup + 3 tbsp) sorghum flour (or light buckwheat, white teff, oat flour)
- 25 g (2 tbsp) caster/superfine or granulated sugar
- 8 g (2½ tsp) instant yeast (or 10g active dry yeast)
- 8 g (1½ tsp) salt
Wet Ingredients
- 360 g (1½ cups) lukewarm water
- 120 g (½ cup) whole milk, lukewarm
- 20 g (1½ tbsp) sunflower oil or other neutral oil
- 10 g (2 tsp) apple cider vinegar
Others
- Cornmeal, for dusting
Instructions
- Make the psyllium gel: In a bowl, combine the psyllium husk and lukewarm water. Stir and let it sit for about 30-45 seconds until a gel forms.
- Mix dry ingredients: In a large bowl or the bowl of a stand mixer fitted with a dough hook, whisk together tapioca starch, millet flour, sorghum flour, sugar, instant yeast, and salt.
- Activate yeast if needed: If using active dry yeast instead of instant, mix it with sugar and milk, let it sit for 5-10 minutes until frothy, then add to the dry ingredients along with remaining wet ingredients.
- Combine wet ingredients: Add milk, oil, and apple cider vinegar to the psyllium gel and mix thoroughly.
- Form the dough: Make a well in the dry ingredients, pour in the psyllium gel-milk mixture, and knead until smooth and evenly combined. The dough should be slightly sticky but supple.
- Prepare for proofing: Sprinkle cornmeal on a large baking sheet and set aside.
- Shape muffins: Turn dough onto a lightly floured surface, gently knead into a ball, then divide into eight equal 125g portions. Shape each into a smooth ball, place on the cornmeal-lined sheet, and flatten to about 1¼ inch (3cm) thick. Sprinkle tops with extra cornmeal.
- Proof the muffins: Cover with plastic wrap and let proof in a warm place for about 1 hour or until doubled in size. Alternatively, proof inside a turned-off oven with a cup of boiling water for warmth and humidity.
- Heat cooking surface: Preheat a large cast iron skillet, frying pan, or griddle over low heat until warm but not hot, without adding any grease or butter.
- Cook the muffins: Using a spatula, carefully transfer muffins to the skillet. Cook over low heat for 11-12 minutes until deep golden brown on the bottom. Do not cover.
- Flip and cook other side: Flip carefully and cook for another 11-12 minutes until evenly browned and cooked through.
- Cool completely: Transfer cooked muffins to a wire rack and cool completely, at least 1 hour, before splitting with a fork to enhance the nooks and crannies.
Notes
- Using psyllium husk powder requires slightly less quantity (17g vs 20g whole psyllium husk).
- You can substitute the gluten-free flours listed with alternatives like cornstarch, brown rice flour, buckwheat, teff, or oat flour (if not sensitive).
- Do not grease the cooking pan to get the classic English muffin texture and crust.
- Proofing in a warm humid environment helps the dough rise better.
- Cooling completely before eating prevents the interior from being sticky and allows crumb structure to set.
- Store muffins in a closed container at room temperature for up to 2-3 days; toast before serving to refresh.
Keywords: gluten free English muffins, homemade English muffins, gluten free breakfast bread